Design and Implementation of Adventure Game Based on Unity3D Engine
1.1 Background to the selection of the topic
1.2 Purpose and significance of the study
2 Development tools and environment
2.1.2 Introduction to the Unity Engine
2.1.3 Introduction to Game Framework
2.1.4 Introduction to Microsoft Visual Studio
4.1 Program Function Module Design
5 Detailed Design and Implementation
5.2 Design and Implementation of System Functions
5.2.1 Design and realization of the light module
5.2.2 Design and implementation of the music module
5.2.3 Design and implementation of the scanner module
5.2.4 Design and implementation of the main character module
5.2.5 Design and Implementation of the Camera Module
5.2.6 Design and Implementation of the Laser Gate Module
5.2.7 Design and implementation of the automatic door module
5.2.8 Design and implementation of the electric gate module
5.2.9 Key Module Design and Implementation
5.2.10 Design and implementation of the elevator door module
5.2.11 Design and implementation of the elevator module
5.2.12 Design and realization of the robot module
5.3 Optimization of the effect of scene fog
6.1 Purpose of numerical planning
6.2 Methods of numerical planning
6.3.1 Values for the Protagonist Module
6.3.5 Laser Gate Module Values
6.3.6 Virtual axis module values
7.3.1 Character Movement Module Testing
7.3.2 Testing of the electric gate module
7.3.6 Laser Gate Module Testing
7.3.7 Automatic door module testing
7.3.11 Scene Fog Effect Testing
7.3.12 System guide package testing
7.3.13 Character Shouting Functionality Testing
7.3.14 Character static step test
preamble
In the last stage of student life, the thesis is an important task that every college student must accomplish. However, many undergraduate thesis whites may be at a loss when they get a thesis topic ...... Don't be anxious, next I will share my thesis from my college days. I will show how it was to write this thesis in terms of topic selection, feasibility analysis, design and implementation. In this thesis, the game design principles, techniques and tools I used are presented and the implementation of the various modules of the game are described in detail. Through this thesis, I hope to provide some valuable ideas and suggestions for students entering their senior year of college, to help you successfully complete your thesis, and also to provide some references and insights for game development enthusiasts.
summaries
Along with the rapid development of computer network and hardware technology, video games are gradually transforming from 2D to large-scale 3D masterpieces. The essential tool for developing games is the so-called game engine. Different game engines have their own advantages and disadvantages, among which Unity engine with its flexibility allows developers to create and optimize content for more than 20 platforms.
This system uses the Unity engine for game development, realizing character movement, props pickup, AI character patrol navigation and attack, laser door response, sound lighting response, camera scanning and other functions; the production process uses a number of common Unity components, including, but not limited to, lights, sounds, triggers, colliders, script components. The programming language used in the whole game development process is C#, and the whole process uses object-oriented programming ideas to write scripts. The game interface is clear, highly visual and interactive.
Keywords:Unity3D; Game Development; C#
Abstract
With the rapid development of computer networks and hardware technology, video games have gradually transformed from 2D to large-scale 3D masterpieces. The necessary tool for developing games is the so-called game engine. While each game engine has its strengths and weaknesses, Unity’s flexibility allows developers to create and optimize content for over 20 platforms.
The system uses the Unity engine for game development, to achieve character movement, props pick up, AI character patrol navigation and attack, laser door response, sound and light response, camera scanning, and other functions; Several common Unity components were used, including, but not limited to, lights, sounds, triggers, colliders, and scripting components. The programming language used in the whole game development process is C#, and the whole process uses object-oriented programming ideas to write scripts. The game interface is clear, highly visible, and interactive.
Key Words:Unity3D; Game development; C#
1 Introduction
1.1 Background to the selection of the topic
As China’s game industry chain continues to upgrade in recent years, new formats including eSports and live game broadcasting provide new growth points for the development of the game industry. It’s a great time to be an independent game developer, and as an independent game developer, you can choose a variety of open source game frameworks to build your own game engine, or you can choose your favorite game engine to develop games. The focus here is on the Unity engine used in the design. Currently more than 70% of the world’s top 1000 games are developed with Unity. The growth rate in our country is also particularly rapid, like the explosive game “Original God” in 2020, NetEase’s “Eternal Hijacking” in 2021 and Tencent’s “League of Legends Handbook” are all developed with Unity engine.
Unity currently supports more than 20 platforms including IOS, Android, PC, Switch, PS4, PS5 and all VR, AR, and all hardware is kept up to date. Because of Unity’s strong cross-platform compatibility, developers can achieve one-time development and multi-platform deployment. By the end of 2020, Made With Unity apps will be downloaded 5 billion times per month, with 1.5 million monthly Unity users worldwide, and a global average of 2.8 billion monthly players reached by Unity-created and operated businesses. Today the Unity engine is used not only in the gaming industry, but even in the automotive, transportation, manufacturing, architecture, engineering, construction, film and animation fields, and education.
With the continuous updating of Unity3d engine, Unity is gradually not only a game creation tool, but also a real-time 3D interactive content creation and operation platform, which provides one-stop service from development to operation to empower developers to build a complete meta-universe ecosystem. Unity is most likely to become the base platform of the future virtual world.
With the increasing demand for entertainment, it is important to develop a game using a mature and powerful engine that meets the needs of high-stress people in a fast-paced life.
1.2 Purpose and significance of the study
In recent years, the advancement and innovation of technologies such as 5G network and cloud computing have become important factors driving the development of the game industry. At the same time, China’s game industry chain continues to be upgraded, including e-sports, game live broadcasting and other new forms of business to provide new growth points for the development of the game industry. Independent research and development capability is the core factor that determines the quality of a game, and directly determines the playability, balance and stability of the product, which in turn is an important factor in determining the success of the game product. Moreover, the design of character skills, the development of game props and a series of game numerical planning also have a significant impact on the game’s playability and balance. Therefore, in this case, the use of a game engine to create a more comprehensive game from scratch and record the process can enable the public to understand the process of game development. Through people’s understanding of game development, it will stimulate their interest in exploring game development, and in the process of development, more innovative ideas for game design will be developed, and more novel and interesting entertainment games will be produced, which not only enriches people’s entertainment life, but also has important practical significance in promoting the development of China’s game industry.
2 Development tools and environment
2.1 Development tools
The programming language used for the system is C#, the development tools used are Unity 2019.4.29f1c2 (64-bit), and Visual Studio 2019, and the framework used is Game Framework.
2.1.1 Introduction to C#
C# is a modern, general-purpose, object-oriented programming language approved and endorsed by Ecma and ISO. Developed by Anders Hejlsberg and his team during the development of the .Net Framework.C# was designed for use with the Common Language Infrastructure (CLI).The CLI consists of executable code and a runtime environment that allows the use of a variety of high-level languages on different computer platforms and architectures. Although C# is conceived as an object-oriented programming language very close to the traditional high-level languages C and C++, it is very similar to Java and has many powerful programming features that make it popular among programmers.The main features of C# are also many, such as Boolean Conditions, Automatic Garbage Collection, Standard Libraries, and the C# Runtime Environment. Garbage Collection), Standard Library, Assembly Versioning, Properties and Events, Delegates and Events Management, easy-to-use Generics. Delegates and Events Management, easy-to-use Generics, and more.
2.1.2 Introduction to the Unity Engine
Unity3D is a software that integrates game development, interactive development, virtual reality, augmented reality and other interactive development. In recent years, the localization of Unity China has been developed at a rapid pace, and new features such as Multiplay, Vivox (cross-end communication solution), etc. have been introduced continuously.
Unity currently supports more than 20 platforms including IOS, Android, PC, Switch, PS4, PS5 and all VR, AR, and all hardware is kept up to date. Because of Unity’s strong cross-platform compatibility, developers can do one-time development and deployment of multiple platforms.
Today, the Unity engine is not only used in the game industry, but even in ATM applications (manufacturing, automotive, transportation), AEC applications (architecture, engineering, construction), film and animation, and education.
With the continuous updating of Unity3d engine, Unity is gradually not only a game creation tool, but also a real-time 3D interactive content creation and operation platform, which provides one-stop service from development to operation to empower developers to build a complete meta-universe ecosystem. Unity is most likely to become the base platform of the future virtual world.
2.1.3 Introduction to Game Framework
Game Framework is a game architecture based on the Unity engine that greatly standardizes the development process, speeds up development, and ensures product quality. It greatly speeds up game development and enables rapid implementation of various feature sets. It helps to focus more on the gameplay during the game creation process, without having to spend too much effort on other basics such as creating menus or settings.
The complete Game Framework consists of three parts: the GameFramework, UnityGameFramework.Runti me, and UnityGameFramework.Editor.
2.1.4 Introduction to Microsoft Visual Studio
Microsoft Visual Studio (VS) is a very powerful IDE tool used by programmers. And for the first time in the latest release, version 2022, it has become a 64-bit IDE tool.Visual Studio can develop apps for Android, iOS, Mac, Windows, Web, and the cloud.Visual Studio has the ability to code quickly, debug and diagnose easily, and extend and customize it according to the developer’s preferences, Visual Studio features fast code writing, easy debugging and diagnostics, extension and customization to developer preferences, and efficient collaboration. The target code written in Visual Studio is available for all platforms supported by Microsoft.
3 System Development Analysis
3.1 Needs analysis
I have tried to analyze the needs of this game in the following ways:
First of all, the player game released in what platform to provide players to play, which is particularly important point. Because of the variety of equipment to play games, different equipment can play different games, bring the player’s experience is also different. For example, gaming devices include PC, Switch, PS4 and cell phones, etc. PC relies on mouse and keyboard to operate the game, Switch and PS4 rely on the joystick to operate the game, and cell phones operate the screen to play the game.
Secondly, the age group of the player distribution, different age, they will play different games. The types of games are various, such as RPG (Role Playing Game), ARPG (Action RPG), SRPG (Simulation RPG), FPS (First Person Shooting), RTS (Real Time Strategy) real-time strategy games, AVG (Advanture Game) adventure games, EDU (education) development games, FLY (Fly Game) flight simulation games, TAB (Table Game) tabletop games, SPG (Sport Game) sport games, FTG (Fighting Game) games, and other games. games, SPG (Sport Game), and FTG (Fighting Game). The survey found that among players aged 0-9 years old, the favorite game types are action games and puzzle games. Among players aged 10-14, the favorite game genres are action, role-playing and sandbox. Among 15-18 year olds, favorite genres are action and real-time strategy. 19-24 year olds favor action, role-playing, and real-time strategy. 25-30 year olds favor action, puzzles, and real-time strategy. 31-59 year olds favor board games and role-playing. Among players over 59 years old, only board games and puzzles are more popular. Through the survey, role-playing and action games cover a wider range of age groups than other types of games.
Furthermore, the length of playing the game, in the fast-paced life, many players prefer games with strong interactivity and appropriate length. Through the survey on the length of a single game for some games: King of Glory: 15-30 minutes; League of Legends: 20-30 minutes; Hearthstone Legends: 5-20 minutes; Original God: 20-40 minutes of daily tasks; through the survey, it can be seen that a shorter single time has a greater advantage in the market.
So, how to control the duration of the game and ensure its interactivity is another important element that needs to be taken care of in the design process of this game.
The above analysis is used to design and produce a 3D adventure game called Stealth, a 3D adventure game that is simple, easy to play and friendly. I define this game as a relaxing and entertaining pastime for teenagers and office workers.
According to the analysis of the needs are roughly divided into the following points: as an adventure game, the primary goal is to control the game protagonist, then it is to set up the corresponding obstacles, such as: moving doors (will open when close to), the key to pass the level, and the most important is to add the AI robots, the robots can patrol, and find the protagonist will be tracked and attacked.
3.2 Feasibility analysis
Feasibility analysis is also known as feasibility analysis. The purpose of a feasibility analysis is to analyze the feasibility of the method from a number of levels, such as technical, economic and social environment, as well as to solve the problem in the shortest possible time and with the least cost and money.
3.2.1 Technical feasibility
The Unity engine is used to create the whole system, and the programming language is C#. In the development process, the main technology is mainly through the C# programming to carry out the realization of the function, in the Unity engine to carry out the relevant operations, first of all is to add all kinds of required components, such as: Audio Source (sound) components, Rigidbody (rigid body) components, Animator (animation) components, and so on; and then it is the setting of each component, such as Then it is the setting of each component, such as the volume of the sound component, 2D and 3D switching, etc.; there is also the animation tree, material ball settings, etc.. Most of the specialized knowledge used has reached a very mature level after many years of development of the Unity engine. And the knowledge used are all in the school classroom or online search can be learned, for related professional students can be realized. Therefore, it is technically feasible.
3.2.2 Economic feasibility
The entire game system is set up in the Unity engine for scenes and game objects, and the scripts required for the entire design are created in Visual Studio. The two software programs required for the creation of the system can be downloaded and used free of charge through the corresponding official websites. The equipment required to run the game is also relatively low performance, and can be used to run the system on everyday devices. Based on the concept of open-source sharing, the game does not have any paid features, so users can play and modify the game as much as they want. It is therefore economically viable.
3.2.3 Legal feasibility
This work is intended for free use, contains material models, video, and audio with attribution, and is not intended for use in commercial games or applications. The system does not involve access to private information or permissions, and the entire game is designed to comply with the law and is therefore legally viable.
3.2.4 Operational feasibility
With the purpose of entertainment and leisure development of this game, so in the use of the game is particularly easy to get started, the operation is also particularly simple, novices do not need a few minutes to learn, and the game does not contain horror and pornography and other content, suitable for players of all ages to operate. Therefore, the operation is feasible.
3.2.5 Time feasibility
Producing this system will be realized one by one through the steps of feasibility analysis, functional design, detailed design and system testing, which will reasonably control the scale and time schedule of the whole production to ensure that the predetermined requirements will be met within a certain period of time, and therefore it is feasible in terms of time.
3.2.6 Social feasibility
This system is fully ethical and does not contain socially negative content. This system has been developed in compliance with relevant government regulations and industry requirements. Based on the concept of open source and free of charge, changes in other environments do not affect the development of this system.
4 Overall Functional Design
4.1 Program Function Module Design
The functional modules of this game contain lighting module, protagonist module, AI robot module, electric gate module, laser door module, music module module, elevator door module, elevator module, scanner module, camera module, automatic door module. The main module is the operation module, which is mainly responsible for the user’s operation, including the character’s movement, shouting and props picking up.
The overall module design diagram of the game’s functions is shown in Figure 4-1.
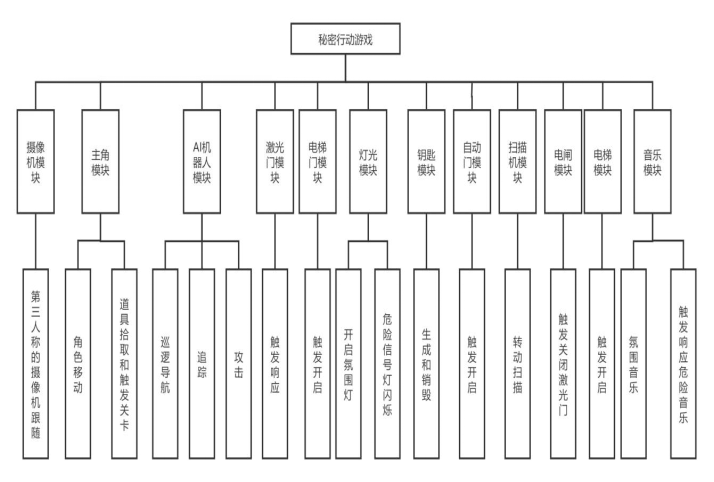
Figure 4-1 Functional Module Diagram
In the whole system, it is mainly designed around the main character, and the modules in the scene have their own functions.
Lighting module: switches between ambient lights in the scene and lights that trigger alarms
Protagonist Module: The main function is to get the keys of the protagonist and then move and get the keys, the protagonist contains the character’s backpack and blood.
AI Robotics Module: patrols the map to navigate, chase, and shoot.
Electric Gate Module: get player keys to turn it on, which can close the corresponding laser gate.
Laser door module: player touch triggers an alarm.
Music Module: Switch the background music in the scene and the music that triggers the alarm.
Elevator Door Module: The first step is to determine whether the player has access to the key, when the player’s backpack contains the key close to the elevator door (touch the trigger), the elevator door will automatically open, the player can enter the elevator at this time.
Elevator Module: When the elevator door opens, the player can enter the elevator, which then rises, ending the game.
Scanner Module: The scanner automatically rotates and scans to determine if a player is passing by, and will enter alarm mode when triggered.
Camera Module: third-person camera-following function.
Automatic Door Module: When the player approaches, the automatic door will open automatically.
4.2 Program flow design
By analyzing the requirements of this system in detail, the user plays the game by operating the protagonist actions. The operation flow chart is shown in Figure 4-2.
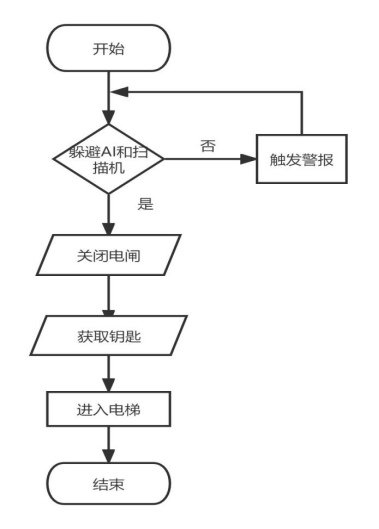
Figure 4-2 System Operation Flowchart
Through the flowchart design of the gameplay of the design of a simple, after the start of the game to operate the player to move to avoid the AI robot patrols and scanning machine scanning, if triggered by the two will be attacked by the AI caused by the death of the restart of the game, to ensure that did not trigger to the two, then look for opportunities to turn off the electric gate and the key to get the keys to obtain the keys to get the keys to enter the elevator, you can get through the game to get the final victory! The final victory is achieved by entering the elevator.
5 Detailed Design and Implementation
5.1 Scene Modeling
The overall scene model, video, and audio use a set of resource packs provided by Unity. First of all, the overall game scene construction, after the completion of the construction of the scene to add colliders, to ensure that the collider can wrap the scene of each object. To ensure that the characters, AI robots and other game objects can move in the scene without generating large-scale through the mold and other anomalies. The game scene is shown in Figure 5-1.
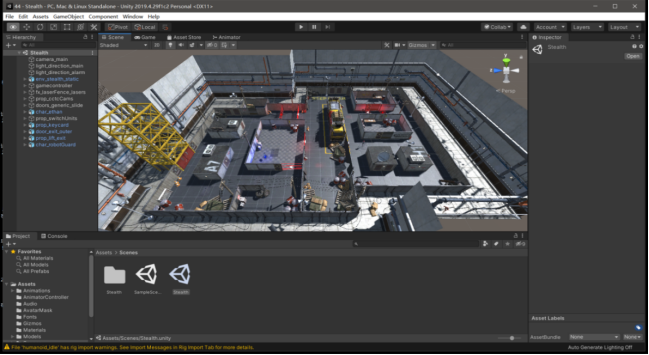
Figure 5-1 Game Scene
The system implementation will involve the movement of characters and robots in the scene, for which it is necessary to add a mesh component to the scene and add to it the exclusive mesh contained in the scene resources. The scene mesh is shown in Figure 5-2.
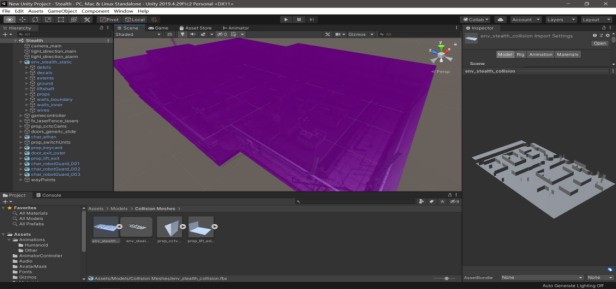
Figure 5-2 Scene Grid
5.2 Design and Implementation of System Functions
5.2.1 Design and realization of the light module
In the Hierarchy panel, create a light object (ection_alarmion_alarm) to adjust the light color to red; modify the light intensity to 0 and add the script AlarmLight. write a script to control the intensity of the light, so that the intensity of the light can be adjusted in the range of 0-1, thus achieving the effect of smooth switching between normal light and alarm light when the player triggers the mechanism or is tracked by the robot. When the player triggers a mechanism or is tracked by a robot, the normal light and the alarm light can be switched smoothly. The normal ambient light is shown in Figure 5-3. Danger ambient light is shown in Figure 5-4.
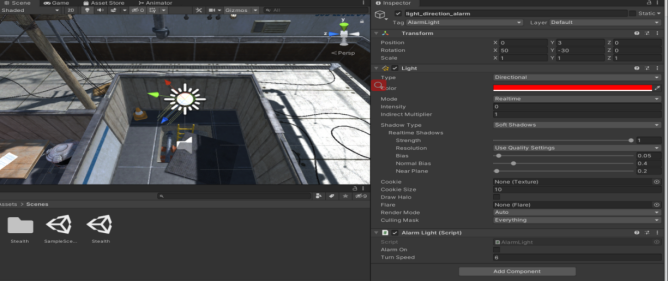
Figure 5-3 Normal Ambient Lighting
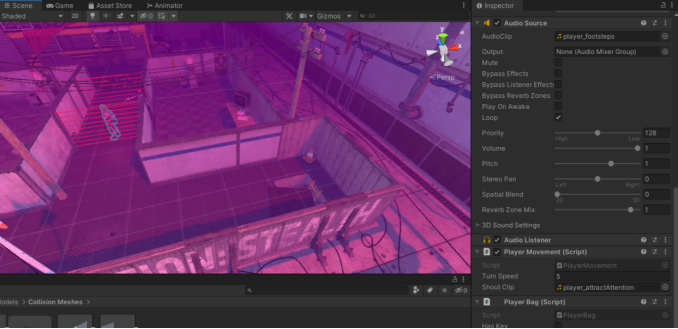
Figure 5-4 Hazardous Ambient Lighting
5.2.2 Design and implementation of the music module
Create a sound object (gamecontroller) in the Hierarchy panel and add the script LastPlayerSighting, add the Audio Source component and attach the child object secondmusic to also add the Audio Source component. Write a script to smoothly turn on and off the lights and sounds by detecting alarms and safe positions to control how the music and lights look in safe situations and how they look in dangerous situations. The background music is set to 2D, and the purpose of 2D is to ensure that the volume level is consistent throughout the game scene. The background music module is shown in Figure 5-5.
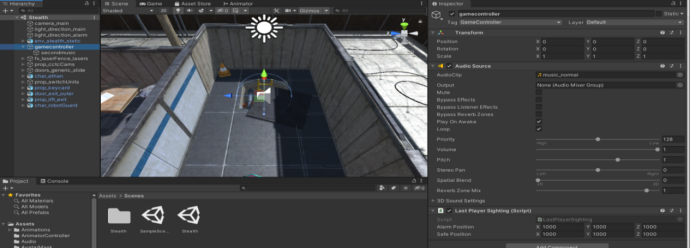
Figure 5-5 Music Module
5.2.3 Design and implementation of the scanner module
Find the Scanner object (prop_cctcCams) in the Hierarchy panel, add an empty object (trigger) to the bottom of the Scanner and place it at the bottom of the camera model; add a Light with Rang=40, Type=SpotSpo tAngle=62, color=red, light intensity=4, cookie=fxcameraView_alp; add a MeshCollider, set it as a trigger and add an animation through Animation to achieve the effect of swinging from side to side; add an AlarmTrigger. cookie=fxcameraView_alp; add a MeshCollider, set it as a trigger, and add an animation to achieve the effect of swinging left and right through Animation; add an AlarmTrigger script. Write a script to determine whether it is a player or not, and detect whether there is a player through the trigger If a player is detected, trigger an alarm so as to enter a dangerous situation. The scanner module is shown in Figure 5-6.
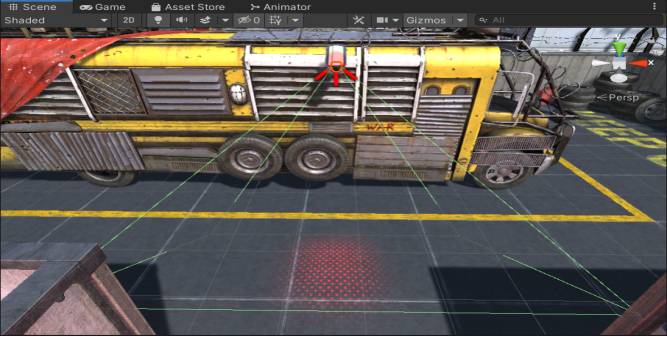
Figure 5-6 Scanner Module
In order to make the scanner can smoothly swing left and right for scanning, add Animation for it, set the maximum swing curve to 90 degrees. The scanner animation curve is shown in Figure 5-7.
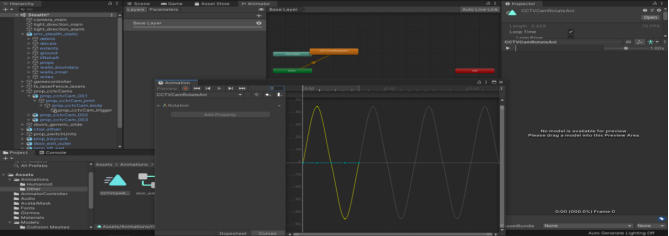
Figure 5-7 Scanner Animation Curve
5.2.4 Design and implementation of the main character module
Find the protagonist object (prop_cctcCams) in the Hierarchy panel, choose the animator: PlayerAnimator Controller; add a rigid body, use gravity, freeze the rotation in xyz direction and the offset in y direction generated by the physics engine; add a capsule collision body for the character, and adjust the appropriate position; Add AudioSource:Clip=player_footsteps, which initially does not play, but loops, 2D sound; add a script to control the movement (PlayerMovement), a script for the player’s backpack (PlayerBag) and a script for the player’s blood level (PlayerHealth). Find InputMananager in ProjectSetting in Edit panel and set Horizontal and Vertical, Sneak, Shout, write several scripts for binding, the movement script makes it possible for the player to control the character’s movement and shouting through keyboard keys, the backpack script is to determine whether or not to make a key acquisition, and the blood script detects the player’s blood status and loads a death animation when the blood level is less than or equal to 0 [14]. The main character module is shown in Figure 5-8 and Figure 5-9.
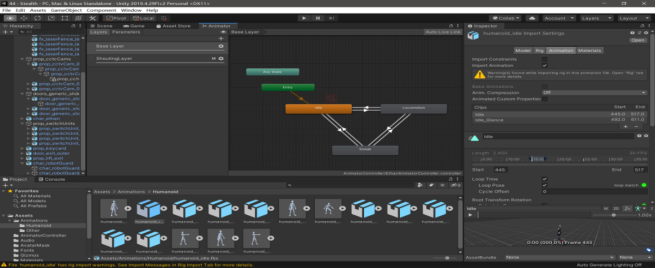
Figure 5-8 Main character animation details
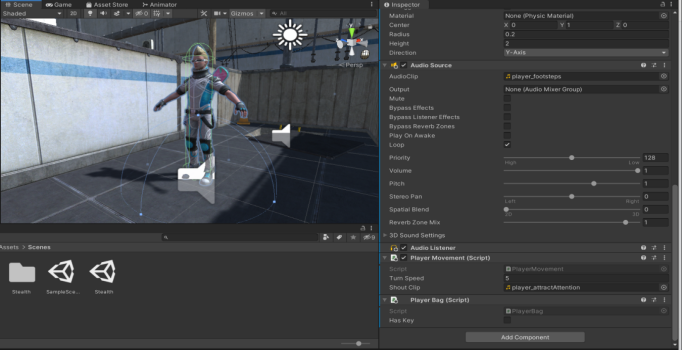
Figure 5-9 Main Character Module
5.2.5 Design and Implementation of the Camera Module
In order to allow the camera to smoothly follow the movement of the protagonist, find the main camera (camera _main) in the Hierarchy panel, add the script CameraFollow, and write a script to control the following speed and offset so that the camera smoothly follows the protagonist’s movement when the player operates. The camera module is shown in Figure 5-10.
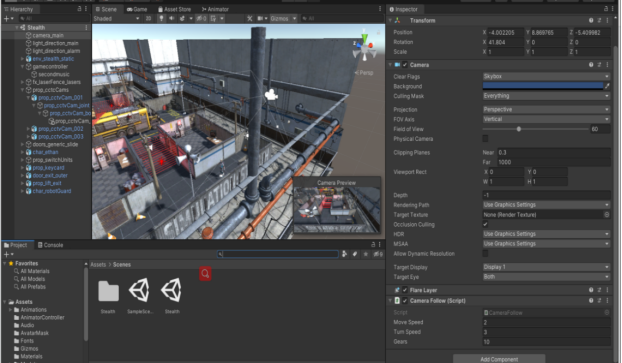
Figure 5-10 Camera Module
5.2.6 Design and Implementation of the Laser Gate Module
Find the laser door object (fx_laserFence_lasers) in the Hierarchy panel and add the script AlarmTrigger to add a trigger so that the door triggers an alarm when the protagonist collides with the laser door. The laser door module is shown in Figure 5-11.
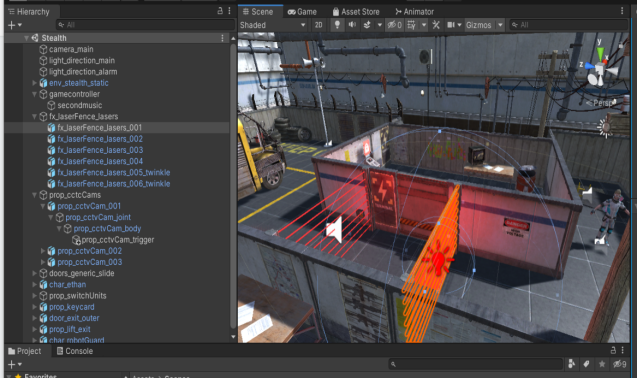
Figure 5-11 Camera Module Diagram
5.2.7 Design and implementation of the automatic door module
Find the automatic door object (door_generic_slide) in the Hierarchy panel, add the script LittleDoorTrigger, add the sound component to make the door open with the corresponding sound, add the trigger to detect the character close to the door will automatically open, here for the control of opening and closing the door animation management, the use of the Atimator Fusion Tree Control the opening and closing of the door, the Animation animation of the automatic door is shown in Figure 5-12. The automatic door module is shown in Figure 5-13.
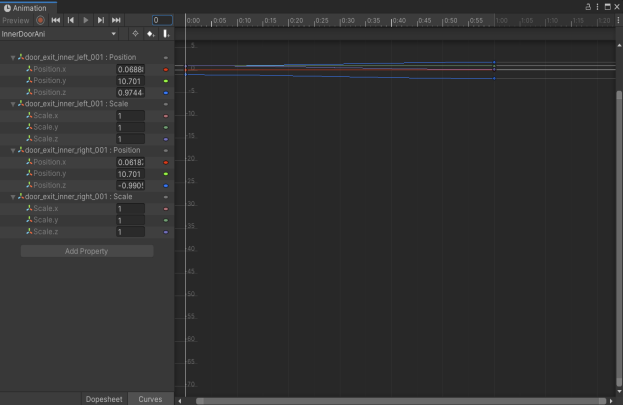
Figure 5-12 Automatic door animation diagram
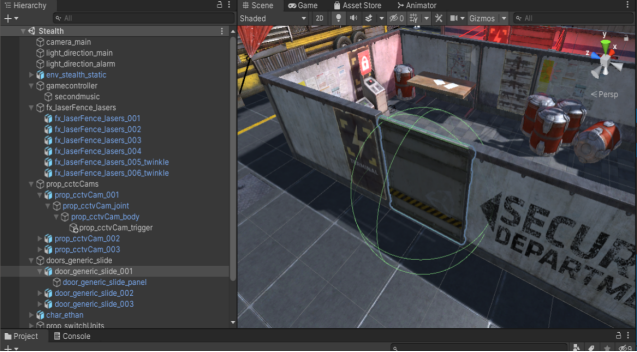
Figure 5-13 Automatic Door Module Diagram
5.2.8 Design and implementation of the electric gate module
In the Hierarchy panel to find the electric gate object (prop_switchUnit), for the small computer prop_switchUnit (parent) add Clip=switch dea ctivation default does not play, do not loop, the initial sound is the largest, the 2D sound; add Box’s triggers, than the collider to be a little larger set to Trigger; add the script SwitchUnitController, write a script, an electric gate switch to control a laser, the player next to the electric gate press z to turn off the corresponding laser, the corresponding electric gate can turn off the corresponding laser door [15]. The electric gate module is shown in Figure 5-14.
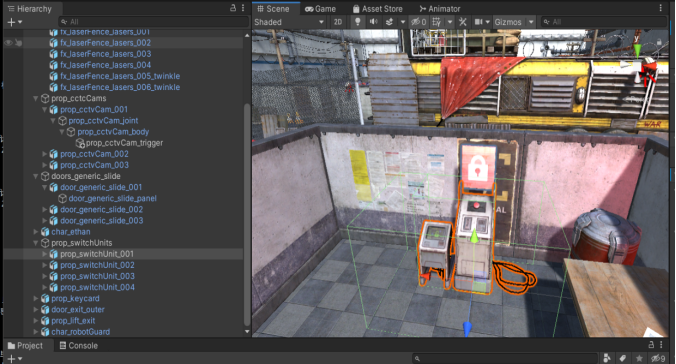
Figure 5-14 Electric Gate Module Diagram
5.2.9 Key Module Design and Implementation
Find the key object (prop_keycard) in the Hierarchy panel, set the animatior to “KeyAnimatorController”; add a light Light, render it as follows: PointRange=5, Color=Blue, Light Intensity 3; add a spherical trigger y=1, r=1 to add the trigger component, add the script PickUpKeyCard, destroy it after the player has triggered it. Add a spherical trigger y=1, r=1 add a trigger component, add a script PickUpKeyCard, destroy it after the player triggers it. Add a sound to make a sound after the player has set off. The key module is shown in Figure 5-15.
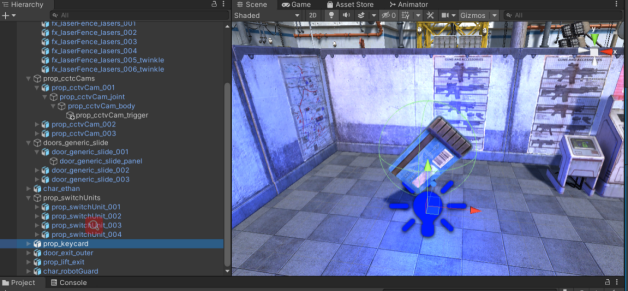
Figure 5-15 Key Module Diagram
5.2.10 Design and implementation of the elevator door module
Find the elevator door object (door_exit_outer) in the Hierarchy panel, add the trigger component, add the script BigRedDoorTrigger to detect if the player has a key, add the sound of opening and blocking the door, and add the Atimator Fusion Tree to control the opening and closing of the door, just like the automatic door. When the player has the key and is close to the elevator door (within the trigger range of the elevator door), the elevator door opens and the door opening sound is emitted at the same time. The elevator door module is shown in Figure 5-16.
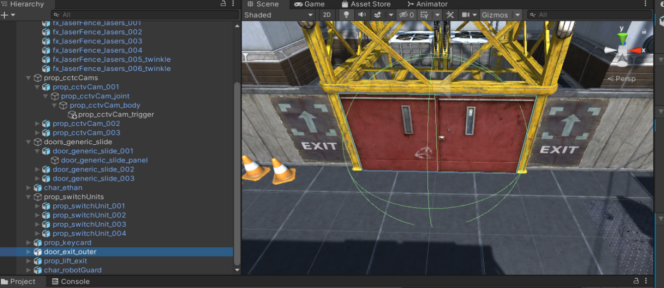
Figure 5-16 Elevator door module diagram
5.2.11 Design and implementation of the elevator module
Find the elevator object (prop_lift_exit) in the Hierarchy panel, add the sound component to add the sound of the elevator rising, add the script LiftRaise, and write a script that detects whether the player’s backpack contains a key, and then the elevator rises after entry if the player has acquired the key. The elevator module is shown in Figure 5-17.
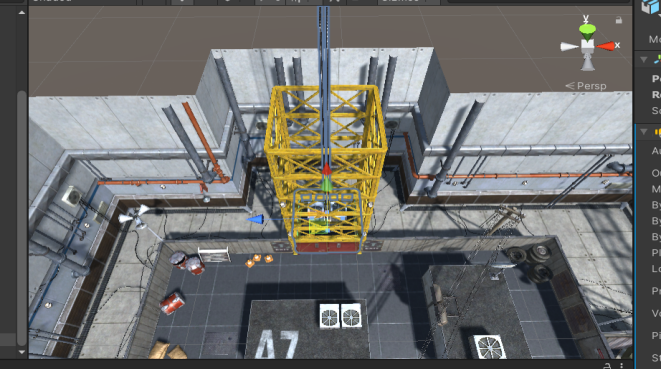
Figure 5-17 Elevator Module Diagram
5.2.12 Design and realization of the robot module
Find the robot object (char_robotGuard) in the Hierarchy panel, add the Rigid Body component, set it to be is Kinematic, and don’t add any constraints; add the Capsule Collider; add the Sphere Collider. Add the navigation controller navmesh agent with default settings; add the script EnemyPower and write it so that the robot can detect the player visually and audibly. Add script EnemyAnimation and write it so that the robot can move towards the target position. Add the script EnemyAI and write it so that the robot can patrol the navigation route according to the planned path. Use the Atimator component to create a fusion tree to add the robot’s attack, tracking and stopping behaviors. Add the pistol “prop_sciFiGun_low” to the right hand side of the robot model; add subobject Effects to create the effect; add the Light component to the Effect, setActive=false; Range=10; light intensity is 2; add the script by default. EnemyShooting and write the robot attack animation. The robot module is shown in Figure 5-18.
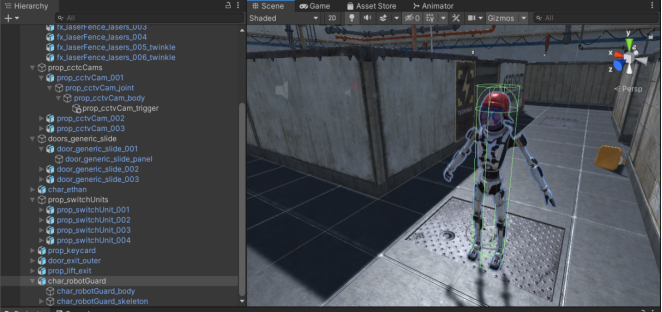
Figure 5-18 Robot Module
The script EnemyAI to write, write the use of four public classes, that is, you can add four points for mounting, when set up four points and mounted to the script, the script is also mounted to the robot after the start of the game can make the robot according to the planning of the path patrol navigation route navigation routes as shown in Figure 5-19.
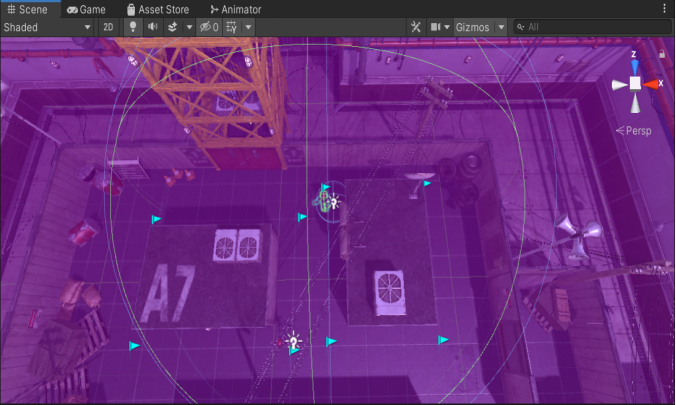
Figure 5-19 Robot navigation route
5.3 Optimization of the effect of scene fog
Adding a fog effect to the scene can make the game scene more adventurous, find the Lighting Setting under Rendering in Windows. set the color in OtherSetting, and then find the Inspector in the main camera camera_main. Rendering Path is set to Legacy Deferred, and the final effect is shown in Figure 5-20.
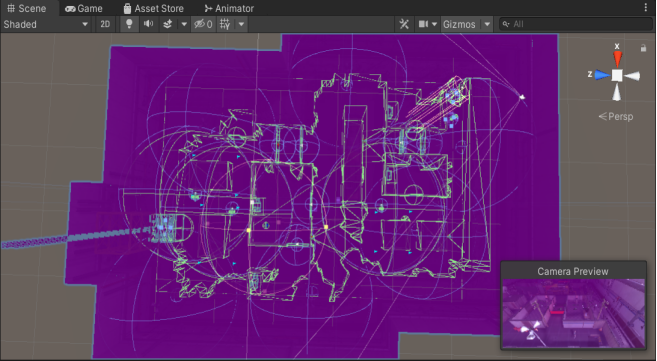
Figure 5-20 Fog Effect
5.4 Packaging of the system
In order to facilitate the use of the system, the whole system will be packaged into an exe file by packaging. Under the File panel, find Bulid Settings, firstly, add the project, next, select the publishing platform (this system is PC), and finally, perform Bulid, which can be packaged as an executable file. The packaging process and results are shown in Figure 5-21 and Figure 5-22.
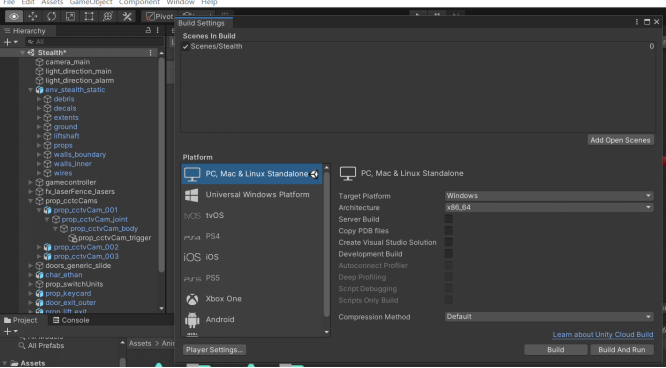
Figure 5-21 Packing Process

Figure 5-22 Packing results
6 Numerical planning
6.1 Purpose of numerical planning
Although numerical planning cannot determine whether a game is fun or not, the numerical value has a great relationship with whether a game is not fun and how deep the players can play it. A game’s entertainment comes from the gameplay can also be said to be the establishment of the rules, as opposed to the quantitative expression of the rules is the value, in the strict sense of the numerical settings can reflect the design ideas is a good value. Numerical value can be said to be a tool, standardize the game value can not only reduce the cost of research and development, but also reduce the cost of operation. There is a saying that half of the work is half of the work. The importance of numerical value is reflected in the last 10, after all, the game feeling this kind of thing is too subjective, how to use numbers to drive up all kinds of systems, to achieve the preset purpose, is the value of the biggest role.
6.2 Methods of numerical planning
There are many ways to plan values, and most values are calculated by applying some formulas. Different games also use different formulas to make subtle calculations to ensure the fairness of the game, i.e. game balance. In order to ensure balance, the values will be set incrementally in the system, and the system will be used repeatedly to debug the changes.
6.3 Numerical detailing
After a systematic design, all the modules included in the system with the values are named and standardized, and the magnitude of their values is summarized.
6.3.1 Values for the Protagonist Module
In order to ensure that players can have the use of functions such as turning and blood, after numerical design, the main character module of each value as shown in Table 6-1.
Table 6-1 Main Module Values
|
name |
screenplay title |
numerical value |
|
Main character name |
Char_ethan |
|
|
Turning speed |
turnSpeed |
5f |
|
Main Character Blood |
playerHP |
500 |
|
Backpack Key Acquisition |
HasKey |
empty |
|
Main character movement speed |
follow an animation |
|
|
initial position |
000 |
6.3.2 Robot module values
After numerical design, the values of each robot module are shown in Table 6-2.
Table 6-2 Robot Module Values
|
name |
screenplay title |
numerical value |
|
Robot name |
char_robotGuard |
|
|
Pursuit speed |
chasingSpeed |
5f |
|
Patrol speed |
patrolingSpeed |
2f |
|
patrol point |
wayPoints |
4 |
|
Waiting Interval |
interval |
|
|
Dead Reckoning |
deadZone |
20 |
|
Maximum angle of field of view |
fieldOfView |
110 |
|
Can you see the players |
playerInSight |
|
|
harm |
playerHealth.TakeDamage |
50 |
6.3.3 Elevator module values
After numerical design, the values of each elevator module are shown in Table 6-3.
Table 6-3 Elevator Module Values
|
name |
screenplay title |
numerical value |
|
Elevator name |
prop_lift_exit |
|
|
Waiting for the rise |
waitRaise |
1f |
|
Elevator ascent speed |
moveSpeed |
3f |
|
Elevator sound playback time |
clipPlayInterval |
3f |
|
Game over sound wait time |
endGameClipWaitInterval |
5f |
|
Game Over Sound Clip |
endGameClip |
6.3.4 Camera module values
After numerical design, the values of the camera module are shown in Table 6-4.
Table 6-4 Camera Module Values
|
name |
screenplay title |
numerical value |
|
Camera Name |
camera_main |
|
|
travel speed |
moveSpeed |
3f |
|
rotation speed |
turnSpeed |
10 |
|
Camera Dynamic Adjustment Gear |
gears |
5 |
|
Objectives to be followed |
followTargetl |
|
|
Ray collision detector |
hit |
6.3.5 Laser Gate Module Values
After numerical design, the values of the laser gate module are shown in Table 6-5.
Table 6-5 Master Module Values
|
name |
screenplay title |
numerical value |
|
Laser door name |
fx_laserFence_lasers_005_twinkle |
|
|
interval time |
interval |
2 |
6.3.6 Virtual axis module values
In order to ensure that the player can move forward and backward, left and right and other behaviors through the virtual axis, after the numerical design, the values of the virtual axis module are shown in Table 6-6.
Table 6-6 Virtual Axis Module Values
|
name |
screenplay title |
numerical value |
|
former conduct |
Vertical |
w |
|
be back |
Vertical |
s |
|
turn right |
Horizontal |
a |
|
turn right |
Horizontal |
d |
|
cry out |
Shout |
x |
|
Operation of electric gates |
Sneak |
z |
|
move stealthily |
Shift |
Shift |
7 Functional Testing
7.1 Purpose of the test
Because the whole development process is more complex, more functions, so it is inevitable that some problems will occur, through the function of the test can check the system interface of each functional module is in line with the requirements of the design, if there is a problem, it can be solved before the release of the game, which not only ensures the stability of the game can also ensure that the user’s experience in the use of the system.
7.2 Test methods
After the initial completion of the game’s various functions, the game will begin to run, to detect whether the normal operation of the various modules to ensure that the game experience to meet the requirements of the needs analysis, including the protagonist to move, robots patrolling, tracking and attacking, automatic door opening and closing, alarm lights and alarm sound triggering, and so on.
7.3 Test cases
7.3.1 Character Movement Module Testing
The virtual axis of the role module is tested for movement to ensure that the role can be operated for various operations when using the system, and the specific test results are shown in Table 7-1 and Figure 7-1.
Table 7-1 Role Movement Tests
|
name |
manipulate |
Expected results |
actual result |
|
Character moves normally |
Keyboard press WASD respectively |
Move forward, backward, left and right |
as expected |
|
Character cannot move |
Keyboard presses other than WASD |
Character does not move |
as expected |
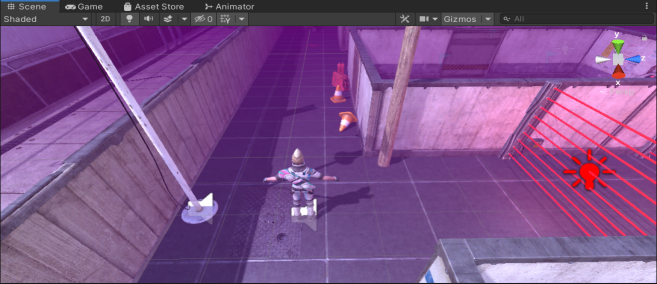
Figure 7-1 Character movement test
The pickup function of the role module is tested, and the specific test results are shown in Table 7-2 and Figure 7-2.
Table 7-2 Role Pickup Tests
|
name |
manipulate |
Expected results |
actual result |
|
Characters pick up normally |
Character enters key trigger range |
Picked up successfully |
as expected |
|
Characters can’t pick up |
Character not in range of key trigger |
Failed to pick up |
as expected |
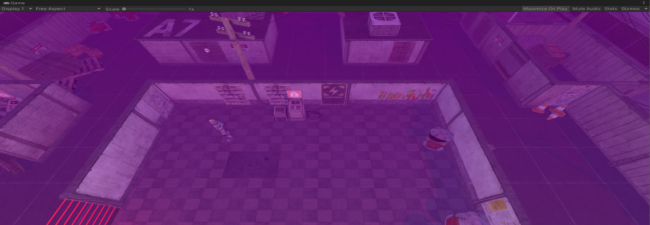
Figure 7-2 Character Pickup Test
The virtual axis of the role module is tested for movement, and the specific test results are shown in Table 7-3 and Figure 7-3.
Table 7-3 Role Death Tests
|
name |
manipulate |
Expected results |
actual result |
|
Character Death |
Setting the character’s blood level to 0 |
Character Death |
as expected |
|
Character Survival |
Adjusting the character’s blood level above 0 |
Character Survival |
as expected |
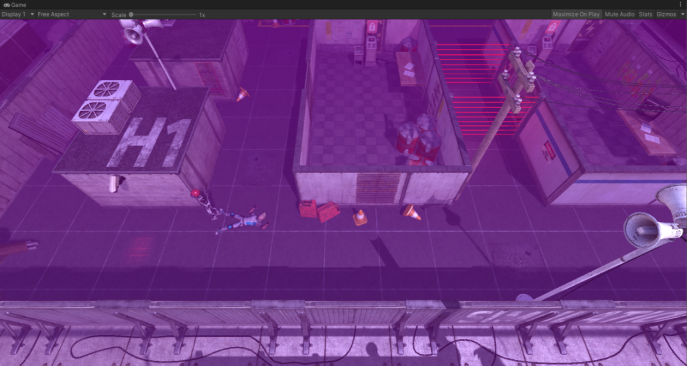
Figure 7-3 Character Death Test
7.3.2 Testing of the electric gate module
In order to ensure that the electric gate can be operated smoothly to close the laser door, so that the player can avoid the tracking of the robot at the same time there are other routes to walk, the electric gate module is tested, the specific test results are shown in Table 7-4 and Figure 7-4.
Table 7-4 Electric Gate Control Tests
|
name |
manipulate |
Expected results |
actual result |
|
Electric gate control laser door closure |
Approach the electric switch and press the z button |
Close the corresponding laser door |
as expected |
|
Electric gate not closing laser door |
Pressing the z button without approaching the electric switch |
Failure to close the corresponding laser door |
as expected |
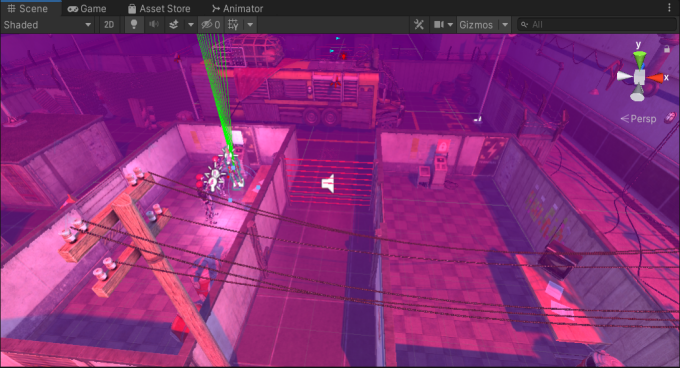
Figure 7-4 Electric Gate Control Test
7.3.3 Robot module testing
The robot module patrol navigation was tested and the specific test results are shown in Table 7-5 and Figure 7-5.
Table 7-5 Robot patrol navigation control test
|
name |
manipulate |
Expected results |
actual result |
|
The robot follows the path of the point waypoint for navigation |
The game starts with a click |
The robot follows the path of the point waypoint for navigation |
as expected |
|
Robot at rest |
The game hasn’t started. |
Robot at rest |
as expected |
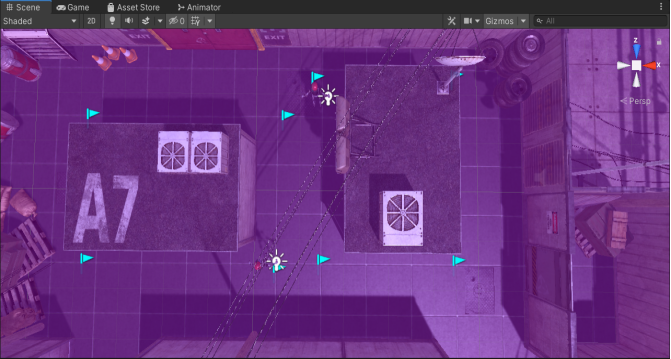
Figure 7-5 Robot patrol navigation control test
The robot module tracking navigation was tested and the specific test results are shown in Table 7-6 and Figure 7-6.
Table 7-6 Robot Tracking Navigation Control Tests
|
name |
manipulate |
Expected results |
actual result |
|
Robots tracking protagonists |
Character Trigger Alert |
Robots tracking protagonists |
as expected |
|
Robot maintains patrol navigation, not tracking protagonist |
No alarms are triggered and the protagonist is not in the robot’s field of view |
Robot maintains patrol navigation, not tracking protagonist |
as expected |
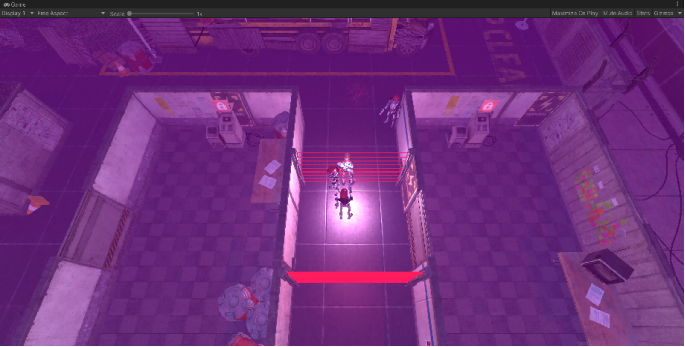
Figure 7-6 Robot tracking navigation control test
In order to ensure that the robot can produce attack behavior when it finds the protagonist, the robot module attack function is tested, and the specific test results are shown in Table 7-7 and Figure 7-7.
Table 7-7 Robot Attack Test
|
name |
manipulate |
Expected results |
actual result |
|
Robots attacking the protagonist |
The protagonist is being tracked by a robot and is in range of the robot’s attack |
Robots attacking the protagonist |
as expected |
|
The robot did not attack the protagonist |
The protagonist is not being tracked by a robot and is not in range of a robot attack |
The robot did not attack the protagonist |
as expected |
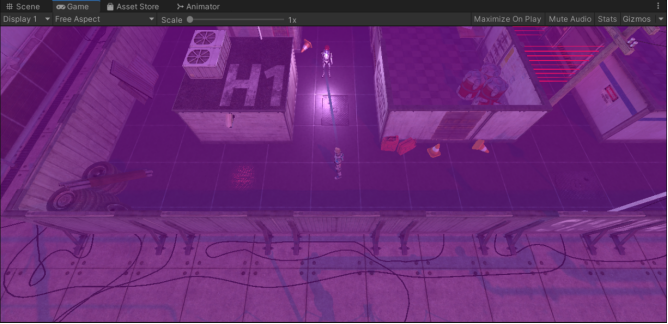
Figure 7-7 Robot Attack Test
7.3.4 Camera Module Testing
The camera module was tested and the specific test results are shown in Table 7-8 and Figure 7-8.
Table 7-8 Camera Tests
|
name |
manipulate |
Expected results |
actual result |
|
Camera follows normally |
Start the game and move the character to the corner |
Camera follows normally |
as expected |
|
Camera follow jams or character loss occurs |
Start the game and move the character to the corner |
Camera follows normally |
as expected |
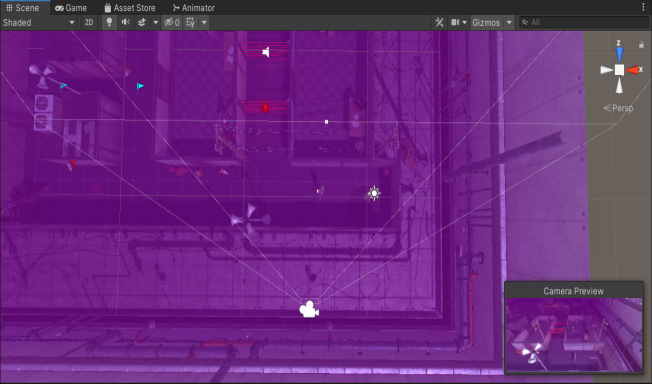
Figure 7-8 Camera Test
7.3.5 Elevator module testing
In order to ensure the end of the game judgment, need to be in the player into the elevator, the elevator can produce rising behavior, the elevator module to test, specific test results as shown in Table 7-9 and Figure 7-9.
Table 7-9 Elevator Tests
|
name |
manipulate |
Expected results |
actual result |
|
The elevator’s going up. |
The protagonist enters the elevator |
The elevator’s going up. |
as expected |
|
Elevator not in motion |
The protagonist did not enter the elevator |
Elevator not in motion |
as expected |
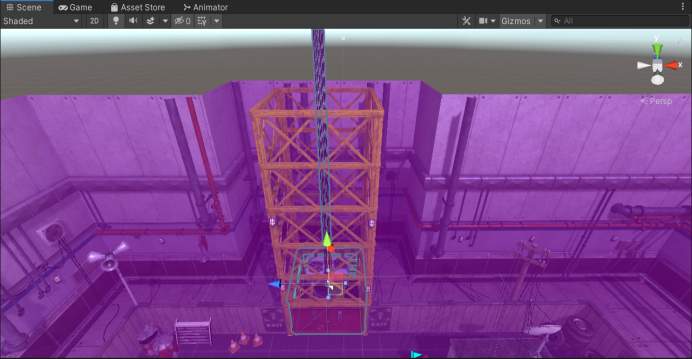
Figure 7-9 Elevator Test
7.3.6 Laser Gate Module Testing
To ensure that the laser door can trigger the alarm properly when it comes into contact with the player, the laser door module is tested, and the specific test results are shown in Table 7-10 and Figure 7-10.
Table 7-10 Laser Gate Test
|
name |
manipulate |
Expected results |
actual result |
|
Trigger Hazard Alert |
The protagonist touches the laser door |
Trigger Hazard Alert |
as expected |
|
Hazard warning not triggered |
The protagonist didn’t touch the laser door |
Hazard warning not triggered |
as expected |
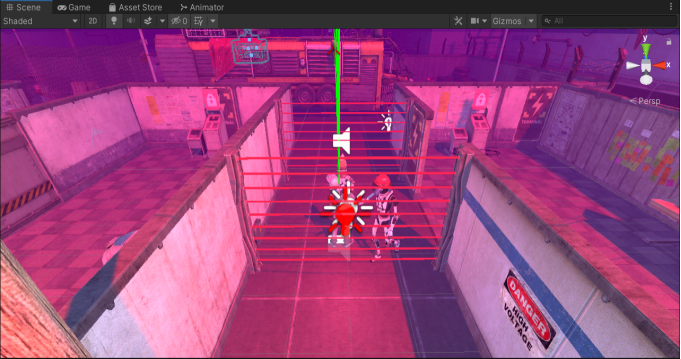
Figure 7-10 Laser Gate Test
7.3.7 Automatic door module testing
The automatic door module was tested and the specific test results are shown in Table 7-11 and Figure 7-11.
Table 7-11 Automatic Door Tests
|
name |
manipulate |
Expected results |
actual result |
|
The automatic door opens. |
The main character triggers the automatic door trigger |
The automatic door opens. |
as expected |
|
Automatic door not opening |
The protagonist has not triggered the automatic door trigger |
Automatic door not opening |
as expected |
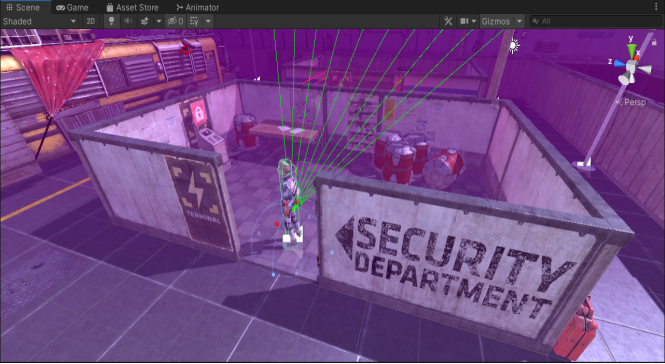
Figure 7-11 Automatic Door Test
7.3.8 Scanner module testing
The scanner module was tested and the specific test results are shown in Table 7-12 and Figure 7-12.
Table 7-12 Scanner Tests
|
name |
manipulate |
Expected results |
actual result |
|
Scanner Oscillation Scanning |
Start Game |
Scanner Oscillation Scanning |
as expected |
|
Scanner at rest |
Game not started |
Scanner at rest |
as expected |
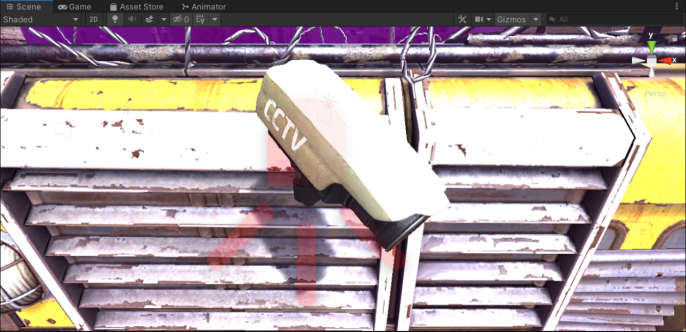
Figure 7-12 Scanner Test
7.3.9 Lighting module test
In order to improve the game experience, to ensure that the lighting of the scene can be switched smoothly, the lighting module is tested, and the specific test results are shown in Table 7-13 and Figure 7-13.
Table 7-13 Scene Lighting Test
|
name |
manipulate |
Expected results |
actual result |
|
Smooth switching between normal ambient and hazard lights |
The protagonist goes from a safe situation to triggering a dangerous obstacle |
Smooth switching between normal ambient and hazard lights |
as expected |
|
Normal ambient and hazard lights do not switch smoothly |
The protagonist goes from a safe situation to triggering a dangerous obstacle |
Smooth switching between normal ambient and hazard lights |
as expected |
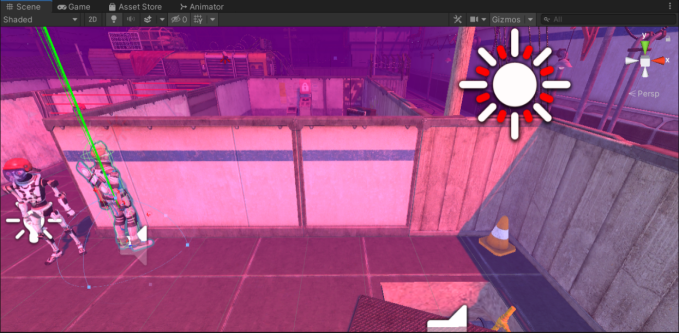
Figure 7-13 Scene Lighting Test
7.3.10 Music module testing
The music module was tested and the specific test results are shown in Table 7-14 and Figure 7-14.
Table 7-14 Scene Music Test
|
name |
manipulate |
Expected results |
actual result |
|
Smooth switching between normal ambient and dangerous music |
The protagonist goes from a safe situation to triggering a dangerous obstacle |
Smooth switching between normal ambient and dangerous music |
as expected |
|
Normal ambient music and danger music cannot be switched smoothly |
The protagonist goes from a safe situation to triggering a dangerous obstacle |
Smooth switching between normal ambient and dangerous music |
as expected |
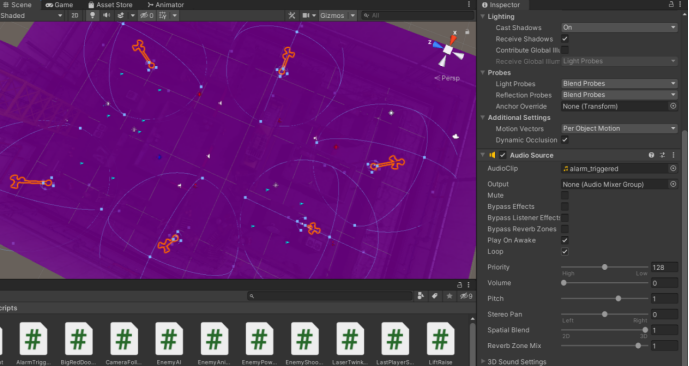
Figure 7-14 Music Test
7.3.11 Scene Fog Effect Testing
In the production process to add the scene of the fog effect, in order to ensure the complete display of the fog effect, here on the scene of the fog effect test, the specific test results as shown in Table 7-15 and Figure 7-15.
Table 7-15 Scene Fog Effect Test
|
name |
manipulate |
Expected results |
actual result |
|
Scene fog effects can be fully realized |
Observing the scene after adding the fog effect |
Scene fog effects can be fully realized |
as expected |
|
No fog effect in the scene |
Observation of the scene after the fog effect has not been added |
No fog effect in the scene |
as expected |
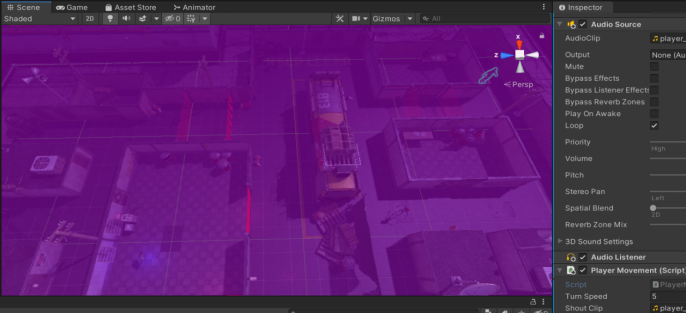
Figure 7-15 Scene Fog Effect Test
7.3.12 System guide package testing
The system was finally packaged in the PC, to ensure that the final executable file can be consistent with the effect in the engine, the system’s packages were tested, and the specific test results are shown in Table 7-16 and Figure 7-16.
Table 7-16 System Guide Packet Test
|
name |
manipulate |
Expected results |
actual result |
|
The system is packaged and running successfully |
Getting the system up and running |
Guide packages can be operated normally |
as expected |
|
The system was packaged but did not run successfully. |
Getting the system up and running |
Failed to import package, failed to run |
as expected |

Figure 7-16 System Guide Packet Test
7.3.13 Character Shouting Functionality Testing
The character shouting function was tested, and the specific test results are shown in Table 7-17 and Figure 7-17.
Table 7-17 Role Shouting Test
|
name |
manipulate |
Expected results |
actual result |
|
Character Shouting |
Press z after the game starts |
Character Shouting |
as expected |
|
Character does not produce shouting behavior |
Game starts without the z key |
Character does not produce shouting behavior |
as expected |
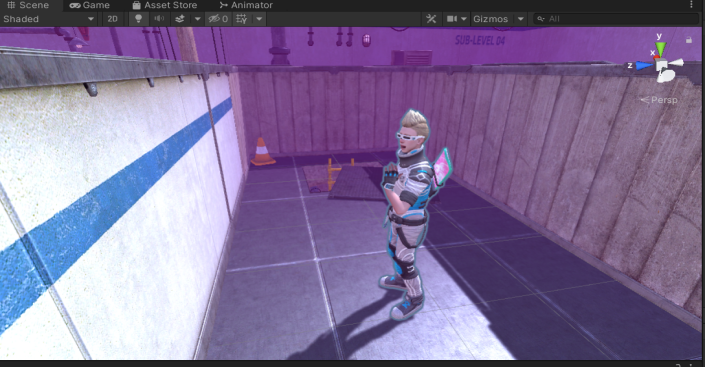
Figure 7-17 Role Shouting Test
7.3.14 Character static step test
The character static step movement function is tested, and the specific test results are shown in Table 7-18 and Figure 7-18.
Table 7-18 Role Shouting Test
|
name |
manipulate |
Expected results |
actual result |
|
Characters move at a standstill |
Hold down the shift key on your keyboard while your character is moving. |
Characters move at a standstill |
as expected |
|
Character not moving at a standstill |
Character does not hold down the shift key while moving. |
Character not moving at a standstill |
as expected |
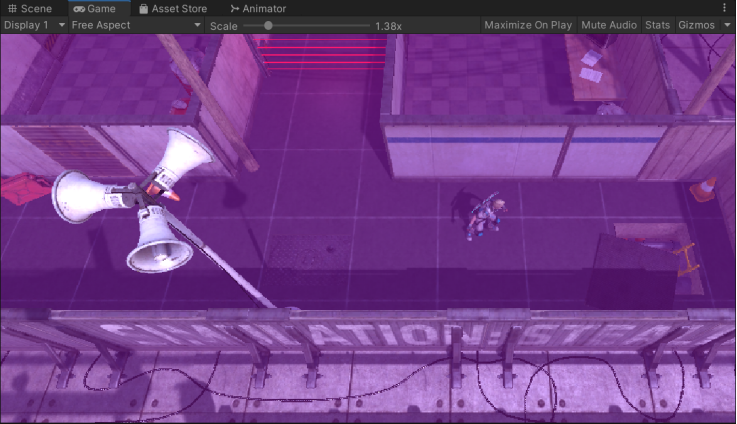
Figure 7-18 Character static step movement test
8 Summary
The whole game system is set up in Unity engine for scenes and game objects, and the scripts needed for the whole design are made in Visual Studio, and the programming language used is C#. Through the demand analysis, general design and detail design to complete the production, and finally the system testing is completed. The final realization of an adventure game is to control the movement of the character to avoid obstacles and get the key to pass the final level. The game interface is simple, easy to use and interactive. The overall design work is summarized as follows:
Software requirements analysis is performed using multiple aspects to ensure that the game is playable and entertaining, followed by the framework design and process design of the game.
The first step of formal development is to build the whole game scene to ensure the rationality of the model position. Then gradually script and add components to each module.
After the completion of the game modules, the game was tested to ensure that the game works properly and meets the initial system requirements.
After the above steps, the entire system is completed, although the period encountered a variety of problems, encountered a lot of failures, but through their own documents and website information access and repeated attempts, the difficulties are solved, recall that although full of hardship but no lack of innovation and breakthroughs in the fun.
The final realized system will be able to fully realize the timely response of each sound in the game scene, the change of lights in the scene, the control of the game character, the death of the character, the switch of the automatic door, the picking up of the props to pass the level, the operation of the electric gate to close the laser door, the automatic patrol of the AI robots, the tracking of the character and the attack. The overall picture of the system has a strong sense of technology, the game is highly playable and easy to start, and the length of a single game is moderate. The expected system requirements were met.
a thank-you note
This is the end of my writing. It also means that this is the end of my school career. It started in the golden fall of 20**, and will end in the summer of 2022. I’ve been dreaming of going to college, but I’m going to say goodbye. As far as the eye can see, all are memories. I am grateful for all the sadness I feel. I would like to thank my alma mater for its nurturing and care.
I would like to thank my supervising teacher **** for his professional knowledge, kindness and guidance, which I sincerely admire. Especially in the process of thesis writing, I have encountered a variety of problems, Mr. Wang has been carefully guided. It is difficult to measure the effort that Mr. Wang has put into it. I have been studying for more than ten years, but it is rare to find a good teacher, so I will remember and be grateful for my whole life.
More than twenty years, not without the silent contribution of parents, they allow me to follow the work of their own choices, not only financial support, but more is the spirit of encouragement, they gave me the impetus to move forward, I would like to thank my parents, I wish them good health.
Thank you for meeting the housemates of the **** dormitory, it is you who brought me countless warmth and joy in my college life, I wish you a bright future, peace and happiness.
Finally, I thank myself, I understand what I want in the university and have been working hard, I think graduation is also towards the path of U3d development engineer to continue to develop, go for it.
May you and I be able to lead songs for what we love in the future!
appendice
Appendix 1: Lighting Module Program Code
public class AlarmLight : MonoBehaviour {
    public bool alarmOn = false;
    /// <summary>
    /// Transition speed
    /// </summary>
    public float turnSpeed = 3;
    // Gao Guangqiang
    private float highIntencity = 3f;
    //Low light intensity
    private float lowIntencity = 0f;
    //Target light intensity
    private float targetIntencity;
    // Lighting components
    private Light lt;
    private void Awake()
    {    lt = GetComponent<Light>(); }
    private void Start()
    { // Default target is high light intensity
        targetIntencity = highIntencity;  }
    private void Update()
    {   if(alarmOn)
        {// Transition to target light intensity
 lt.intensity = Mathf.Lerp(lt.intensity, targetIntencity, Time.deltaTime * turnSpeed);
            //Currently has reached the target light intensity at this point, modify the new target light intensity
            if(Mathf.Abs(lt.intensity -
                targetIntencity) < 0.05f)
            { //Switching targets
                if(targetIntencity == highIntencity)
                {   targetIntencity = lowIntencity;
                } else {
                    targetIntencity = highIntencity; }  } }
        else { //transition to low light intensity
            lt.intensity = Mathf.Lerp(lt.intensity,
                lowIntencity, Time.deltaTime * turnSpeed);
            // Calculation to prevent CPU redundancy
            if(lt.intensity - lowIntencity < 0.05f){
lt.intensity = lowIntencity; } } }}public class BigRedDoorTrigger : MonoBehaviour {
public AudioClip doorOpenClip;
public AudioClip refuseOpenClip;
public Animator innerDoorAni;
public LiftRaise liftRaise;
private PlayerBag playerBag;
private Animator ani;
private void Awake()
{
playerBag = GameObject.FindWithTag(
TagsAndParamters.PLAYER).
GetComponent<PlayerBag>();
ani = GetComponent<Animator>();}
private void OnTriggerEnter(Collider other)
{ if(other.CompareTag(TagsAndParamters.
PLAYER))
{ if(playerBag.hasKey) {
// big red door open ani.SetBool(TagsAndParamters.
Paramter_DOOROPEN, true);
//Fence gate open
innerDoorAni.SetBool(TagsAndParamters.
Paramter_DOOROPEN, true);
//Open door sound
AudioSource.PlayClipAtPoint(
doorOpenClip, transform.position); }
else {// Reject the sound of the door opening
AudioSource.PlayClipAtPoint(
refuseOpenClip, transform.position); } } }
private void OnTriggerExit(Collider other) {
if(other.CompareTag(TagsAndParamters.PLAYER))
{ if(playerBag.hasKey) {
//Close the door
ani.SetBool(TagsAndParamters.
Paramter_DOOROPEN, false);
//Fence gate closed
innerDoorAni.SetBool(TagsAndParamters.
Paramter_DOOROPEN, false);
//Close the door声音
AudioSource.PlayClipAtPoint(
doorOpenClip, transform.position);
// If the player has stepped inside the elevator
if(PlayerInLift()) {// confiscate key
playerBag.hasKey = false;
//Trigger the timer, then the elevator goes up
liftRaise.BeginRaise(); }} }}
/// <summary>
/// Determine if the player is in the elevator
/// </summary>
/// <returns><c>true</c>, if in lift was playered, <c>false</c> otherwise.</returns>
private bool PlayerInLift() {
// Direction vector of the gate pointing toward the player
Vector3 dir = playerBag.transform.position - transform.position;
//Fork multiplication
Vector3 normal = Vector3.Cross(transform.forward, dir);
The // normal vector is facing up, indicating that the player is inside the elevator
if (normal.y > 0)
return true; else return false; }}