preamble
The previous section briefly describes the network structure and innovations of YOLOv5 (the drive-through:[YOLO Series] YOLOv5 Super Detailed Explanation (Network Detailed Explanation)) In the next step we will go into a deeper study of YOLOv5, starting with the source code interpretation. Because I am a pure white, just started to download the source code when really a face, so the first from the most basicProject Catalog StructureStart ~ because the relevant interpretation is not a lot, so some of them are based on the author of the English documents given by me to translate their own, if there is something wrong, welcome to correct ah! This is just a simple introduction to each file is to do what, generally understand the project, the specific code will be slowly updated later, you are welcome to pay attention to my column, and I learn together ah! Source code download address:mirrors / ultralytics / yolov5 · GitCodecatalogs
1.7 Other first-level catalog documents
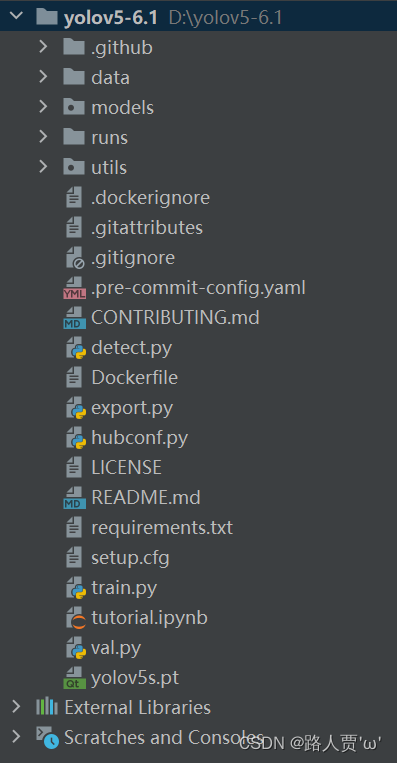
I. Project catalog structure
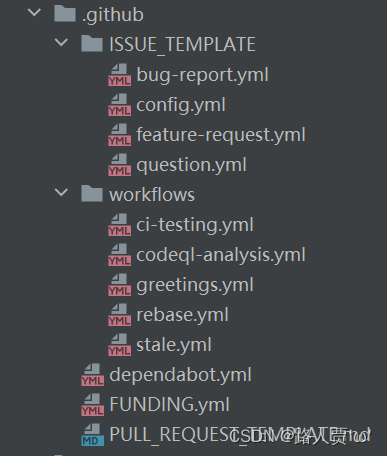
1.1 .github folder
1.2 datasets

1.3 data folder
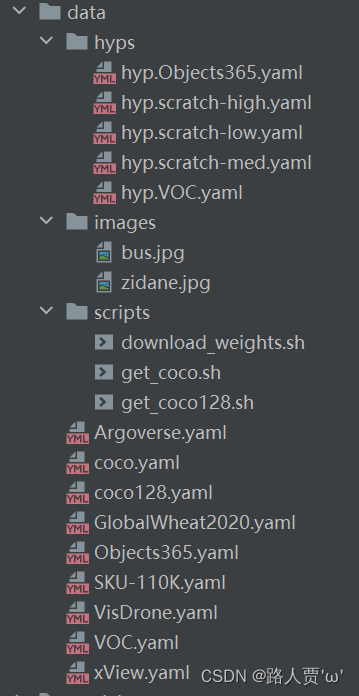
- hyps folder # Store hyperparameter configuration files in yaml format.
- hyps.scratch-high.yaml # High data enhancement for large models i.e. v3, v3-spp, v5l, v5x
- hyps.scratch-low.yaml # Low data enhancement for smaller models i.e. v5n, v5s
- hyps.scratch-med.yaml # in Data Enhancement for medium sized models. i.e. v5m
- images # There are two official test images stored #
- scripts # Store dataset and weights download shell scripts
- download_weights.sh # Download the weights file, including the P5 and P6 versions in five sizes, and the classifier version
- get_coco.sh # Download coco dataset
- get_coco128.sh # Download coco128 (only 128)
- Argoverse.yaml # Each .yaml file that follows corresponds to data in one of the standard dataset formats
- coco.yaml # COCO dataset profiles
- coco128.yaml # COCO128 dataset profile
- voc.yaml # VOC dataset profiles
1.4 models folder
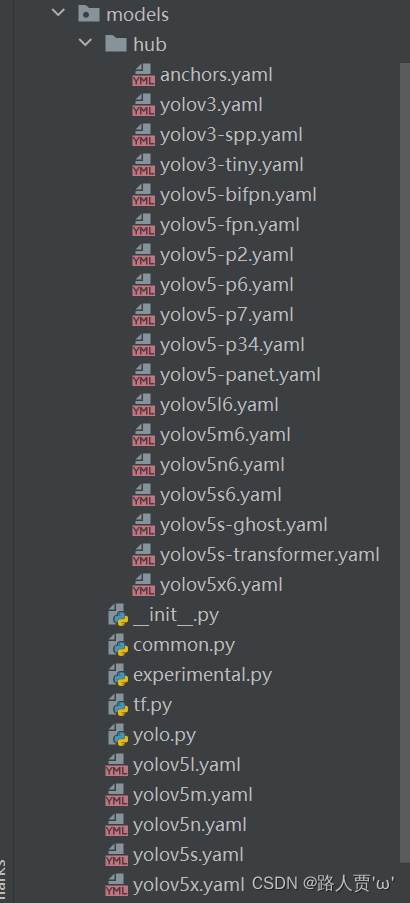
- hub # Store yolov5 target detection network model configuration files for all versions of yolov5.
- anchors.yaml # Default anchors for COCO data
- yolov3-spp.yaml # yolov3 with spp
- yolov3-tiny.yaml # lite yolov3
- yolov3.yaml # yolov3
- yolov5-bifpn.yaml # yolov5l with binary fpn
- yolov5-fpn.yaml # yolov5 with fpn
- yolov5-p2.yaml # (P2, P3, P4, P5) are all output with the same width and depth as the large version, which corresponds to the ability to detect smaller objects than the large version.
- yolov5-p34.yaml # Outputs only (P3, P4) with the same width and depth as the small version, which corresponds to a more focused detection of small and medium-sized objects than the small version
- yolov5-p6.yaml # (P3, P4, P5, P6) are all output with the same width and depth as the large version, which corresponds to the ability to detect larger objects than the large version.
- yolov5-p7.yaml # (P3, P4, P5, P6, P7) are all output with the same width and depth as the large version, which equates to detecting larger objects than the large version.
- yolov5-panet.yaml # yolov5l with PANet #
- yolov5n6.yaml # (P3, P4, P5, P6) are all output, width and depth are the same as the nano version, which is equivalent to detecting larger objects than the nano version, anchor is predefined
- yolov5s6.yaml # (P3, P4, P5, P6) are all output, width and depth are the same as the small version, which is equivalent to detecting larger objects than the small version, anchor is predefined
- yolov5m6.yaml # (P3, P4, P5, P6) are all output, width and depth are the same as the middle version, which is equivalent to detecting larger objects than the middle version, anchor is predefined
- yolov5l6.yaml # (P3, P4, P5, P6) are output, the width and depth are the same as the large version, which is equivalent to detecting larger objects than the large version, the anchor has been predefined, presumably a product of the author’s experiments
- yolov5x6.yaml # (P3, P4, P5, P6) are all output, width and depth are the same as the Xlarge version, which is equivalent to being able to detect larger objects than the Xlarge version, anchor is predefined
- yolov5s-ghost.yaml # backbone’s convolution replaced with yolov5s in GhostNet form, anchor predefined
- yolov5s-transformer.yaml # backbone final C3 convolution added Transformer module for yolov5s, anchor predefined
- _int_.py # Empty
- common.py # Put some of the network structure of the definition of the general module, including autopad, Conv, DWConv, TransformerLayer and so on
- experimental.py # Code of an experimental nature, including MixConv2d, cross-layer weights Sum, etc.
- tf.py # tensorflow version of yolov5 code
- yolo.py # yolo specific modules, including BaseModel, DetectionModel, ClassificationModel, parse_model, etc.
- yolov5l.yaml # yolov5l network model profile, large version, depth 1.0, width 1.0
- yolov5m.yaml # yolov5m network model profile, middle version, depth 0.67, width 0.75
- yolov5n.yaml # yolov5n network model profile, nano version, depth 0.33, width 0.25
- yolov5s.yaml # yolov5s network model profile, small version, depth 0.33, width 0.50
- yolov5x.yaml # yolov5x network model profile, Xlarge version, depth 1.33, width 1.25
1.5 runs folder
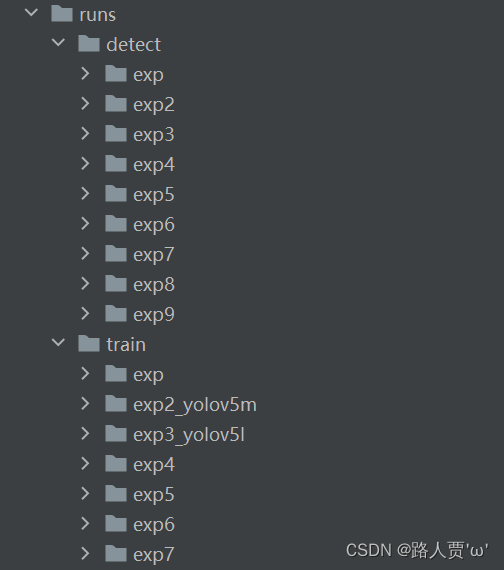
- detect # Test the model, output the image and label the image with objects and probabilities
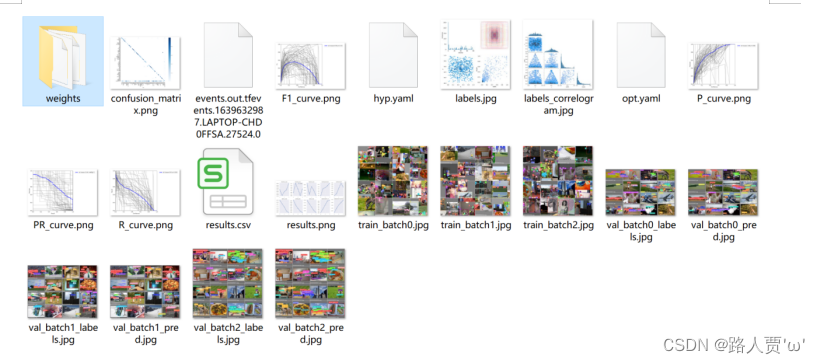
- train # Train the model, output content, model (best, latest) weights, confusion matrix, F1 curves, hyperparameter files, P curves, R curves, PR curves, result files (loss values, P, R), and so onexpn
- expn# nth experimental data
- confusion_matrix.png # Confusion matrix
- P_curve.png # Accuracy vs. confidence plot line
- R_curve.png # Plot line of accuracy vs. confidence level
- PR_curve.png # Plot lines of precision vs. recall
- F1_curve.png # Relationship between F1 scores and confidence (x-axis)
- labels_correlogram.jpg # Predicted tag aspect and position distribution
- results.png # Various loss and metrics (p, r, mAP, etc., see utils/metrics for details) curves
- results.csv # Raw result data corresponding to the png above
- hyp.yaml # Hyperparameter log files
- opt.yaml # Model option log files
- train_batchx.jpg # Training set image x (labeled)
- val_batchx_labels.jpg # Validation set image x (with labeling)
- val_batchx_pred.jpg # Validation set image x (with predictive labeling)
- weights # Weights
- best.pt # Best historical weights
- last.pt # Weight of last test point
- labels.jpg # 4 graphs, 4 graphs, (1, 1) denotes the amount of data in each category
1.6 utils folder
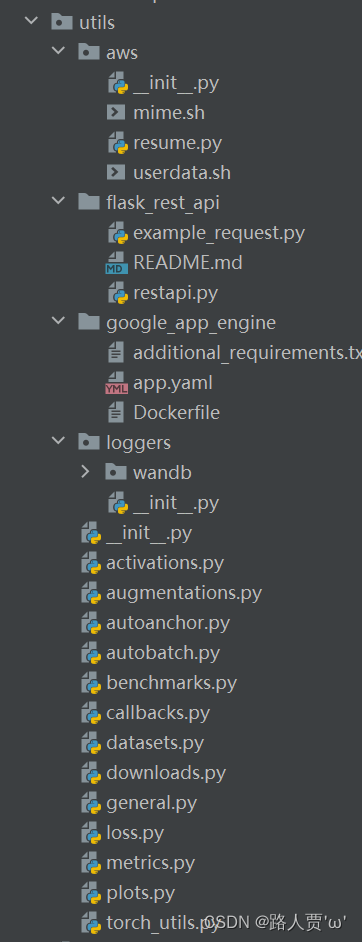
- aws # Resume interrupted training, and aws platform usage related tools
- flask_rest_api # flask-related tools
- google_app_engine # Tools related to Google App Engine
- loggers # Log Printing
- _init_.py # notebook initialization, checking system software and hardware
- activations.py # Activation function
- augmentations # Store various image enhancement techniques
- autoanchor.py # Auto-generated anchor frames
- autobatch.py # Automatic generation of batch sizes
- benchmarks.py # Perform performance evaluation of the model (in terms of inference speed and memory footprint))
- callbacks.py # Callback functions, mainly for loggers
- datasets # dateset and dateloader definition code
- downloads.py # Google Cloud Drive Content Download
- general.py # Project-wide generic code, related utility function implementation
- loss.py # Store the various loss functions
- metrics.py # Model validation metrics, including ap, confusion matrix, etc.
- plots.py # Plotting related functions such as plotting loss, ac curves, and also storing a bbox as an image separately
- torch_utils.py # Auxiliary Functions
1.7 Other first-level catalog documents
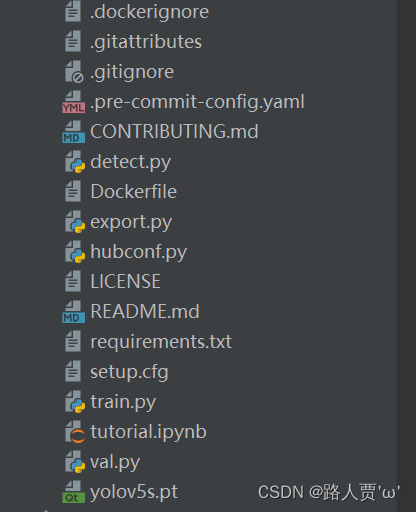
- .dockerignore # docker’s ignore file
- .gitattributes # To be used for the purpose of transferring .ipynbSuffixed files cull GitHub language statistics
- .gitignore # docker’s ignore file
- CONTRIBUTING.md # markdown formatting instructions document
- detect.py # Target detection prediction scripts
- export.py # Model export
- hubconf.py # pytorch hub related
- LICENSE # Certificates
- README.md # markdown formatting instructions document
- requirements.txt # The dependencies can be downloaded via the pip install requirement
- setup.cfg # Project package files
- train.py # Target detection training scripts
- tutorial.ipynb # Target Detection Hands-On Tutorial
- val.py # Target detection validation scripts
- yolov5s.pt # coco dataset model pre-training weights that are automatically downloaded from the web when running code

