1. Preface
The initial page results of the blog can be seen on my blog:Leo, welcome to support the visit.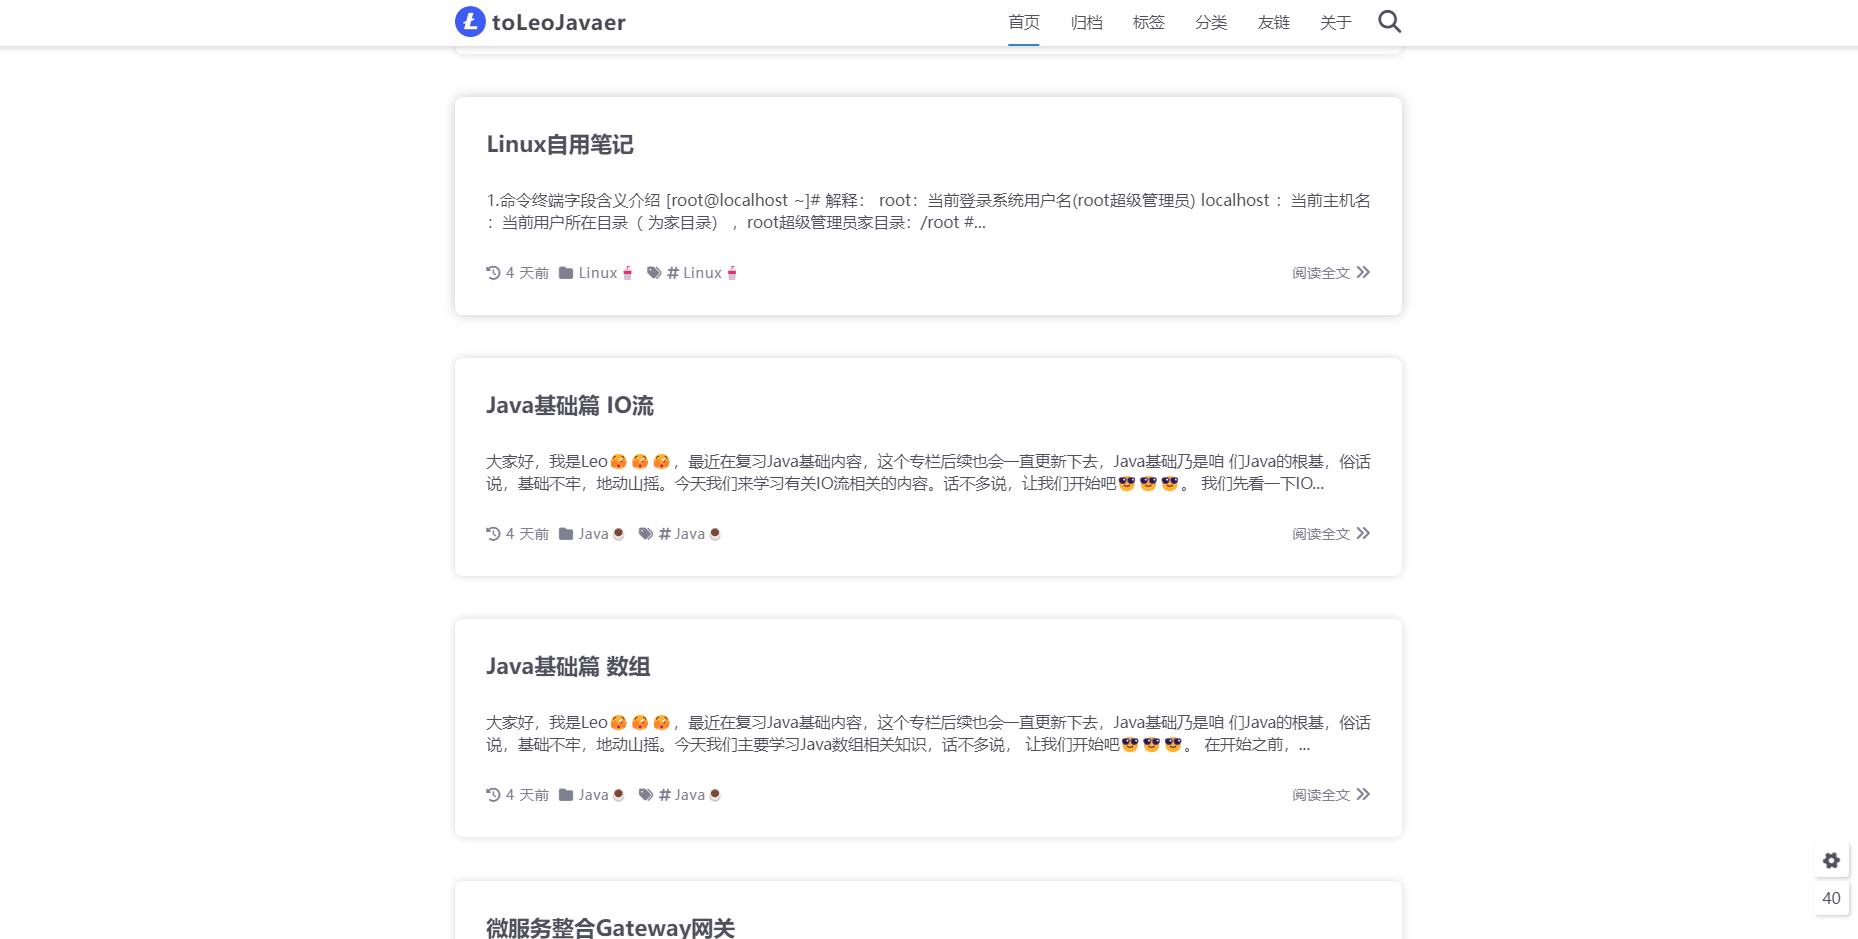 This blog is based onHexo, so first of all, it’s important to understand the framework we’ll be using to build our blog.Hexois an efficient static website generation framework based on theNode.jsFast, simple and powerful, it’s the framework of choice for building a blog. Everyone can enterhexoThe official website for a detailed view asHexoThe creator of the program is Taiwanese, and the support for Chinese is friendly, so you can select Chinese for viewing. ByHexoYou can directly use theMarkdownSyntax to write blogs. I’m sure many of my buddies who write projects have writtenREADME.md file, right? Yes, that’s the format! After writing it, it only takes two or three commands to upload the generated web page to thegithuborcodingYou can manage the code on your hosting platform, and then others can browse your blog page. Isn’t it very simple? You don’t need to care about the specific details of generating the source code of the web page, you just need to write the content of your blog posts with all your heart.
The tutorial is roughly divided into three parts,
- Part I:HexoThere is also the primary build of the deployment to theGithub pageup, as well as personal domain name bindings.
- Part II:Hexobasic configuration, changing themes, enabling multi-terminal work, and in thecoding page Deployment enables domestic and international triage
- Part Three:HexoAdd a variety of features, including a searchableSEOThe system includes readership statistics, visit statistics, and commenting system, etc., and is available abroad.netlifyTo be hosted.
2.Hexo build
2.1 Installing nodejs
Hexois based onnode.jswritten, so it’s necessary to install thenode.jsinnernpmTools. windows:Download either the stable version or the latest versionNode.jsIf you want to install a new version of the program, click on the “Installation Options” button all the way through.Next。 After the final installation, press Win+R to open a command prompt and type innode -vandnpm -vIf the version number appears, then the installation was successful. It is recommended to go directly tonodejs official websiteGo to download as follows.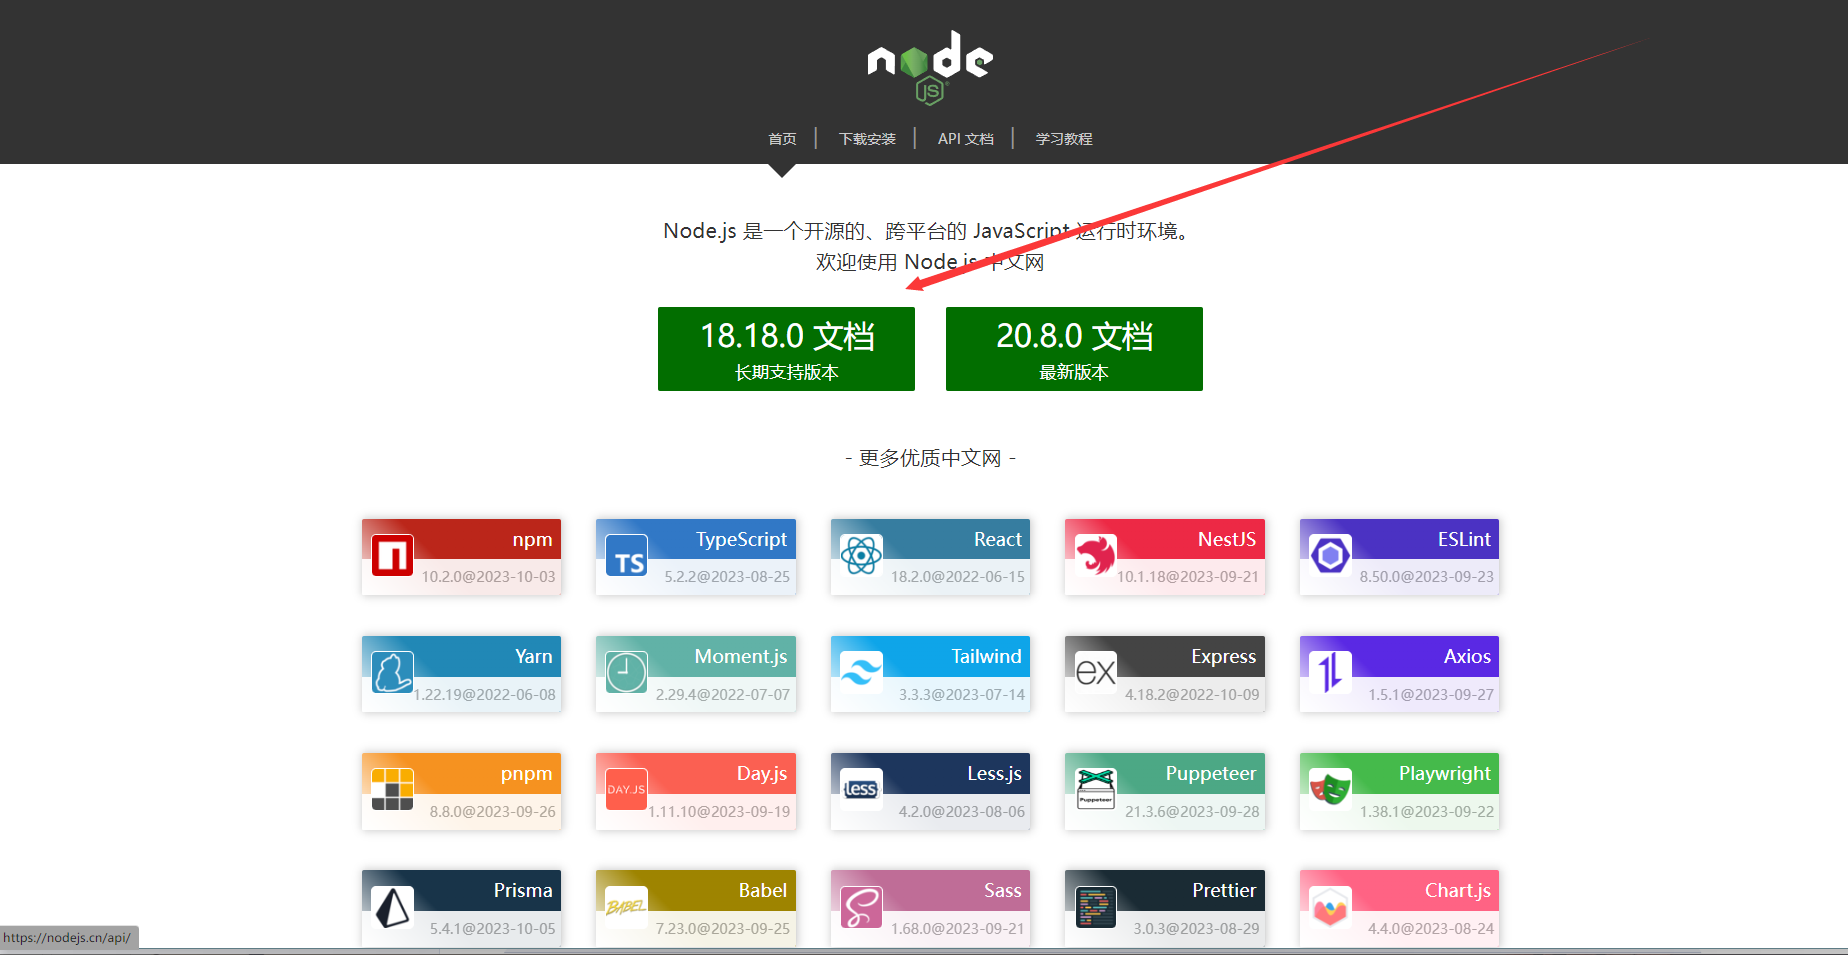 Then unzip it to the folder you specify, for example, I unzipped it to my system’s D:\software\nodejs directory, as shown in the following figure.
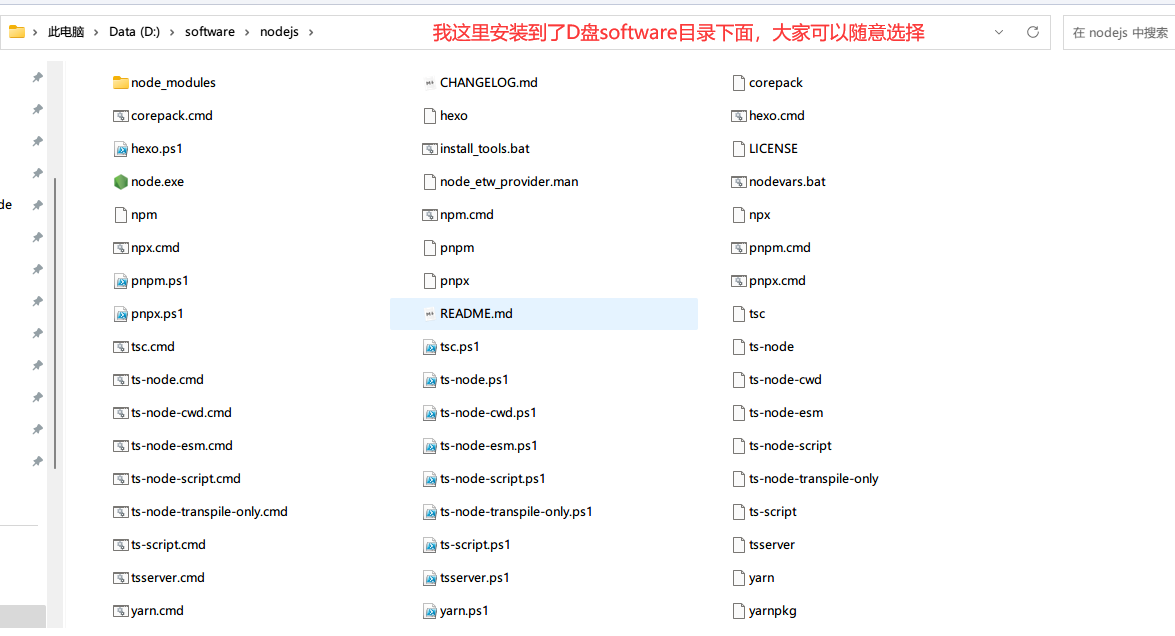 This way we can use, under all users, thenpmYou can also use thenpmcommand for the installed package. Successfully placing thenodejsInstall and configure to the global environment.
After installation, open a command line terminal and type.
node -v
npm -v The installation is successful if you see the version number above!
2.2 Adding Domestic Mirror Sources
If you don’t have a ladder, you can use Ali’s domestic mirrors for acceleration.npm config set registry https://registry.npm.taobao.org2.3 Installing Hexo
aheadgitandnodejsOnce installed, you can install theHexoNow, you can start by creating a folder Hexo** (name is optional here)If you want to store your blog files, then cd to this folder (or right-click on it).(git bash** opens). For example, my blog files are stored in the D:\Hexo directory. Right-click in the directoryGit Bash HereOpen.Gitconsole window, all our future operations will be performed in theGitconsole to do so, there would be no need toWindowsSelf-contained cmd too. Locate the directory and enter the following command to install itHexo. There may be a couple errors reported, just ignore it.npm install -g hexo-clihexo -v See the above, so Hexo is installed.
Next, initialize it.Hexo, i.e. initialize our site, go to our theme root directoryHexoInputhexo initInitialize Folders
hexo init
hexo g
hexo server (or abbreviation: hexo s)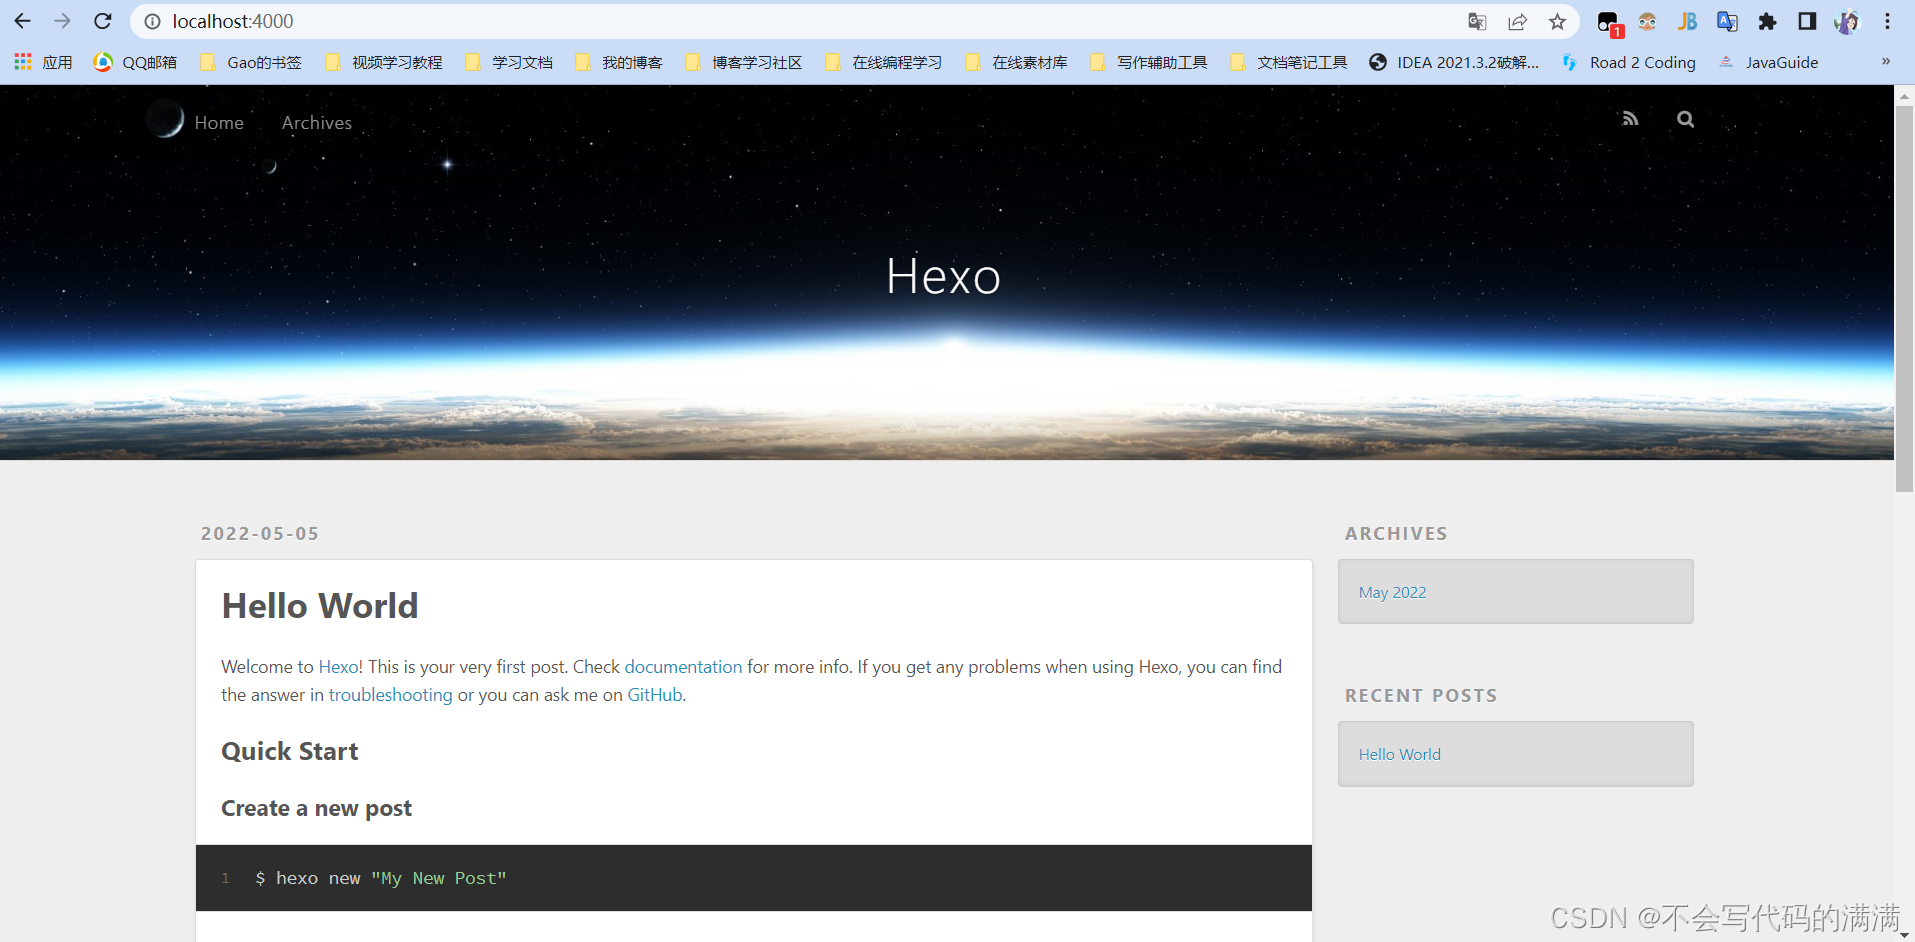 Press ctrl+c to close the local server.
2.4 Registering for a Github account to create a personal repository
Next go ahead and sign up for agithubAn account to host our website. Most of you guys should have one by now, being a competent programmer (Hope) still requires one. Open https://github.com/ and create a new project repositoryNew repository, as shown below:
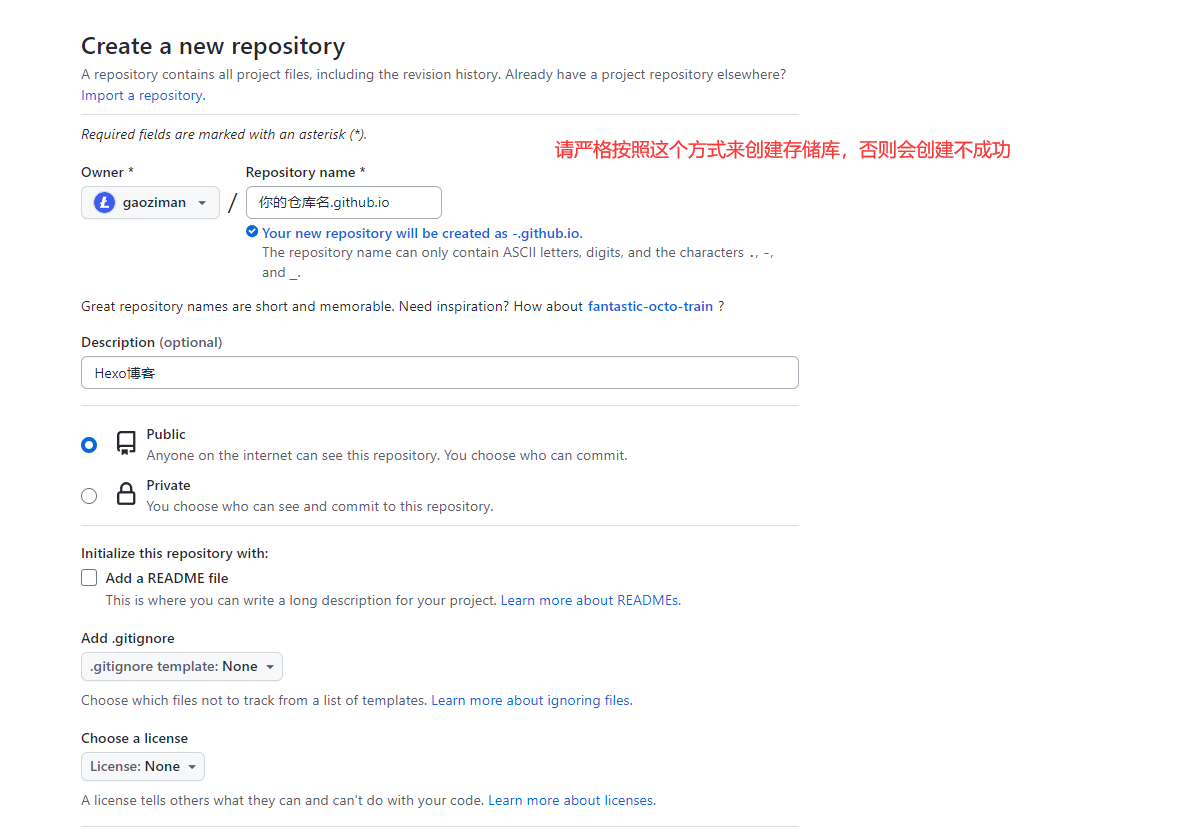 To create a repository with the same username as yours, followed by http://github.io, only then will it be recognized when you want to deploy to a GitHub page in the future, the
That’s http://xxxx.github.io, where xxx is the username you signed up with for GitHub. For example, mine:http://gaoziman.github.io
2.5 Generating SSH to add to GitHub
Generate SSH to add toGitHublinkGithubWith local. Right click to opengit bash, and then enter the following command:git config --global user.name "yourname"
git config --global user.email "youremail"yournameEnter yourGitHubusername.youremailEnter yourGitHubof the mailbox. This wayGitHubIt’s the only way to know if you’re the account that corresponds to it. For example, mine:
git config --global user.name "gaiolan"
git config --global user.email "[email protected]"git config user.name
git config user.emailssh-keygen -t rsa -C "youremail"cat ~/.ssh/id_rsa.pubsettingsClick again on theSSH and GPG keys, create a newSSH, name it whatever you want, put yourid_rsa.pubCopy in the information inside. As shown:
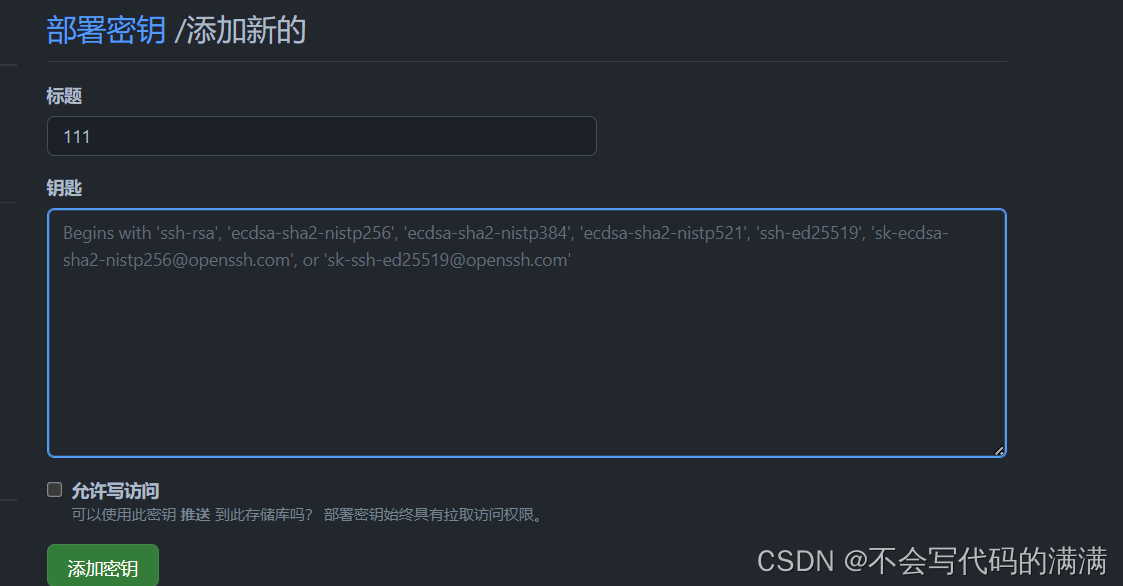 ingit bashEnter the following command.
ssh -T [email protected]
2.6 Deploying Hexo to GitHub
This step allows us to set theHexoandGitHubassociated with it, that is, deploy the hexo-generated post to GitHub, open the blog root directory of the_config.ymlfile, which is the configuration file for the blog, where you can modify various information related to the configuration of the blog. Modify the configuration on the last line:deploy:
type: git
repository: https://github.com/gaoziman/gaoziman.github.io.git
branch: masternpm install hexo-deployer-git --savehexo clean
hexo generate
hexo deploy
Note that you may be asked to enterusernamerespond in singingpassword。
2.7 Setting up a personal domain name
Now the address of your personal website is yourname.github.io, if you feel that this URL is not quite compelling enough, this will require you to set up a personal domain name. But it costs money.However, this step is not necessary, if you do not want to buy a domain name can be skipped first, continue to look at the back, and later want to buy a domain name in the also look at this piece!First you have to buy an exclusive domain name that
xxCloud are available, depending on your personal preference.
This one is based on the example of AliCloud, which is available for purchase on the official AliCloud website:
 Then after real-name authentication into the AliCloud console, point cloud resolution in, find the domain name you just bought, point in to add two resolution records, as shown in the following figure:
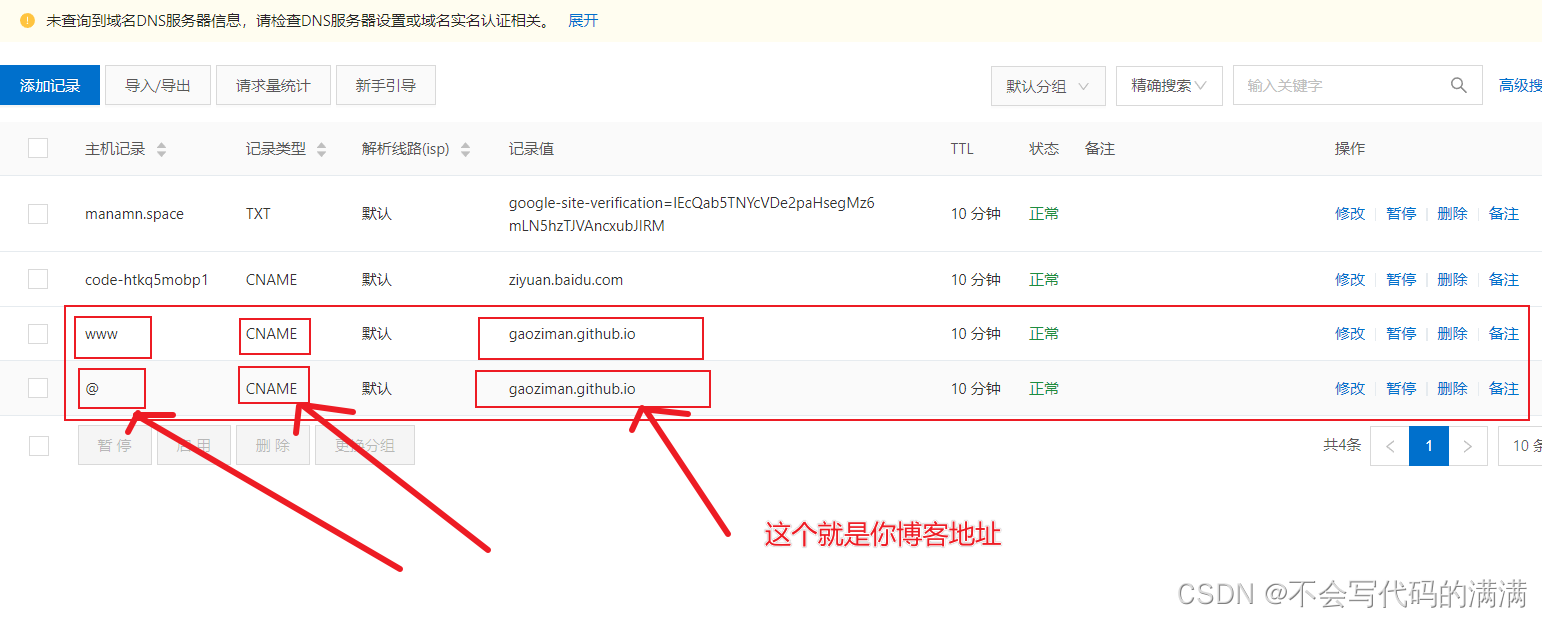 Then open yourgithubFor blog items, click onsettingsPull it down.Custom domainAt that point, fill in your own domain name and save it:
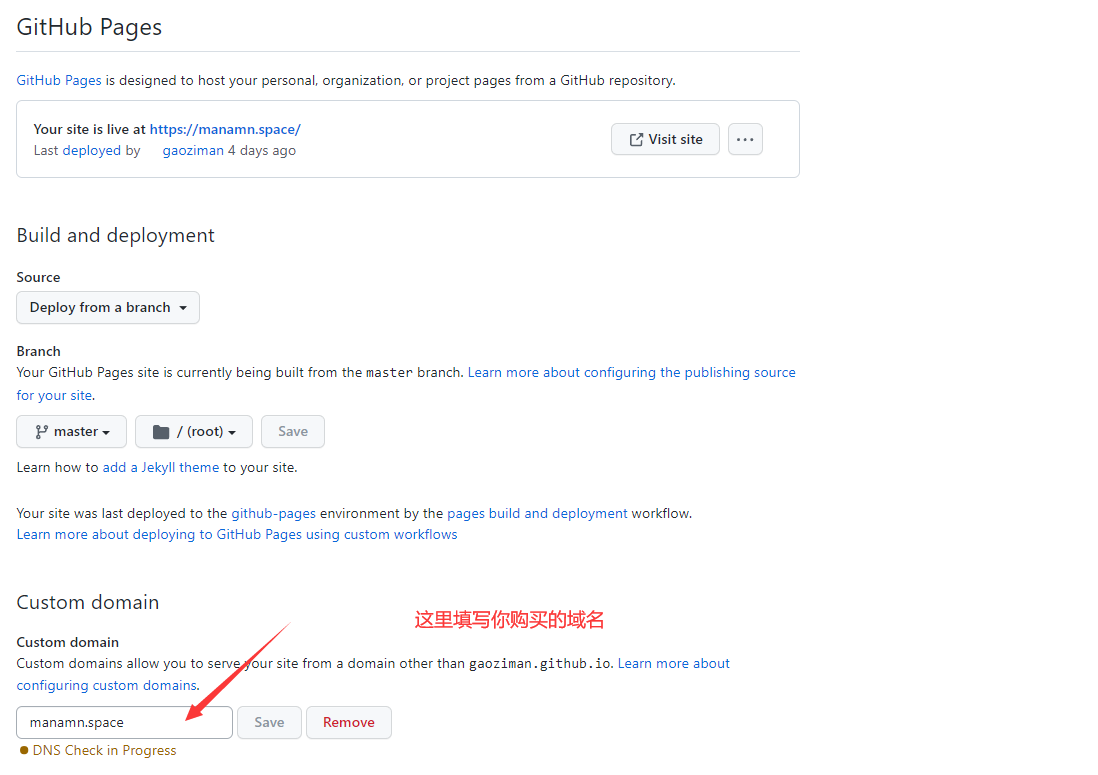 At this point your project root directory should have a file namedCNAMEfile is up. If not, open your local blog **/sourceCatalog, mine isD:\Hexo\source**, NewCNAMEfile, note that there is no suffix. Then write your domain name in it and save it. Finally run thehexo g、hexo duploadGithub。
Before long, open your browser again, enter your own exclusive domain name, you can see the built website!
2.8 Writing and publishing articles
First, right-click in the blog’s root directory and opengit bash, then type hexo new post “my first blog” to create a new post. Then openD:\Hexo\source_postsYou can find a folder and a .md file underneath the directory, one is for storing your images and other data, and the other is your article file. You can write directly in webstrom or VSCode.markdownfile, which can be previewed in real time, or written with tools that use other software for writing md files —->Here is highly recommended!typora。 After writing the markdown file, generate a static web page by typing hexo g in the root directory, and then typehexo sYou can preview the effect locally, and finally typehexo duploadGithubUp. At this point open yourgithub.ioYou can see the published articles on the homepage. Here the first part of the basic is complete, has built a relatively simple personal blog, the next we can personalize our blog.3. Application of the theme
If we want to customize our blog, we first need to come to know about theHexoThe role of some directories and files of the blog, and how to smoothly replace the beautiful theme template and add their own custom source code to achieve personalization
3.1 Hexo related directory files
1.1 Introduction to Blog Directory Composition
The directory structure of our blog is as follows:
- node_modules
- public
- scaffolds
- source
    - _posts
- themes- _config.yml: The site configuration file, where much of the global configuration is located.
- package.json: Application data. From it you can see hexo version information and some components it defaults or depends on.
- scaffolds: template file. When you create a new article, hexo creates it based on the template file, mainly used in cases where you want to add some common content to each article.
- scripts: the folder for scripts, where the js files are.
- source: This folder is the place to put the article, in addition to the article there are some major resources, such as articles in the picture, files and so on. This folder is best to do a regular backup, lost it, the whole site will be ruined.
- themes: Themes folder.
1.2 Hexo Basic Arrangement
The _config.yml in the root directory of the file is the configuration file for the entire Hexo framework. You can modify most of the configurations in it. For details, please refer to the officialConfiguration Description。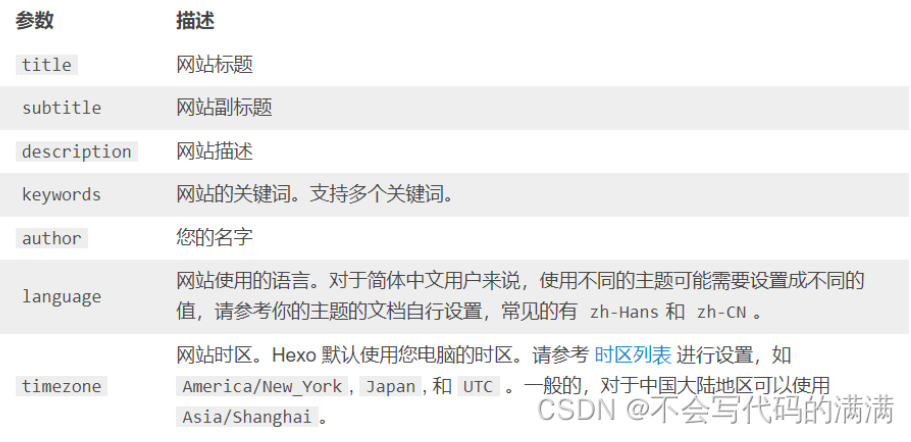
1. Website
Parameter DescriptiontitleSite TitlesubtitleWebsite subtitledescriptionWebsite descriptionauthorYour NamelanguageThe language used on the site timezone the time zone of the site.Hexo Defaults to the time zone of your computer. A list of time zones. For example:America/New_York, Japan, respond in singingUTC 。 Among them.descriptionmainly used forSEOInstead, tell the search engines a brief description of your site, which is usually recommended to include your site’s keywords.authorparameter is used for the theme to display the author of the article.2. Web site
Parameters description url url root web root directorypermalinkwritingPermanent linkFormat permalink_defaults Defaults for sections in permanent links Here you need to change the url to yourWebsite Domain Name。 permalink, which is the same link format you use when generating a particular post. For example, if I create a new article called temp.md, then the address he automatically generates at this time is http://yoursite.com/2022/05/08/temp. The following is the official example, there are many more variables about the link, if you need to go to the official website to findPermanent link 。Parameter Result month/ title/2023/10/10/hello-world month-title.html 2019-08-10-hello-world.html :category/:titlefoo/bar/hello-worldScroll down further and these in the middle are just fine by default. My site configuration is given below
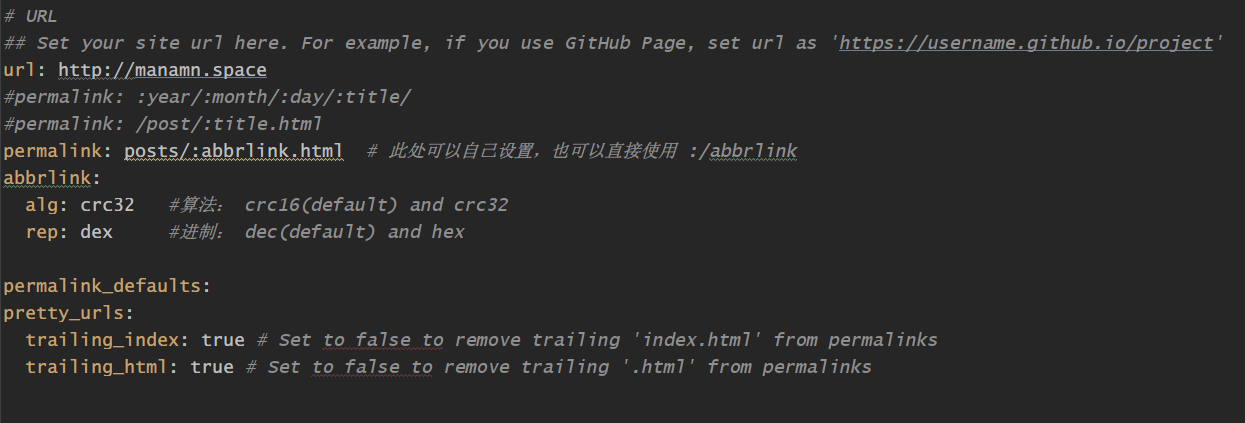
theme: landscap3. Front-matter
Front-matter is the **-** delimited area at the top of the md file used to specify variables for individual files, for example:title: Hexo+Github blog setup record
date: 2023-10-13 15:15:443.2 Change of subject
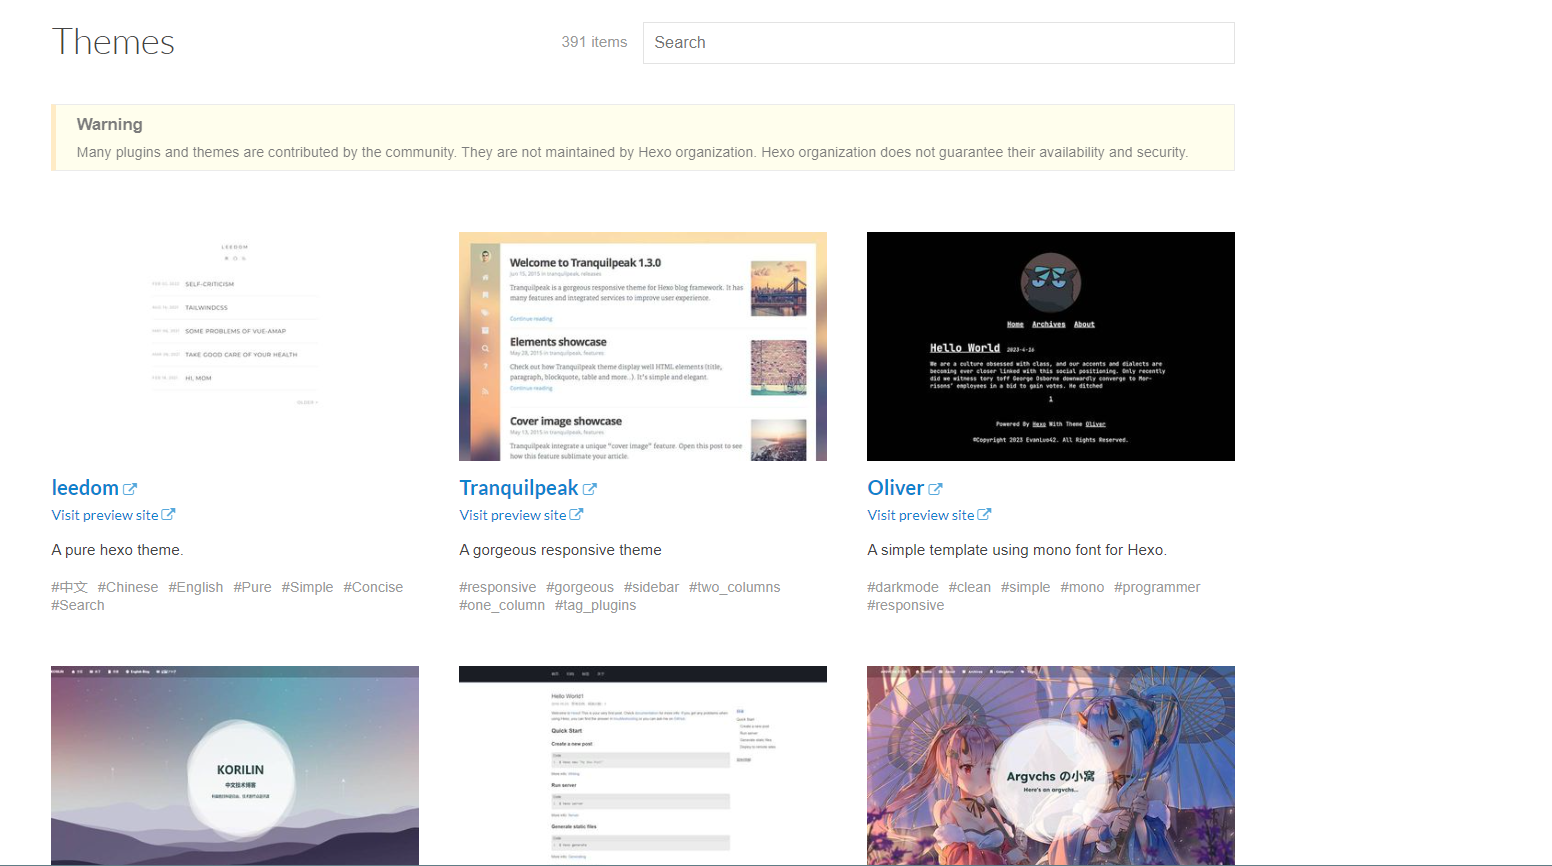 Hexo official for us to provide a lot of developers big brother to provide a lot of beautiful theme for you to change, we look at the choice of a favorite can be.
Official website: https://hexo.io/themes/
I chose a relatively minimalist theme here, the name is keep, we like it can also come to try.
Here is attached his Github address: https://github.com/XPoet/hexo-theme-keep
- Simple and beautiful, the articles are beautiful and easy to read
- Responsive design, the blog is well presented on desktop, tablet, mobile and other devices
- fig. beginning
Bannerphotograph - Timeline-style archive page
- word cloudtabs and category pages of the
- Rich About Me page
- Links page with customizable data
- Support for article topping
- be in favor of
MathJax - lovelyTOCcatalogs
- You can set up additional copyright information when copying article content
- Twikoo、Valine respond in singingDisqus Comments module (recommended)Twikoo )
- integratedUngarlic statisticsGoogle Analytics (Google Analytics) and article word count statistics and other features
- Supports music playback and video playback on the homepage

4.Optimize function
utilizationNetlify The inheritance of deployment can be in its server in accordance with the commands you set, automatically for the deployment of the site, that is to say, when you submit the source code directly to github, netlify will automatically deploy your site. github used to save the source code of the blog , and thenetlifyStatic sites are stored. You can use your github account to log in directly, which makes it easier to associate repositories.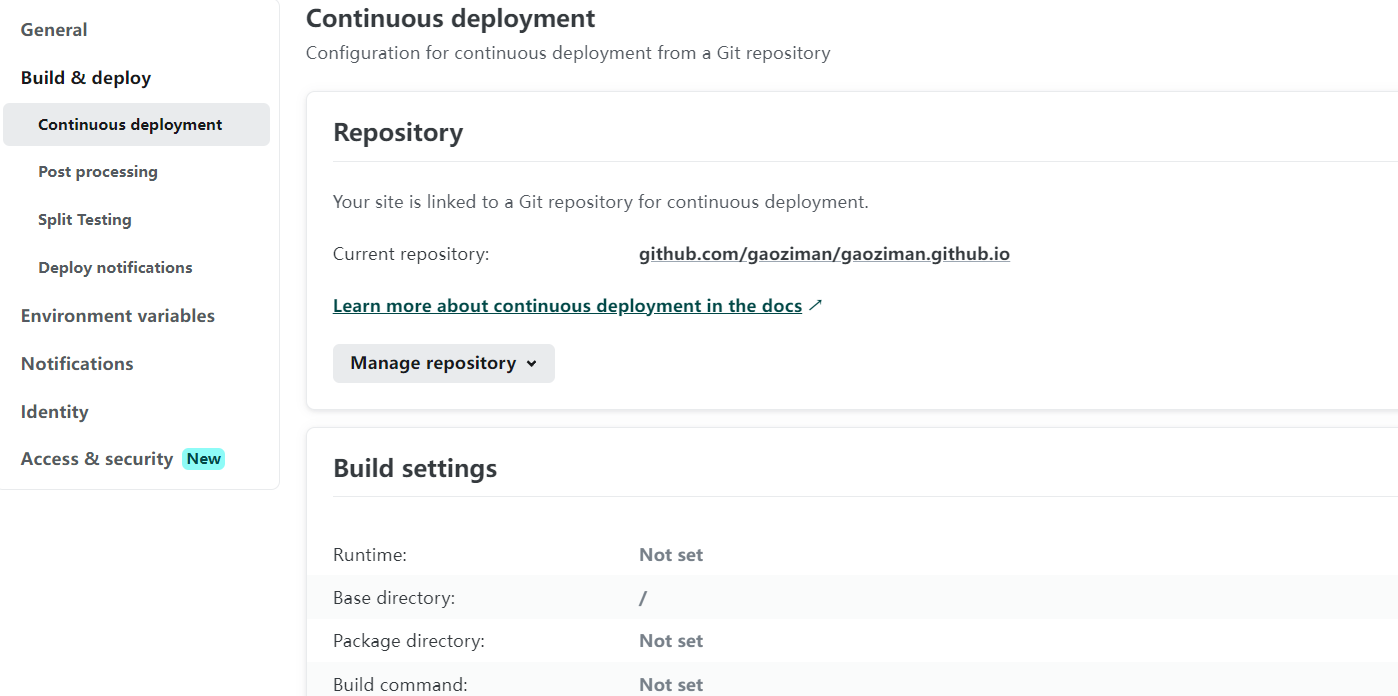 placement preferenceHexodeployment command and set the publish directory. As shown in the figure.
The deployment commands are the same as for local deployment
hexo generate
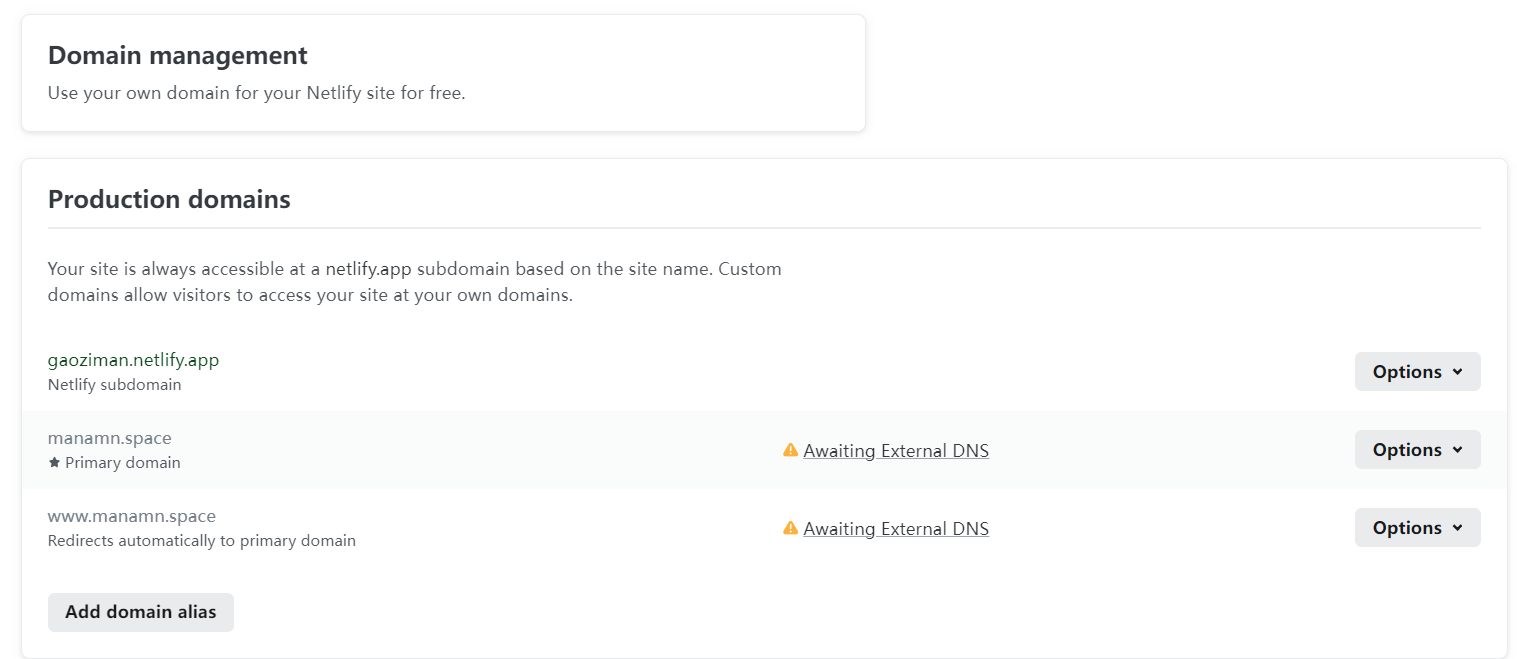 Configure your domain name.netlify Default give you a secondary domain name, you can modify it, you can also bind their own existing domain name. At the same time you can also use the free ssl certificate, open Https.
By this point the configuration is almost complete. At this point, your website can be accessed using the domain name it is assigned or the domain name you are bound to. You can also make other changes according to your own needs.
When you’re done writing the document, put theHexoDirectories are submitted directly to theGitIn the warehouse.netlifywill deploy the site automatically, and you can find it in thenelifyCheck your deployment logs. This way yourGitThe repository is then only used to hold hexo’s source code, and the website is placed in thenetlifyUp.netlifyThere is also a cdn, but the speed is still not very good, the server is abroad and that’s about it. You can also use your owncdnservice to speed up access to the site.
final result
Let’s see the final result
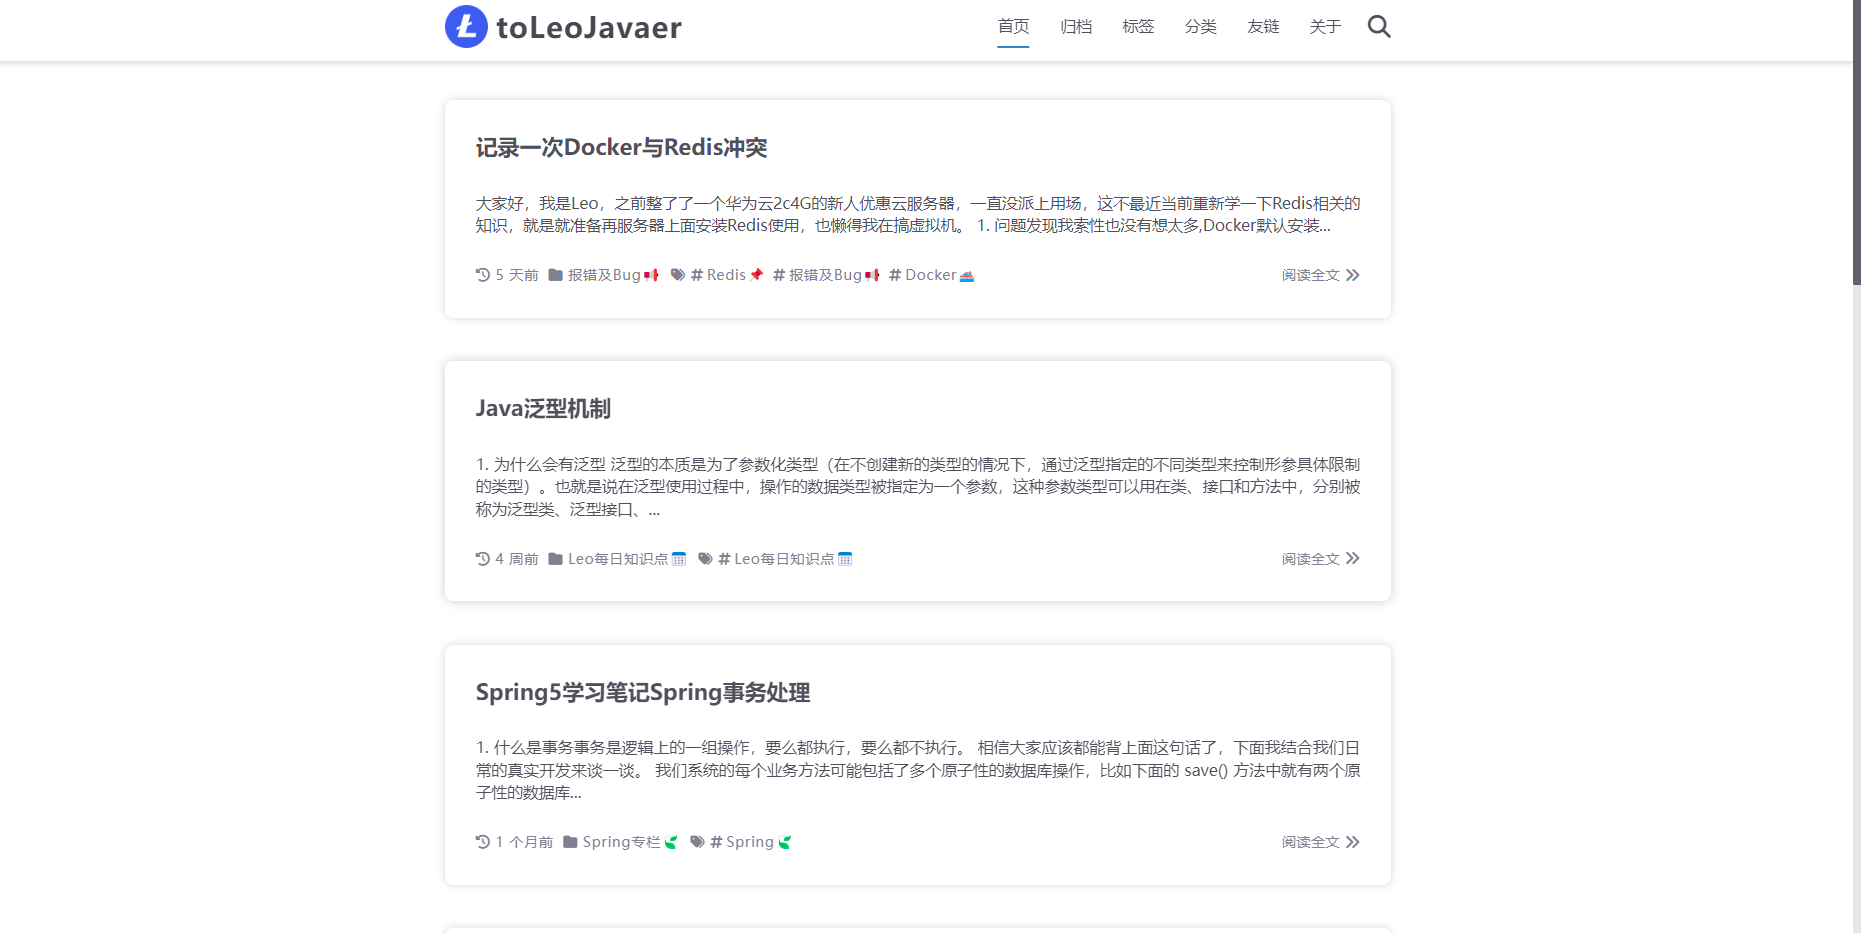 Don’t hesitate to build it if you are interested!
