Also learn ros this thing for a long time, but in the ROS reinforcement learning and ultimately deployed to the real car this process has been all kinds of problems, the laboratory is not much relevant accumulation, their own one person to engage in a very painful. This time when I read the paper, I saw the source code published by others, so I went to learn how others do this process, which is really beneficial.
Eventually, the whole process from virtual training to real vehicle deployment can be realized!
Now the whole process is summarized, the back of the key parts of the description are in the notes inside, I hope that the lab after the schoolmates can easily do the experiments with a long hair article, but also hope to help all of you just contact the ROS students ~!
(Also, I don’t know why there are some strange formatting problems with the directly uploaded md file, but I’m too lazy to change it everywhere, so just bear with me)
But to be honest, after reproducing many algorithms, none of the algorithms deployed in a real car works as well as those trained in a virtual simulation environment (even though it is claimed in the paper that it can be used directly). In this case, when deployed on a real car, the algorithm always stumbles and stumbles. If anyone has actually used any algorithms that work well in real cars, please tell us about them in the comments section or in a private message!
I. Running an Example
1. Prerequisite preparation
(1) Download code
UsedGoal-Driven Autonomous Exploration Through Deep Reinforcement Learning This paper serves as an example, and the process above can give us a good demonstration of its github URL:
https://github.com/reiniscimurs/DRL-robot-navigation
Extracting it, we can get the following file structure:
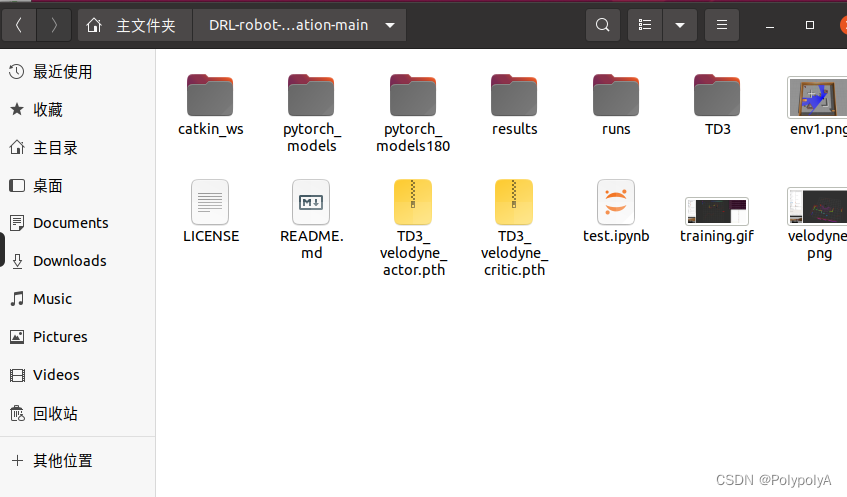
Where **catkin_ws ** is the ROS workspace, which contains the gazebo simulation environment, the p3dx cart model, the velody lidar model, and so on. But its main task is to open a simulation environment
TD3 contains the algorithms described in the article, and its internal structure is as follows:
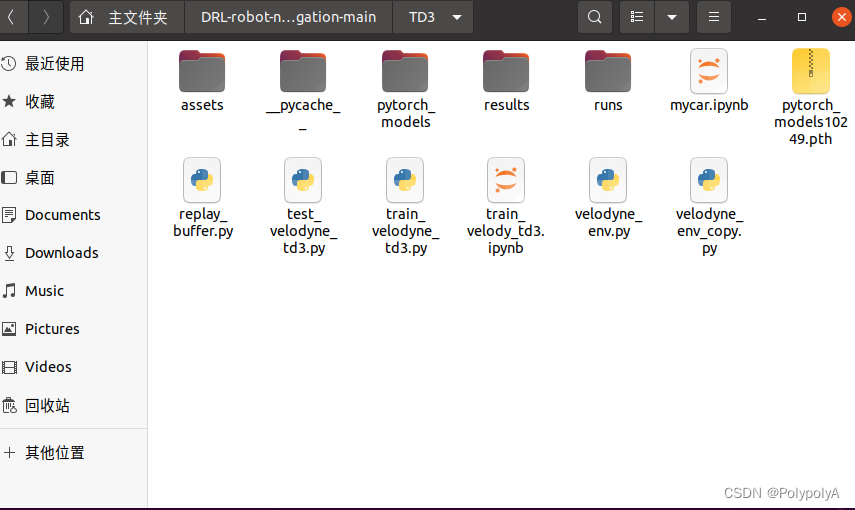
velodyne_env It is the code that sends subscription data, processes the data, gets the status, calculates rewards, etc. It is equivalent to the environment part of gym
train_velodyne_td3 is the training code, which includes the network structure as well as the training part.
(2) python environment
We need to install Anaconda in the Ubuntu environment, create a virtual environment, install libraries such as pytorch and so on, this part must be since you have already begun to do ROS have experience, will not repeat.
(3) ROS environment
With ROS of course you need to install the ROS environment! I’m using Ubuntu 20.04 + ROS1 noetic version.
2. Conduct simulation training
(1) Compilation of workspace
go intocatkin_wsInside the workspace, open a terminal
cd ~/DRL-robot-navigation-main/catkin_ws
catkin_make
During the compilation process, there may be a variety of missing libraries, you can read the error message and then install the
sudo apt install ros-noetic-$Your missing library $(2) Run the training file
Go to the TD3 folder, open the terminal, cd to the path, python run, here you will find that there may still be a lot of libraries missing, here we use pip install installation
python train_velodyne_td3.py
According to its github above, this would allow for training. But in practice, I found that I couldn’t open gazebo this way, and I got all sorts of strange errors, so I made the following changes to it
(3) Changes
① Manually create the launch file
cd ./DRL-robot-navigation-main/catkin_ws/src/multi_robot_scenario/launchWe can see the file here, TD3.world, which is the simulation environment file for its gazebo, we can create a new launch file to open this .world file
Create a new launch file named TD3_world.launch
Enter the following into it
<launch>
    <include file="$(find gazebo_ros)/launch/empty_world.launch">
        <arg name="world_name" value="$(find multi_robot_scenario)/launch/TD3.world"/>
        <arg name="paused" value="false"/>
        <arg name="use_sim_time" value="true"/>
        <arg name="gui" value="true"/>
        <arg name="headless" value="false"/>
        <arg name="debug" value="false"/>
      </include>
</launch>
②Open the environment
Open a new terminal
cd DRL-robot-navigation-main/catkin_ws/
catkin_make
source devel/setup.sh
roslaunch multi_robot_scenario TD3_world.launch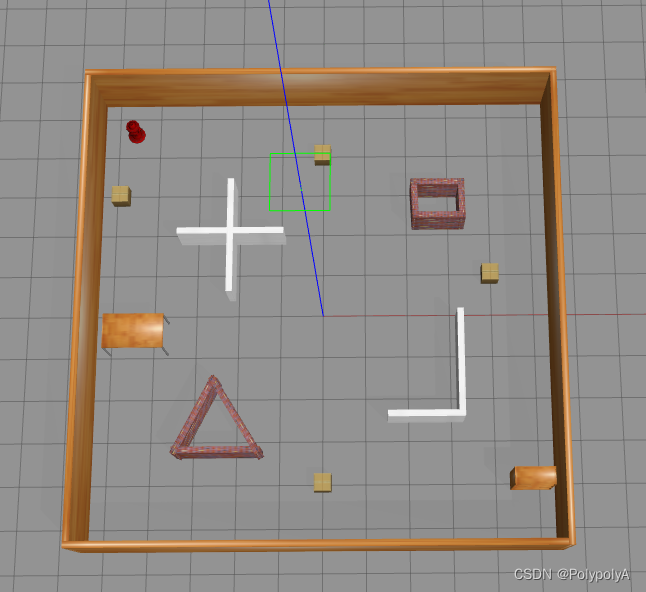
Then we will be able to open this simulation environment, but we find that there is no robot model that we need, so we also need to open the launch folder under the pioneer3dx.gazebo.launch file, then create a new terminal
cd DRL-robot-navigation-main/catkin_ws/
source devel/setup.sh
roslaunch multi_robot_scenario pioneer3dx.gazebo.launch
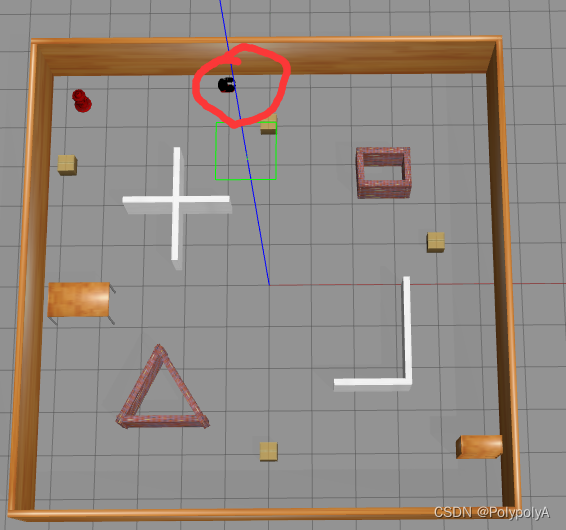
Then we can see the mobile robot within the simulation environment
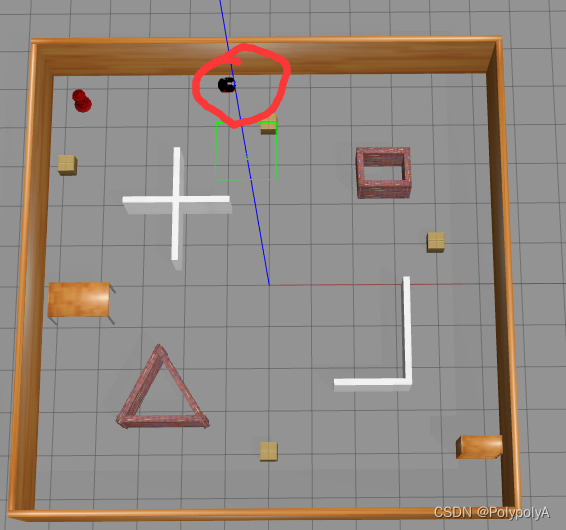
③ Modify the velody_env.py file
When we python run train_velody_td3.py next, we see that it still reports a bunch of messy errors.
We need to make changes to the following:
a: all the **”r1″ in the document.change into“p3dx”**
Includes lines 82, 116 and 130.

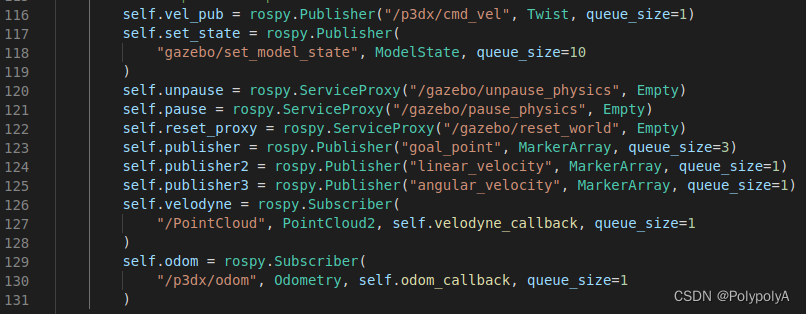
This is due to the fact that if we don’t change it, he will name the bot r1, but if we open it directly, the bot is p3dx, and of course it is possible to change his name r1 during the process of opening it, but for beginners it may be easier to understand by changing it directly.
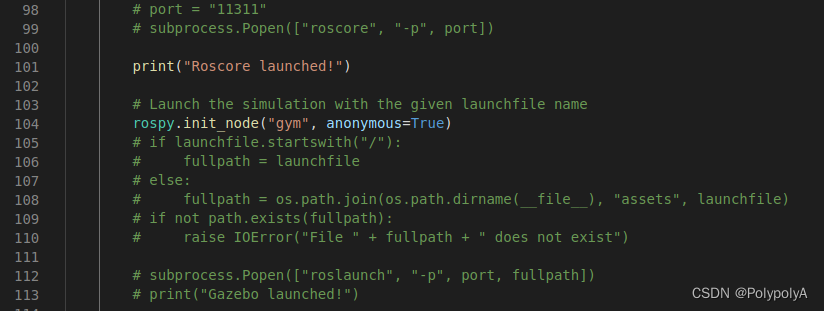
b: comment out the part of its file that opens the launch file
Mainly lines 98 – 113, but note that the initialization node on line 104 should not be commented out
(4) Starting training
The next step is to have fun training! I personally prefer to train directly in vscode
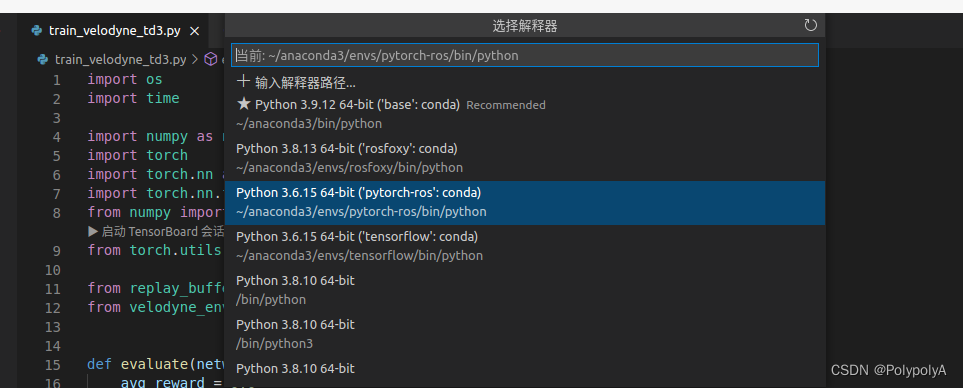
Here you need to select the appropriate environment
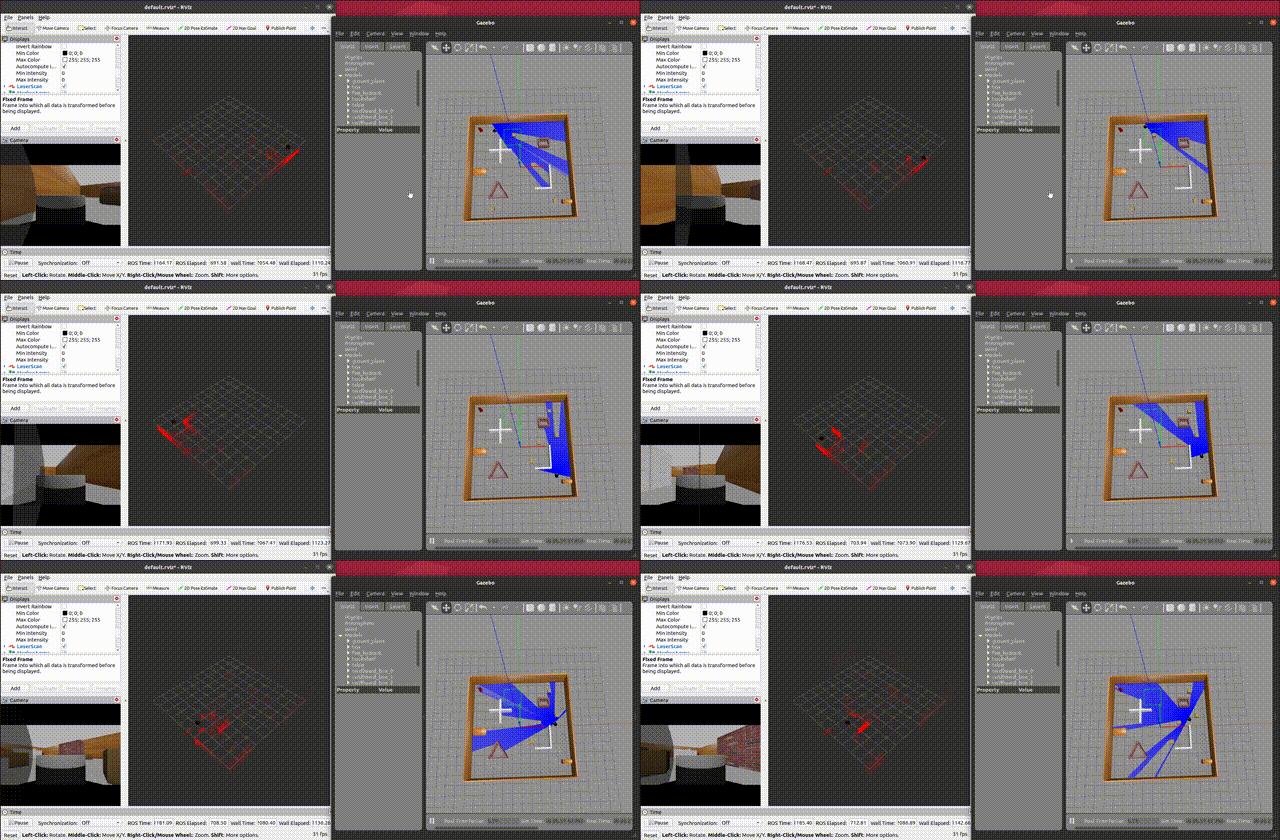
Then just run it, and we find that it runs!
II. Analysis of specific components
1, Gazebo simulation environment part
After running Gazebo according to the first major section, the rostopic list shows that the following topics currently exist in ROS
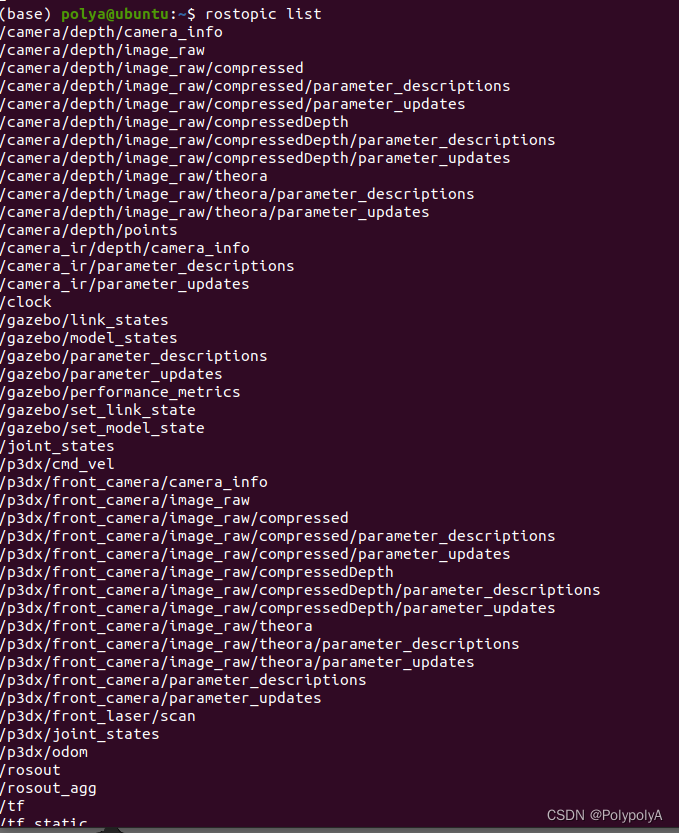
The gazebo simulation environment is shown in the following figure.
2. velody_env.py file
(1)init Critical section
rospy.init_node("gym", anonymous=True) # initializes the ros node

    #-------------------------- posting content ----------------------------
    self.vel_pub = rospy.Publisher("/p3dx/cmd_vel", Twist, queue_size=1) # used to publish control information for mobile robots
    self.set_state = rospy.Publisher(
        "gazebo/set_model_state", ModelState, queue_size=10) # Used to set the position, angle information of the mobile robot
    self.publisher = rospy.Publisher("goal_point", MarkerArray, queue_size=3) # Used to publish target points
    self.publisher2 = rospy.Publisher("linear_velocity", MarkerArray, queue_size=1) # Linear velocity has no practical role in the MarkerArraty algorithm
    self.publisher3 = rospy.Publisher("angular_velocity", MarkerArray, queue_size=1) # Angular velocity has no practical effect on the MarkerArray algorithm
    #-------------------------- services ----------------------------
    self.unpause = rospy.ServiceProxy("/gazebo/unpause_physics", Empty) # Resume emulation
    self.pause = rospy.ServiceProxy("/gazebo/pause_physics", Empty) # Pause the simulation
    self.reset_proxy = rospy.ServiceProxy("/gazebo/reset_world", Empty) # Reset the emulation environment
    # -- -- -- -- -- -- -- -- -- -- -- -- -- -- -- -- -- -- -- -- -- -- -- -- -- -- subscriptions -- -- -- -- -- -- -- -- -- -- -- -- -- -- -- -- -- -- -- -- -- -- -- -- -- -- -- --
    self.velodyne = rospy.Subscriber(
        "/velodyne_points", PointCloud2, self.velodyne_callback, queue_size=1) #subscribe to point clouds published by lidar
    self.odom = rospy.Subscriber(
"/p3dx/odom", Odometry, self.odom_callback, queue_size=1) # Subscribe to mileage information(2)step section
def step(self, action):
        target = False
        # Post the robot's actions, here the STEP input is action, action[0] is the linear velocity, action[1] is the angular velocity
        vel_cmd = Twist()
        vel_cmd.linear.x = action[0]
        vel_cmd.angular.z = action[1]
        self.vel_pub.publish(vel_cmd)
        self.publish_markers(action)
        #Watch out here !!!!!
        # First unpause, post the message and start the simulation
        rospy.wait_for_service("/gazebo/unpause_physics")
        try:
            self.unpause()
        except (rospy.ServiceException) as e:
            print("/gazebo/unpause_physics service call failed")
        # Next you need to stop for a short period of time to allow the cart to travel at its current speed for a while, TIME_DELTA = 0.1
        time.sleep(TIME_DELTA)
        # Then we stop the simulation and start observing the current state #
        rospy.wait_for_service("/gazebo/pause_physics")
        try:
            pass
            self.pause()
        except (rospy.ServiceException) as e:
            print("/gazebo/pause_physics service call failed")
        # Detecting collisions
        done, collision, min_laser = self.observe_collision(self.velodyne_data)
        # Radar status
        v_state = []
        v_state[:] = self.velodyne_data[:]
        laser_state = [v_state]
        # Getting trolley orientation from odometer information
        self.odom_x = self.last_odom.pose.pose.position.x
        self.odom_y = self.last_odom.pose.pose.position.y
        quaternion = Quaternion(
            self.last_odom.pose.pose.orientation.w,
            self.last_odom.pose.pose.orientation.x,
            self.last_odom.pose.pose.orientation.y,
            self.last_odom.pose.pose.orientation.z,
        )
        euler = quaternion.to_euler(degrees=False)
        angle = round(euler[2], 4)

        # Calculate the distance to the target point
        distance = np.linalg.norm(
            [self.odom_x - self.goal_x, self.odom_y - self.goal_y]
        )

        # Calculate the angle of deviation
        skew_x = self.goal_x - self.odom_x
        skew_y = self.goal_y - self.odom_y
        dot = skew_x * 1 + skew_y * 0
        mag1 = math.sqrt(math.pow(skew_x, 2) + math.pow(skew_y, 2))
        mag2 = math.sqrt(math.pow(1, 2) + math.pow(0, 2))
        beta = math.acos(dot / (mag1 * mag2))
        if skew_y < 0:
            if skew_x < 0:
                beta = -beta
            else:
                beta = 0 - beta
        theta = beta - angle
        if theta > np.pi:
            theta = np.pi - theta
            theta = -np.pi - theta
        if theta < -np.pi:
            theta = -np.pi - theta
            theta = np.pi - theta
        # Determine if the target point has been reached
        if distance < GOAL_REACHED_DIST:
            target = True
            done = True
        # Output robot status
        robot_state = [distance, theta, action[0], action[1]]
        state = np.append(laser_state, robot_state)
        # Calculate incentives
        reward = self.get_reward(target, collision, action, min_laser)
        # Return status, reward, if it's over, if it's reached the target point
        return state, reward, done, target
Then we can summarizestepworkflow
①Post cmd_vel control topic
②Start simulation, run for 0.1s (can also be changed), stop simulation
③Get current status information
④Calculation of incentives
⑤Return information such as status, reward, and whether it is over or not
(3)reset section
def reset(self):
        # Reset the environment
        rospy.wait_for_service("/gazebo/reset_world")
        try:
            self.reset_proxy()
        except rospy.ServiceException as e:
            print("/gazebo/reset_simulation service call failed")
        angle = np.random.uniform(-np.pi, np.pi)
        quaternion = Quaternion.from_euler(0.0, 0.0, angle)
        object_state = self.set_self_state
        x = 0
        y = 0
        position_ok = False
        while not position_ok:
            x = np.random.uniform(-4.5, 4.5)
            y = np.random.uniform(-4.5, 4.5)
            position_ok = check_pos(x, y)
        # Here's how to change the initial position of the mobile robot via the /gazebo/set_model_state topic
        object_state.pose.position.x = x
        object_state.pose.position.y = y
        # object_state.pose.position.z = 0.
        object_state.pose.orientation.x = quaternion.x
        object_state.pose.orientation.y = quaternion.y
        object_state.pose.orientation.z = quaternion.z
        object_state.pose.orientation.w = quaternion.w
        self.set_state.publish(object_state)

        self.odom_x = object_state.pose.position.x
        self.odom_y = object_state.pose.position.y

        # Change a target point
        self.change_goal()
        # Change small square obstacles in the environment
        self.random_box()
        self.publish_markers([0.0, 0.0])
        #Start simulation
        rospy.wait_for_service("/gazebo/unpause_physics")
        try:
            self.unpause()
        except (rospy.ServiceException) as e:
            print("/gazebo/unpause_physics service call failed")
        # Execute for a while
        time.sleep(TIME_DELTA)
        # Stop the simulation and get the current state
        rospy.wait_for_service("/gazebo/pause_physics")
        try:
            self.pause()
        except (rospy.ServiceException) as e:
            print("/gazebo/pause_physics service call failed")
        v_state = []
        v_state[:] = self.velodyne_data[:]
        laser_state = [v_state]

        distance = np.linalg.norm(
            [self.odom_x - self.goal_x, self.odom_y - self.goal_y]
        )

        skew_x = self.goal_x - self.odom_x
        skew_y = self.goal_y - self.odom_y

        dot = skew_x * 1 + skew_y * 0
        mag1 = math.sqrt(math.pow(skew_x, 2) + math.pow(skew_y, 2))
        mag2 = math.sqrt(math.pow(1, 2) + math.pow(0, 2))
        beta = math.acos(dot / (mag1 * mag2))

        if skew_y < 0:
            if skew_x < 0:
                beta = -beta
            else:
                beta = 0 - beta
        theta = beta - angle

        if theta > np.pi:
            theta = np.pi - theta
            theta = -np.pi - theta
        if theta < -np.pi:
            theta = -np.pi - theta
            theta = np.pi - theta

        robot_state = [distance, theta, 0.0, 0.0]
        state = np.append(laser_state, robot_state)
        # Return status values
        return state
Then we can summarizestepworkflow
① Reset the simulation environment using /gazebo/reset_world.
②Set the location of carts, obstacles, etc. in the environment
③Start simulation, run for 0.1s (can also be changed), stop simulation
④Get the current status information
⑤ Return status information
(4)reward part
@staticmethod
def get_reward(target, collision, action, min_laser):
    if target:
        return 100.0
    elif collision:
        return -100.0
    else:
        r3 = lambda x: 1 - x if x < 1 else 0.0
        return action[0] / 2 - abs(action[1]) / 2 - r3(min_laser) / 2
Here is the part that calculates the reward, we can set our own reward function that returns the reward.
(5)summarize
So we’re done introducing the most critical code in the env section!
This part is actually essentially no different than in gym, the only difference is that here the environment status information is obtained through the topic’s subscription release.
Also one of the most important parts is that we need to have that action run for that 0.1 or 0.05 seconds every time we execute it so that our cart can run properly for a distance. If we don’t set this run time, the cart’s action will post as fast as it can, then there’s no way for it to run properly at all, and STEP will explode instantly.
3, train_velodyne_td3.py statement
This section is the python file that trains the network parameters.
Lines 1-287 of this are the TD3 network structure and various parameter settings, which are not described in this section.
While from row 288 is the main part of the training, and this part is essentially no different than in the gym. Let’s take the most important part of the process and talk about it.
#291
if done:
    ''''''
    #314
    state = env.reset()
    done = False
# This is the reset part when the turn is over, using env.reset() to reset the environment, reassign positions to the carts and obstacles, and initialize other variables.
''''''
#325
action = network.get_action(np.array(state))
#This is the part where we input our observed states into the neural network and get the actions from them.
''''''
#348
a_in = [(action[0]+1)/2,action[1]]
next_state, reward, done, target = env.step(a_in)
#Here we input the action into the environment and perform a step operation. The step function returns next_state,forward,done,target.
Then we can see that this is actually basically the same training steps as in any reinforcement learning, and just save the network parameters at the end.
III. How to deploy to the actual vehicle
(1) Simulation training to get a good network
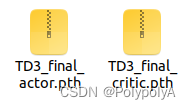
After simulation training, it is possible to obtain the respective network parameters of the ac network
(2) Network parameter loading
class Actor(nn.Module):
    def __init__(self, state_dim, action_dim):
        super(Actor, self).__init__()

        self.layer_1 = nn.Linear(state_dim, 800)
        self.layer_2 = nn.Linear(800, 600)
        self.layer_3 = nn.Linear(600, action_dim)
        self.tanh = nn.Tanh()

    def forward(self, s):
        s = F.relu(self.layer_1(s))
        s = F.relu(self.layer_2(s))
        a = self.tanh(self.layer_3(s))
        return a
# TD3 network
class TD3(object):
    def __init__(self, state_dim, action_dim):
        # Initialize the Actor network
        self.device = torch.device("cuda" if torch.cuda.is_available() else "cpu")  # cuda or cpu
        self.actor = Actor(state_dim, action_dim)
        self.actor.load_state_dict(torch.load("/home/polya/DRL-robot-navigation-main/pytorch_models180/TD3_final_actor.pth"))
        self.actor = self.actor.to(self.device)
        self.max_action = 1
    def get_action(self, state):
        # Function to get the action from the actor
        state = torch.Tensor(state.reshape(1, -1)).to(self.device)
        action = self.actor(state).cpu().data.numpy().flatten()
        action = action.clip(-self.max_action,self.max_action)
        linear_v = (action[0]+1)/2
        angle_v = action[1]
        return linear_v,angle_v
    def load(self, filename, directory):
        self.actor.load_state_dict(
            torch.load("%s/%s_actor.pth" % (directory, filename))
        )
Here we really only need a network of actors, and the function only needs a get_action
Of course it is also possible to write the network directly following the previous one, so that you can also collect actual data along the way for further training.
(3) Acquisition and processing of real vehicle information
#-------------------Pub and Sub--------------
        self.GoalPub = rospy.Publisher("/GoalPoint",Marker,queue_size=10)
        self.LaserSub = rospy.Subscriber("/scan",LaserScan,self.LaserScanCallBack)
        self.OdomSub = rospy.Subscriber("/odom",Odometry,self.OdomCallBack)
        self.goalxSub = rospy.Subscriber("/goal_x",Float32,self.goalxCallBack)
        self.goalySub = rospy.Subscriber("/goal_y",Float32,self.goalyCallBack)
Here I am using a Publisher Publish/GoalPoint topic, this is to make the target point into a Marker to send out, just to display in Rviz
Subscription: 1, /scan LIDAR information, here I used a 2D LIDAR, the scanning information obtained into the PointCloud2 point cloud information and used in the back of the calculation, of course, I also used a 2D LIDAR in the training process for training!
2, /odom odometer information, used to obtain the current position and speed of the real car in real time, of course, here you can also be replaced by what gps imu and other information, just need to finally be transformed into the corresponding state of the training inputs
3, /goal_x and /goal_y. Here is to receive the coordinates of our target position, because of laziness directly wrote two float32 Subscriber to receive, the back can be changed to a custom message or what the odometer information
The next step is to consolidate the information and return an array of state statuses
def GetStates(self): # Actually, this is much the same as the way we got the information in velody_env.py earlier.
        target =False
        v_state = []
        v_state[:] = self.velodyne_data[:]
        # Radar status input
        laser_state = [v_state]
        self.odom_x = self.last_odom.pose.pose.position.x
        self.odom_y = self.last_odom.pose.pose.position.y
        quaternion = Quaternion(
            self.last_odom.pose.pose.orientation.w,
            self.last_odom.pose.pose.orientation.x,
            self.last_odom.pose.pose.orientation.y,
            self.last_odom.pose.pose.orientation.z,
        )
        euler = quaternion.to_euler(degrees=False)
        angle = round(euler[2], 4)
        distance = np.linalg.norm(
            [self.odom_x - self.goal_x, self.odom_y - self.goal_y]
        )
        skew_x = self.goal_x - self.odom_x
        skew_y = self.goal_y - self.odom_y
        dot = skew_x * 1 + skew_y * 0
        mag1 = math.sqrt(math.pow(skew_x, 2) + math.pow(skew_y, 2))
        mag2 = math.sqrt(math.pow(1, 2) + math.pow(0, 2))
        beta = math.acos(dot / (mag1 * mag2))
        if skew_y < 0:
            if skew_x < 0:
                beta = -beta
            else:
                beta = 0 - beta
        theta = beta - angle
        if theta > np.pi:
            theta = np.pi - theta
            theta = -np.pi - theta
        if theta < -np.pi:
            theta = -np.pi - theta
            theta = np.pi - theta
        self.dis = distance
        if distance < GOAL_REACHED_DIST:
            target = True
      	# Robot status input
        robot_state = [distance, theta, self.last_odom.twist.twist.linear.x,self.last_odom.twist.twist.angular.z]
        print(self.dis)
        print(distance)
        print(robot_state)
        state = np.append(laser_state,robot_state)
        # Finally, we return the cart's status inputs, including radar inputs and robot status inputs, as well as whether or not it has reached the target location
        return state,target
(4) Simple executive part
rospy.init_node("my_car") #initialize node
car = mycar() # Instantiate the real car information fetching class
# -------- Lazy Target Points Released ---------------
xpub = rospy.Publisher("/goal_x",Float32,queue_size=10)
ypub = rospy.Publisher("/goal_y",Float32,queue_size=10)
xpub.publish(2.5)
ypub.publish(0.5)
network = TD3(24,2) #Instantiate TD3 network
pub = rospy.Publisher("/cmd_vel",Twist,queue_size=10) #/cmd_vel publish for controlling cart movement
rate = rospy.Rate(10) # wait frequency, equivalent to DELTA_TIME in the simulation environment

while not rospy.is_shutdown():
    state,target = car.GetStates() #Get state information
    if not target:
        linear_x,angular_z = network.get_action(np.array(state)) # input state into network, output linear and angular velocity
        cmd_vel = Twist() #Post speeds into Twist
        cmd_vel.linear.x = linear_x/5 # here found that the fastest 1m/s is still too fast, so manually reduced to the maximum 0.2
        cmd_vel.angular.z = angular_z/5
        pub.publish(cmd_vel) #publish the message

    if state[20]<COLLISION_DIST: #simply determine collision
        pub.publish(Twist())
        break
    if target: #Simple to determine if the target has been reached or not
        pub.publish(Twist())
        break
    rate.sleep() # stop for a period of time, let here set to 0.1s, then the control frequency is 10hz
Then run it and we can open rviz and see the cart move!
But here I use the cart actually simulation environment is not a cart, em but their control is also relatively similar to it, and finally can realize the corresponding effect, the most correct way is to import your own cart urdf into the gazebo simulation!
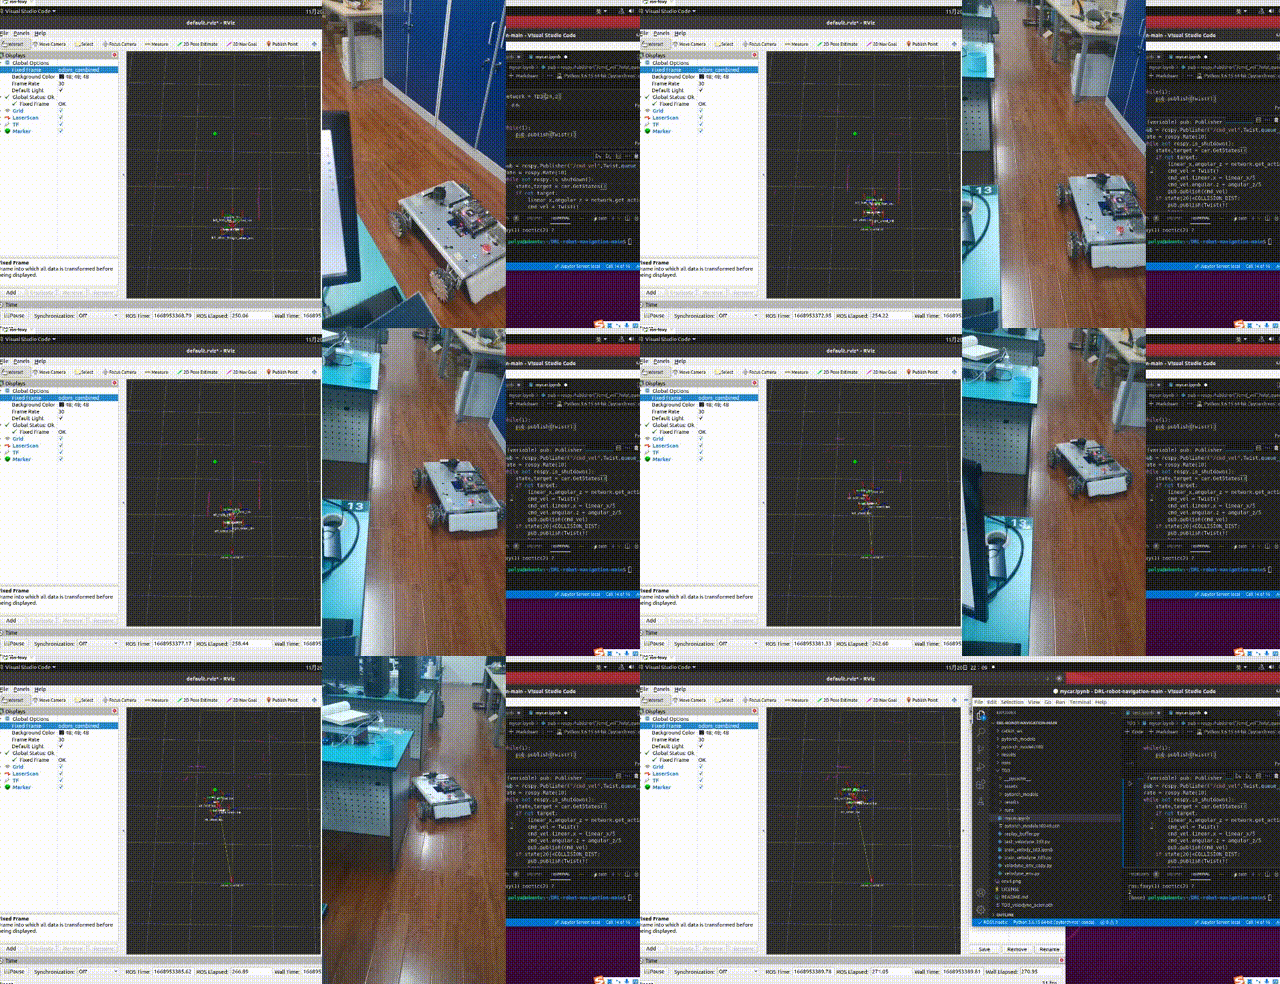
By the way, jupyter is used to write here, I found it really easy to mess with the algorithmic part of ROS inside jupyter! It’s worth a try!
