I. MySQL Download (Installation Version)
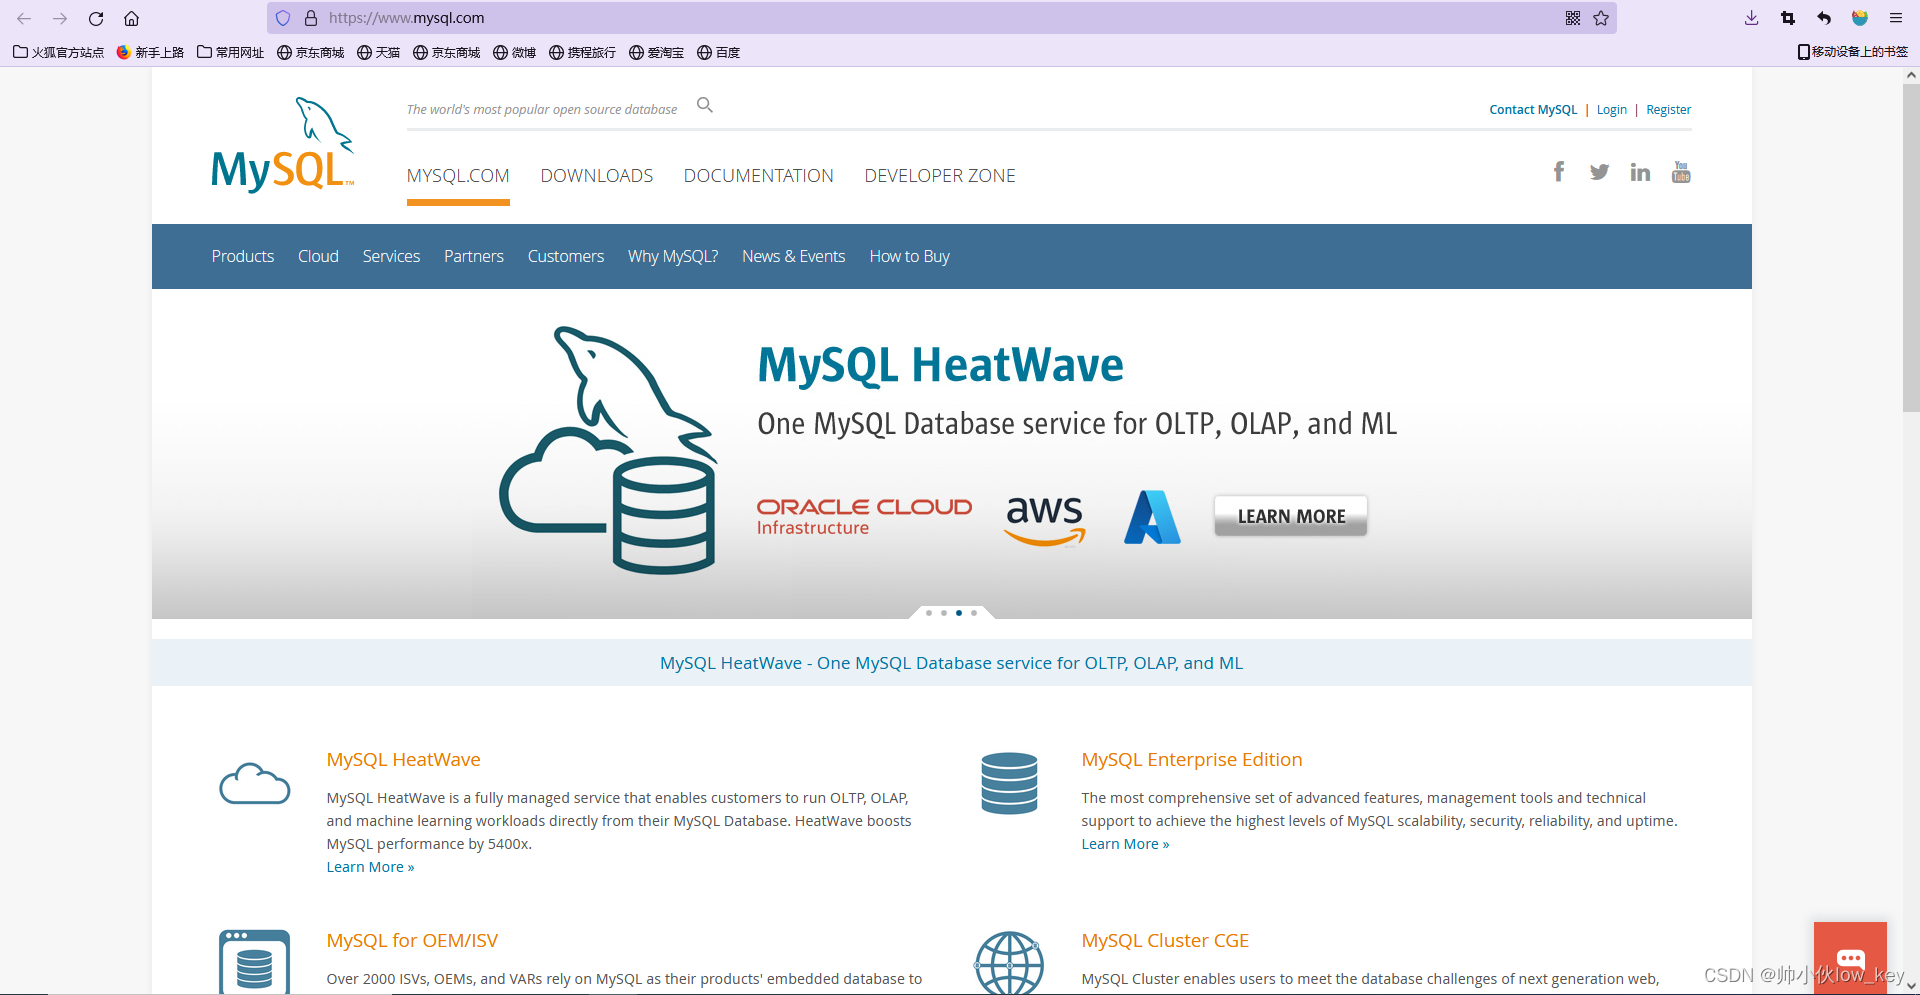
1. Go to the official MySQL website
Official website address:https://www.mysql.com/
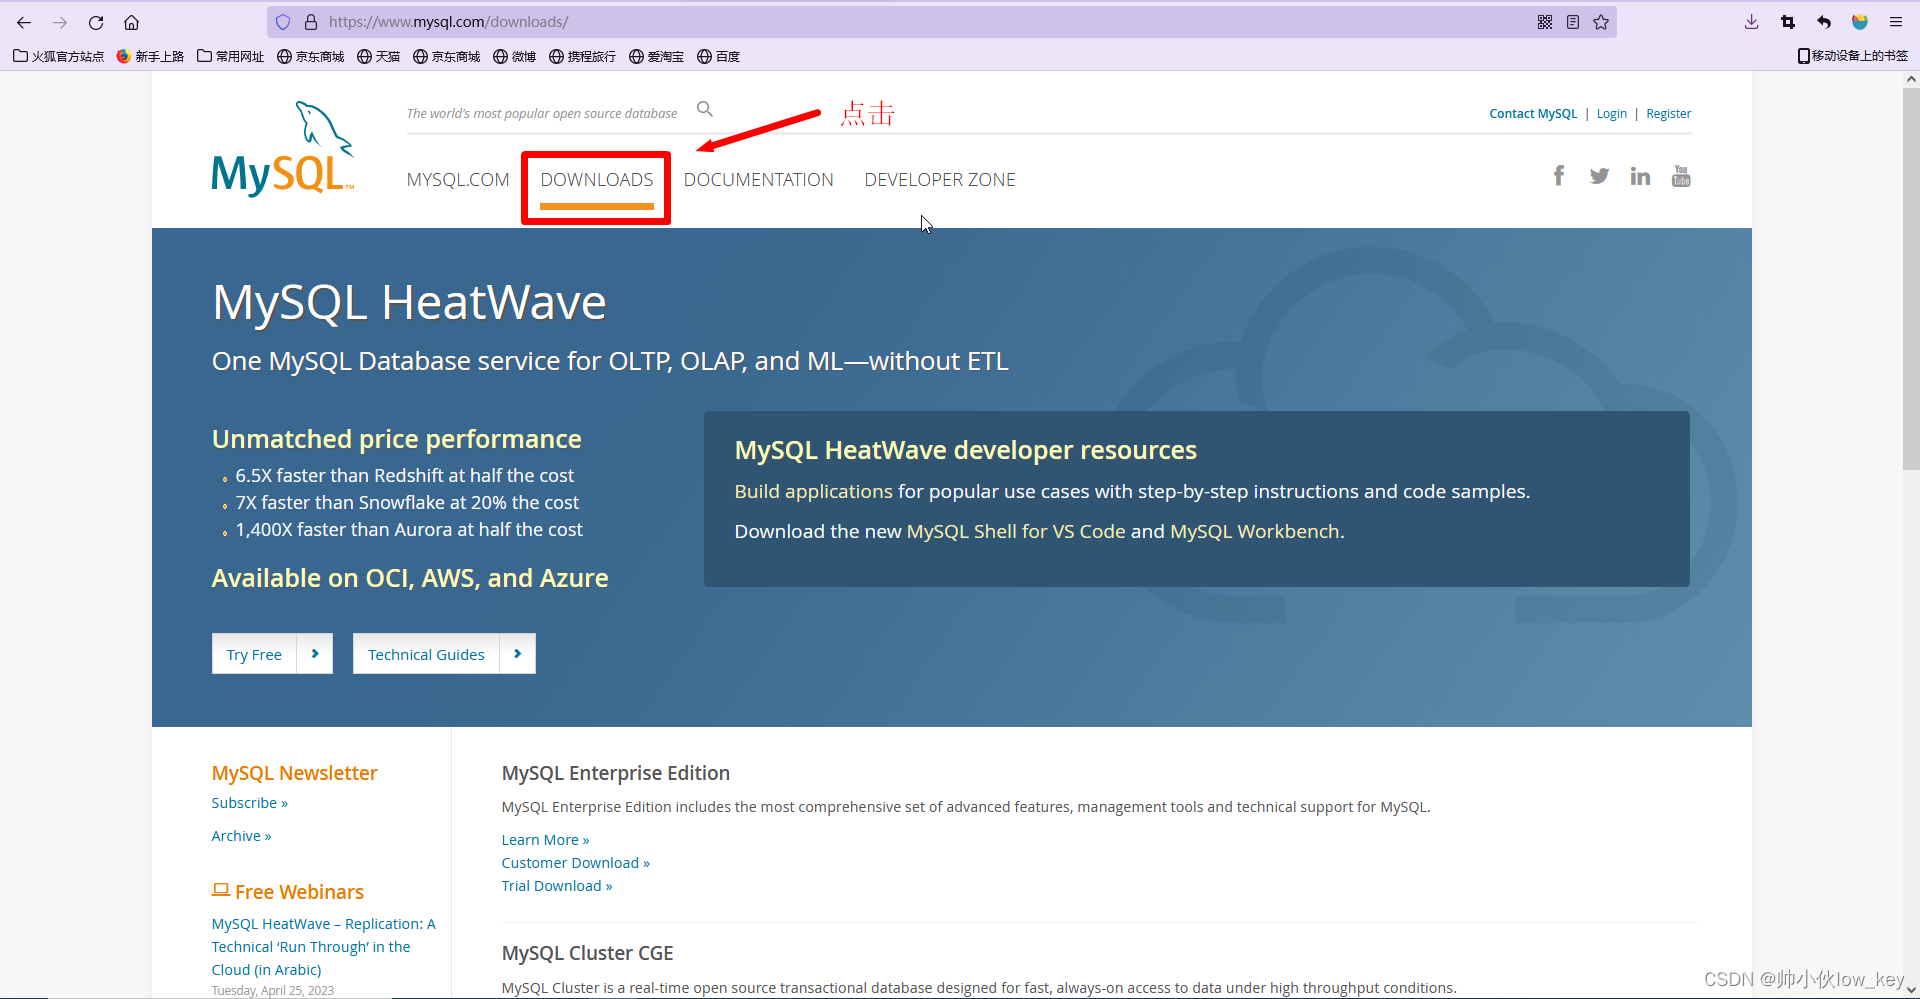
2. Click [DOWNLOADS].
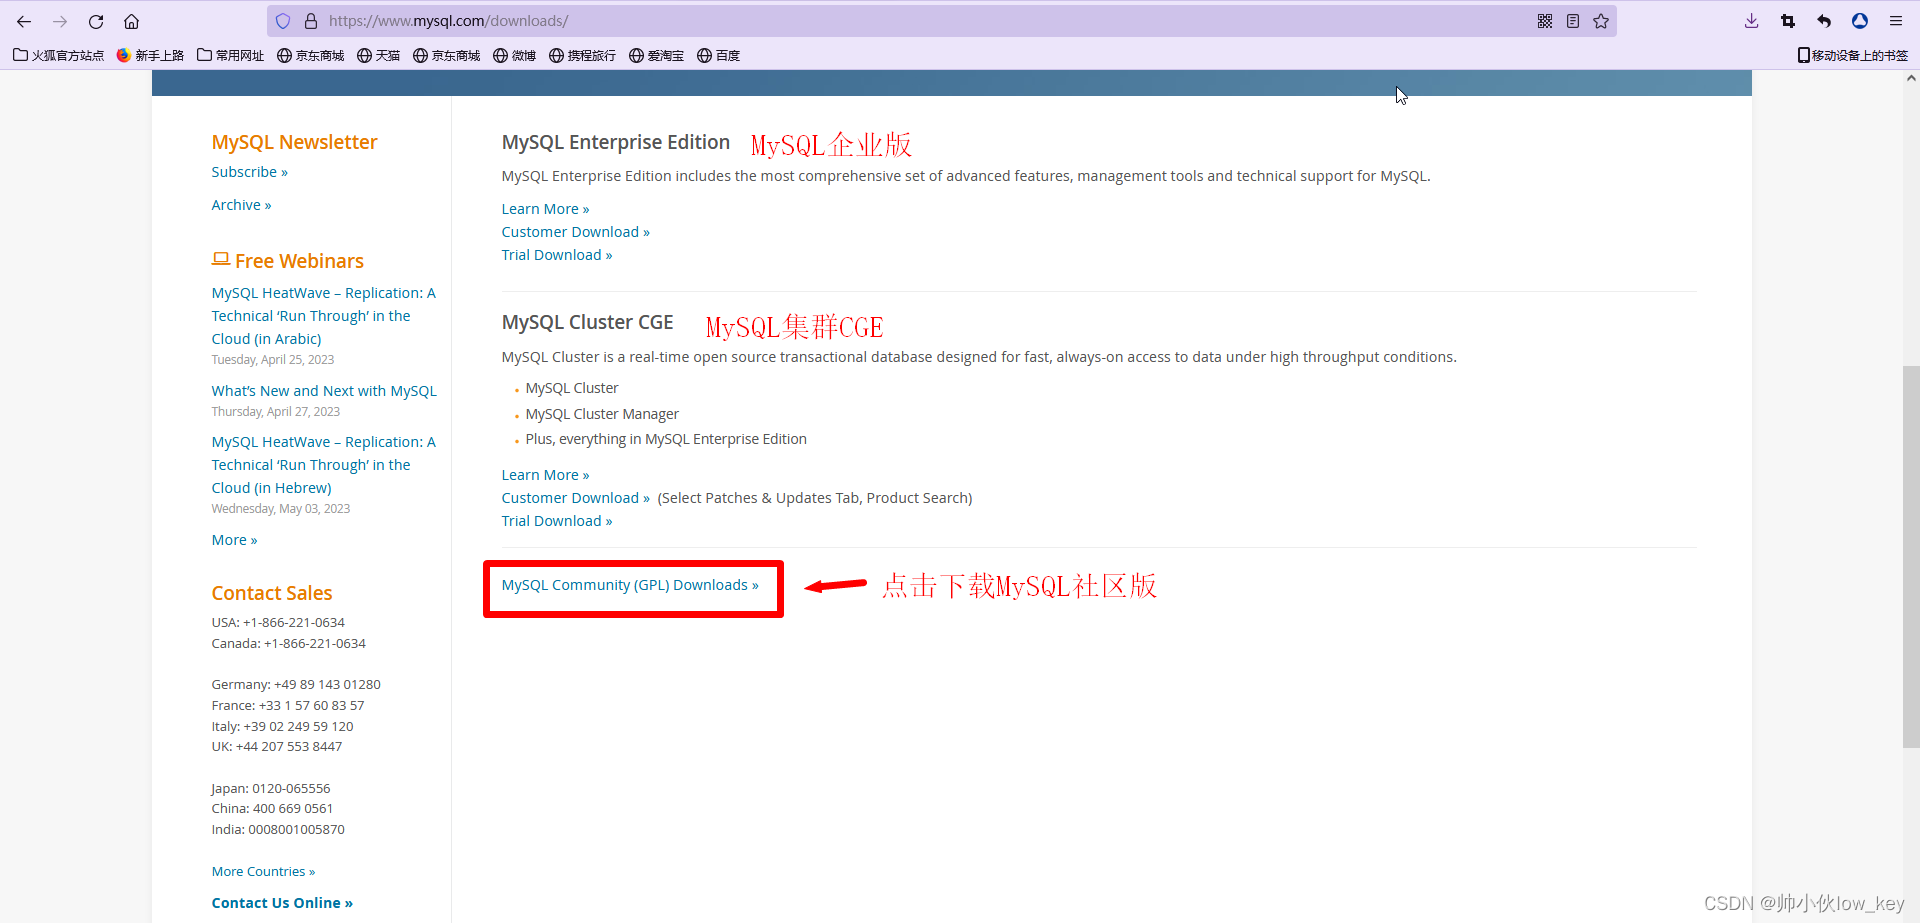
3. Scroll down and click [MySQL Community (GPL) Downloads] to download MySQL Community Edition.
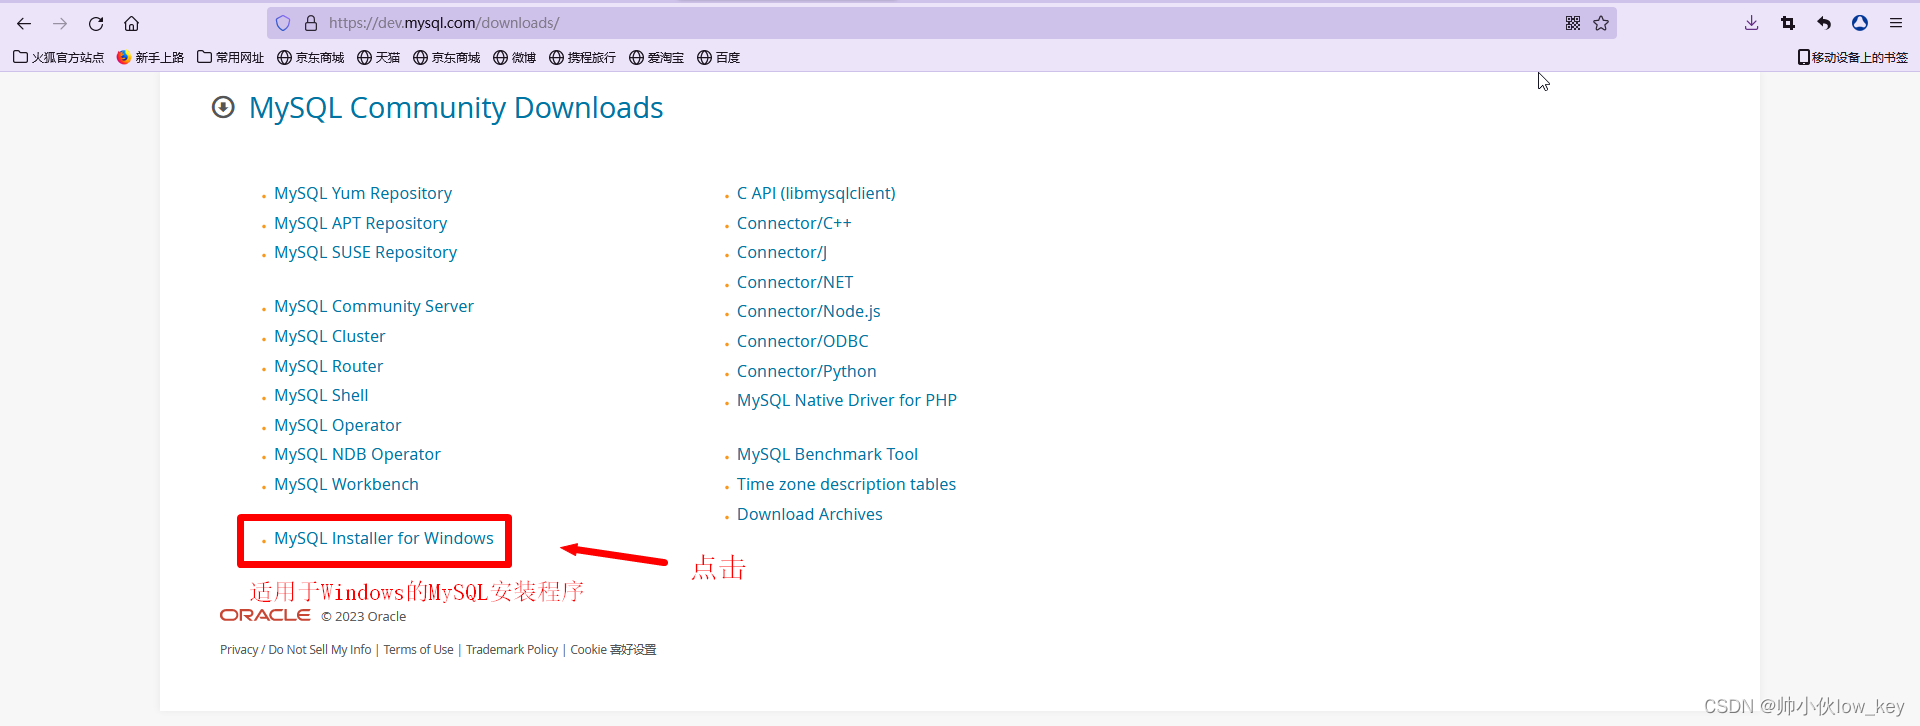
4. Click [MySQL Installer for Windows] to download the MySQL installer.
5. You will then come to the MySQL latest version download page.(”MySQL Installer 8.0.33“This refers to MySQL version 8.0.33, which is the latest version I can see at the moment. As time goes by, the company may keep updating it, so the latest version number you see may be different from mine.)First of all, click to expand the selection of Windows system, if the default is Windows system does not need to be modified, and then select the offline installation, click [Dwonload].
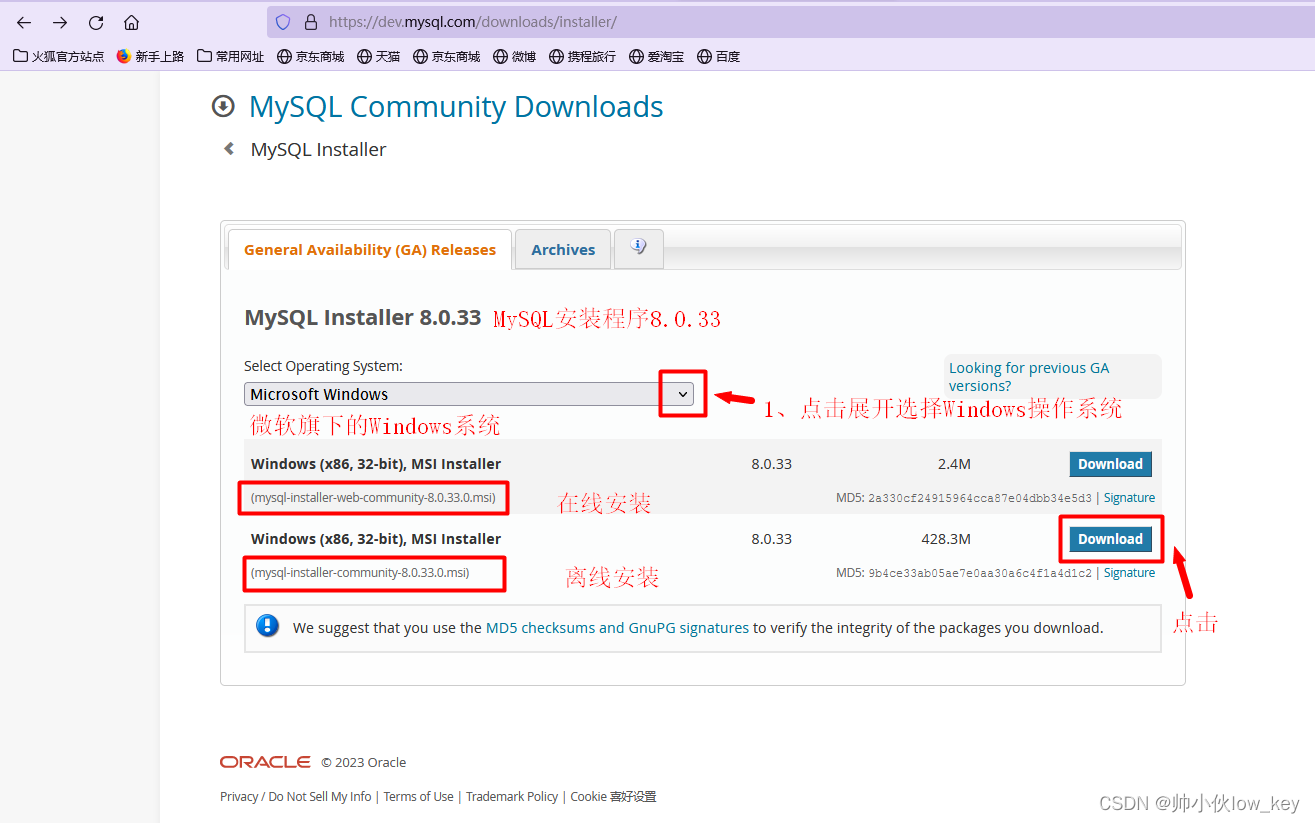
【mysql-Installer-web-community-8.0.33.0.msi】:This means that MySQL version 8.0.33 is installed online.“.msi”It refers to the program installation file, that is, the installation version, and online installation is to download the online installation package, the installation package will be downloaded to a temporary folder, when you install MySQL, download the installation package it will be automatically deleted, and will not stay on your computer, the advantage is that it occupies a small amount of memory, only a few megabytes of the size of the download speed will be very fast, the disadvantage is that you must keep the Internet connection to be able to perform the The disadvantage is that you have to stay connected to the Internet to install the program.
【mysql-Installer-community-8.0.33.0.msi】:This means offline installation, it is a complete installation package, it will be downloaded to your computer local download place, do not need to network can be installed, and you can copy the installation package to the U disk, and then you can take away at any time to paste to other computers for installation, the disadvantage is that the memory will take up a little bit more, compared to online installation of the download time will be a little longer.
Notes:The following is an additional note, which may be ignored and directed to point 6.
If you want to download previous versions, you can click [Archives] to see all previous versions.
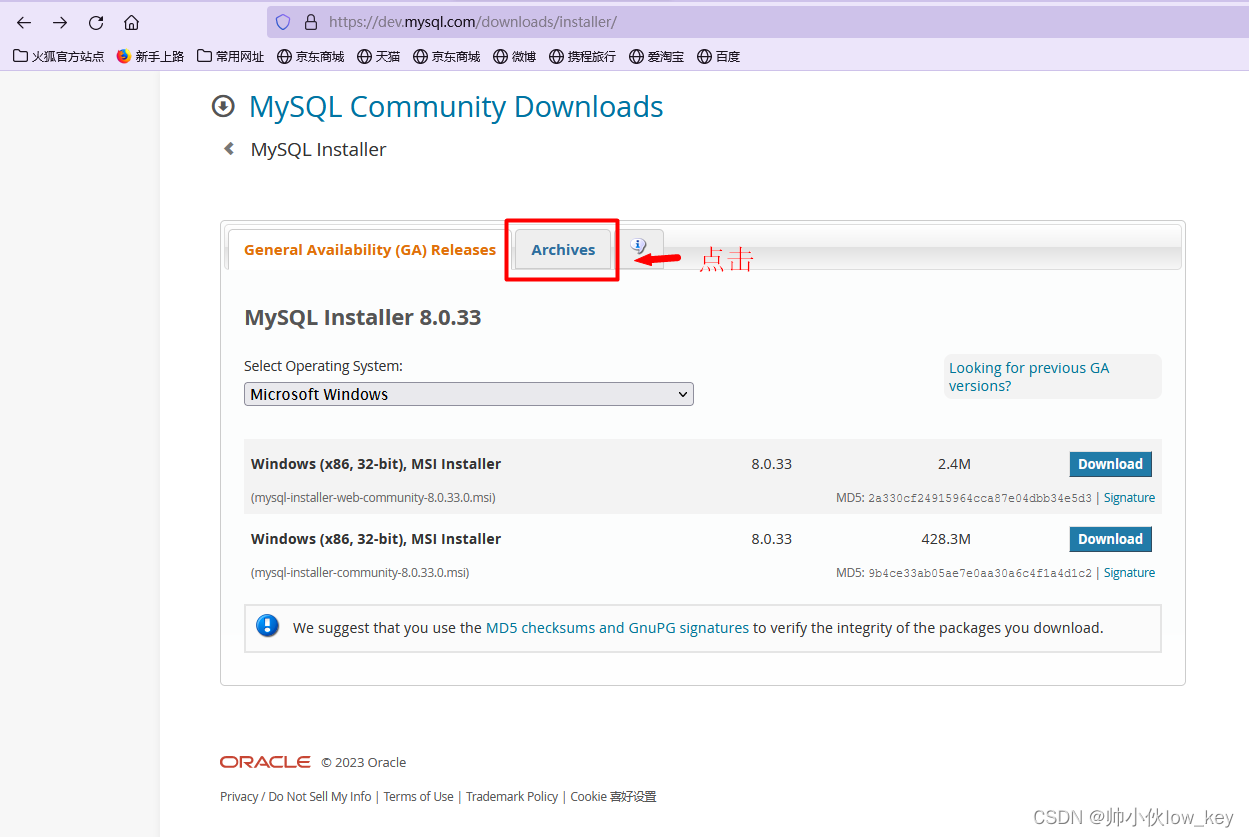
Clicking on Expand will allow you to select all previous versions.
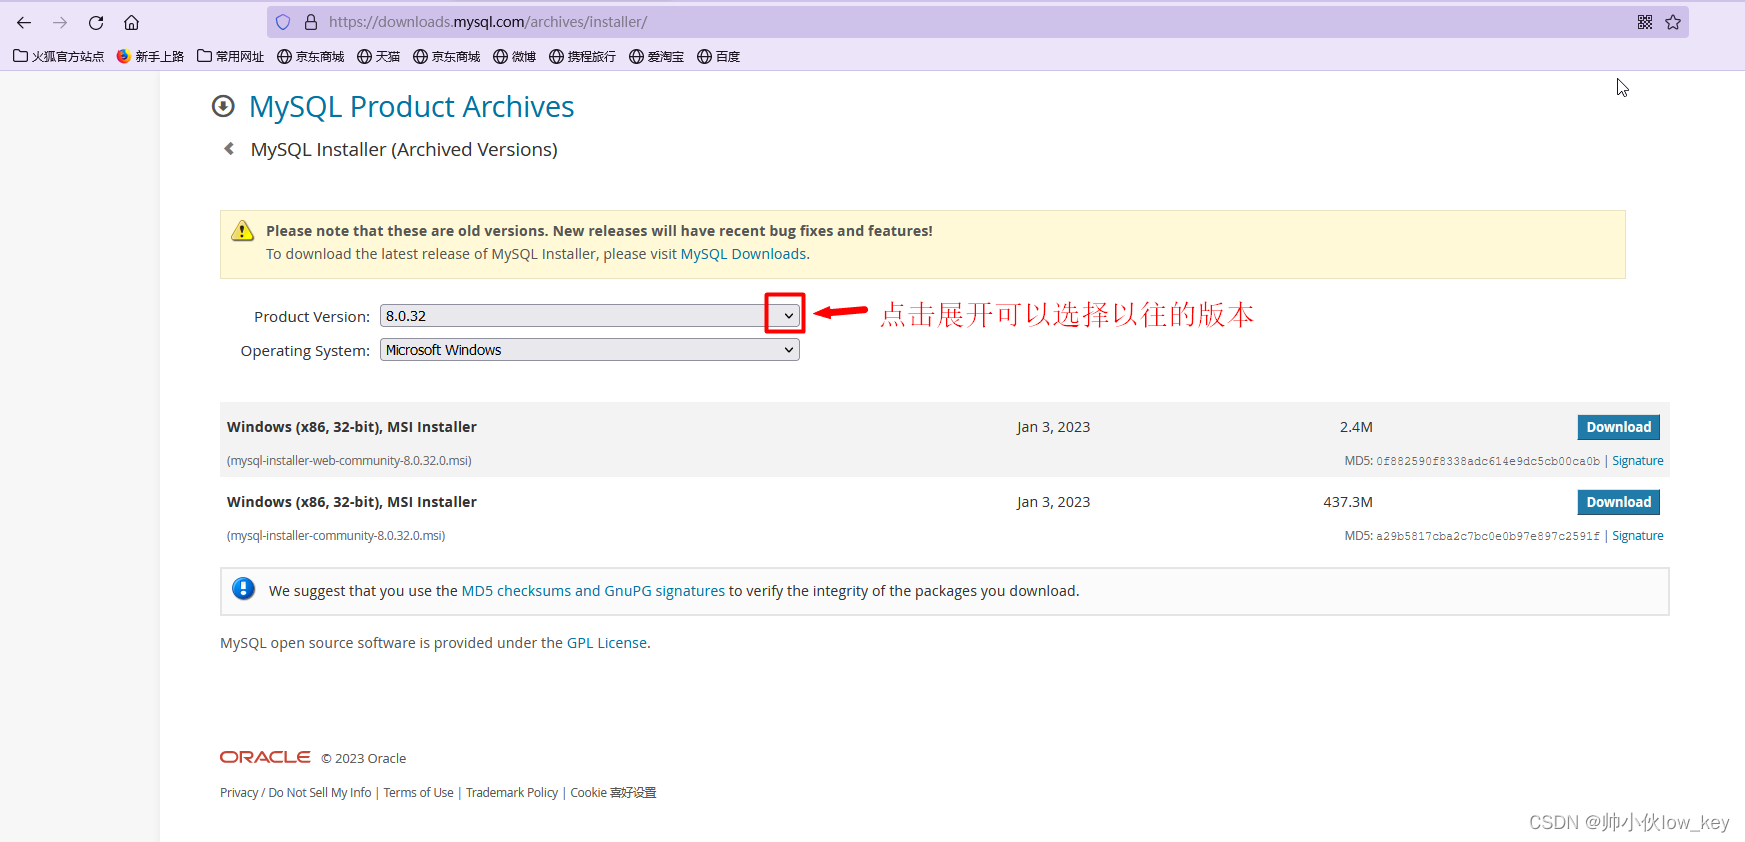
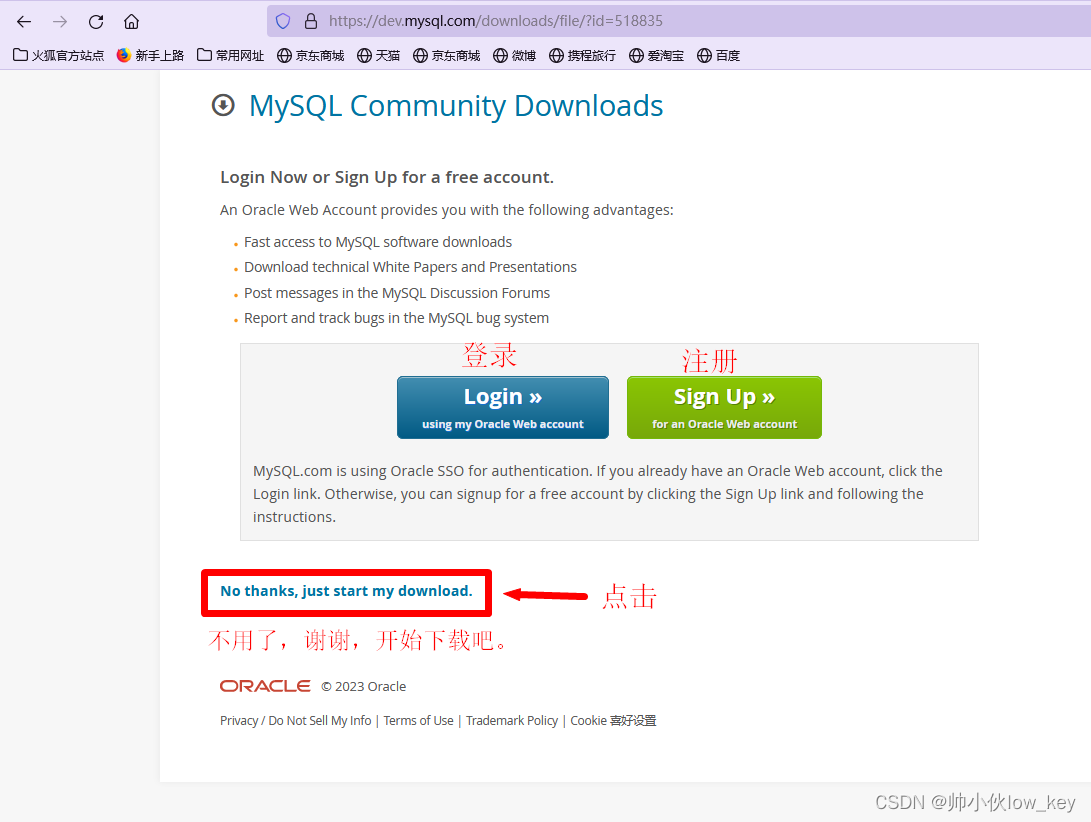
6, and then it will let the login or register MySQL account, can be ignored, because I logged on the account to see, found that it just let you register an account only, click [No thank start my download] for MySQL download.
7. Downloading

Second, mysql installation
1、Double click to open the installation package after downloading.

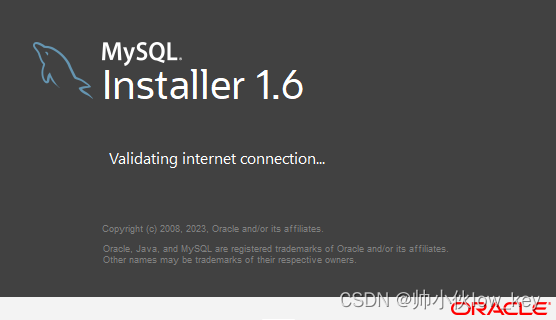
2. The MySQL installer is being started. 1.6 refers to the version of the installer, not the version of MySQL.
4, and then will pop up to select the installation type of window, check the “Custom”, select custom installation, click [Next] Next.
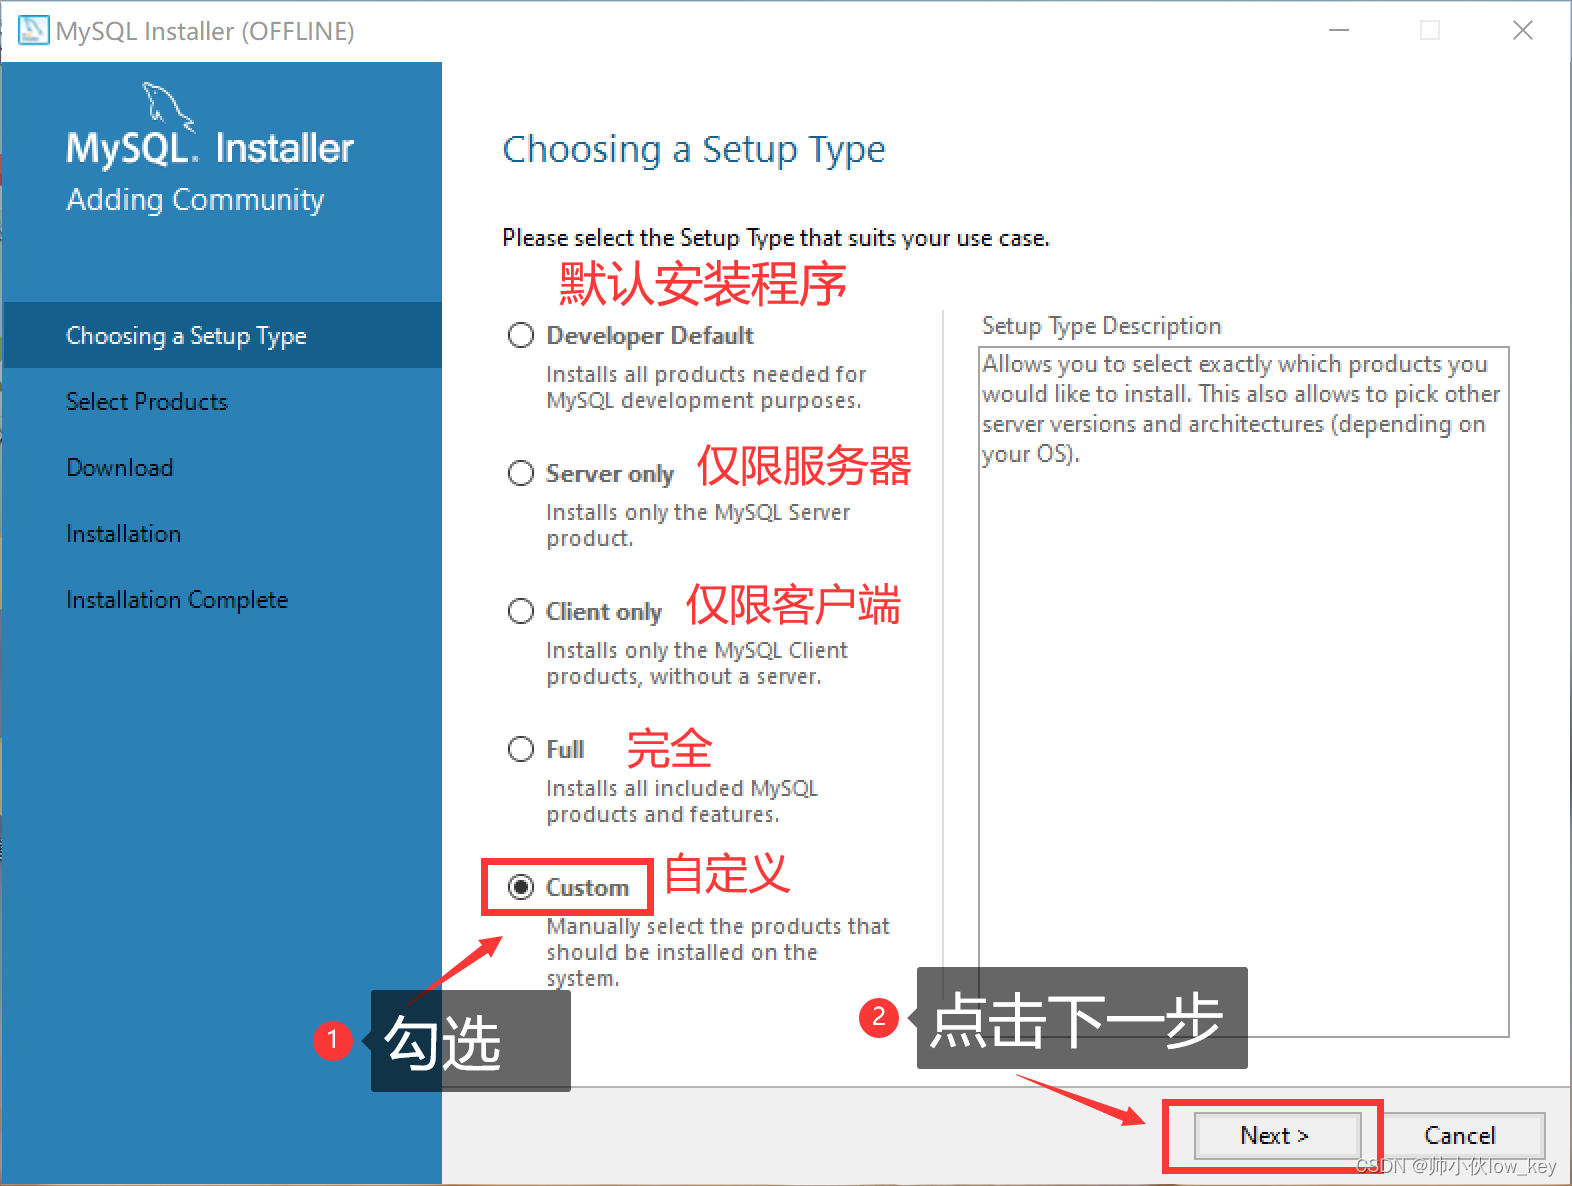
| Developer Default: | Install all products required for MySQL development. |
| Server only: | Install only MySQL server products. |
| Client onmly: | Install only the MySQL client product, not the server. |
| Full: | Install all included MySQL products and features. |
| Custom: | Manually select the product that should be installed on the system. |
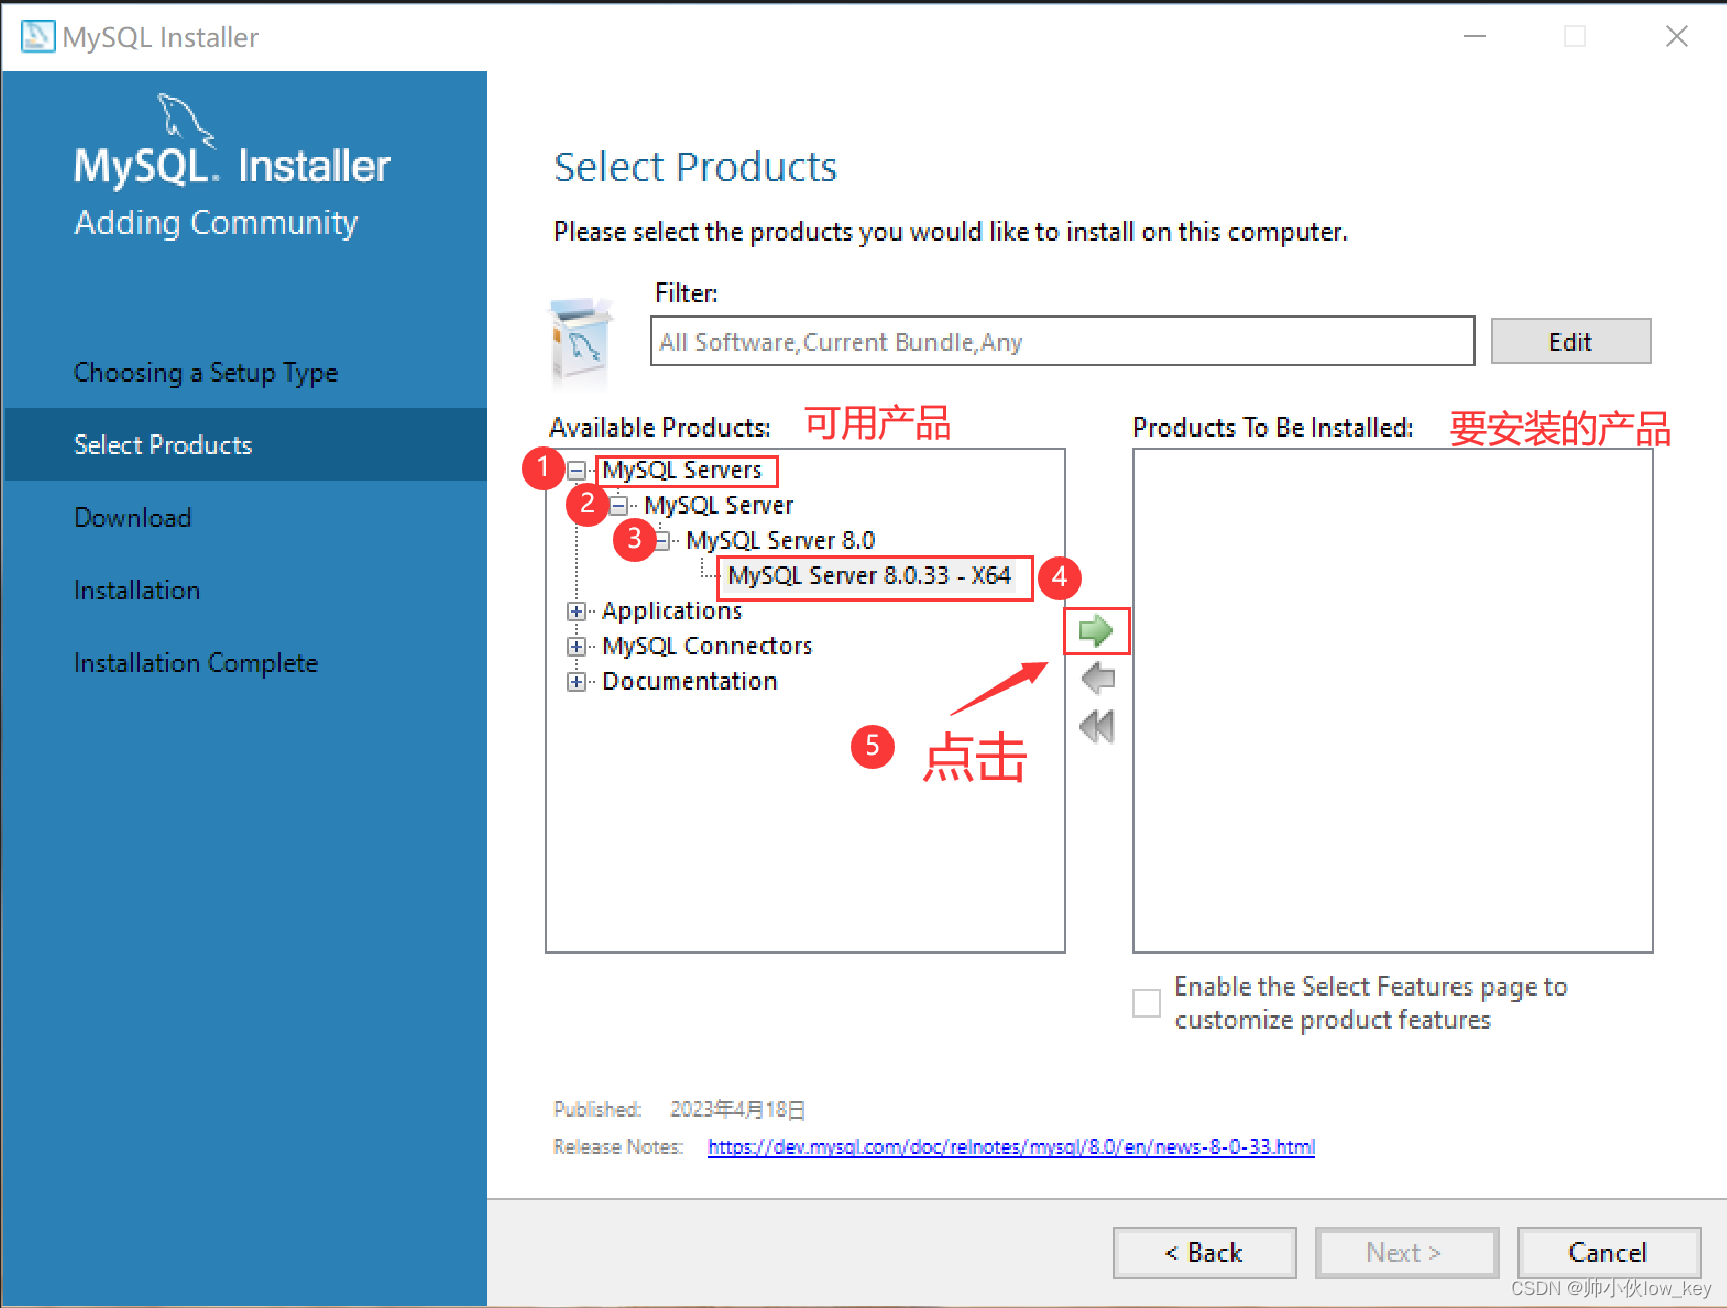
5. Select “MySQL Servers”.(MySQL server), click on the + sign to expand expand expand expand expand, select the version of MySQL server you want to install, and then click on that green arrow to add it to the right.
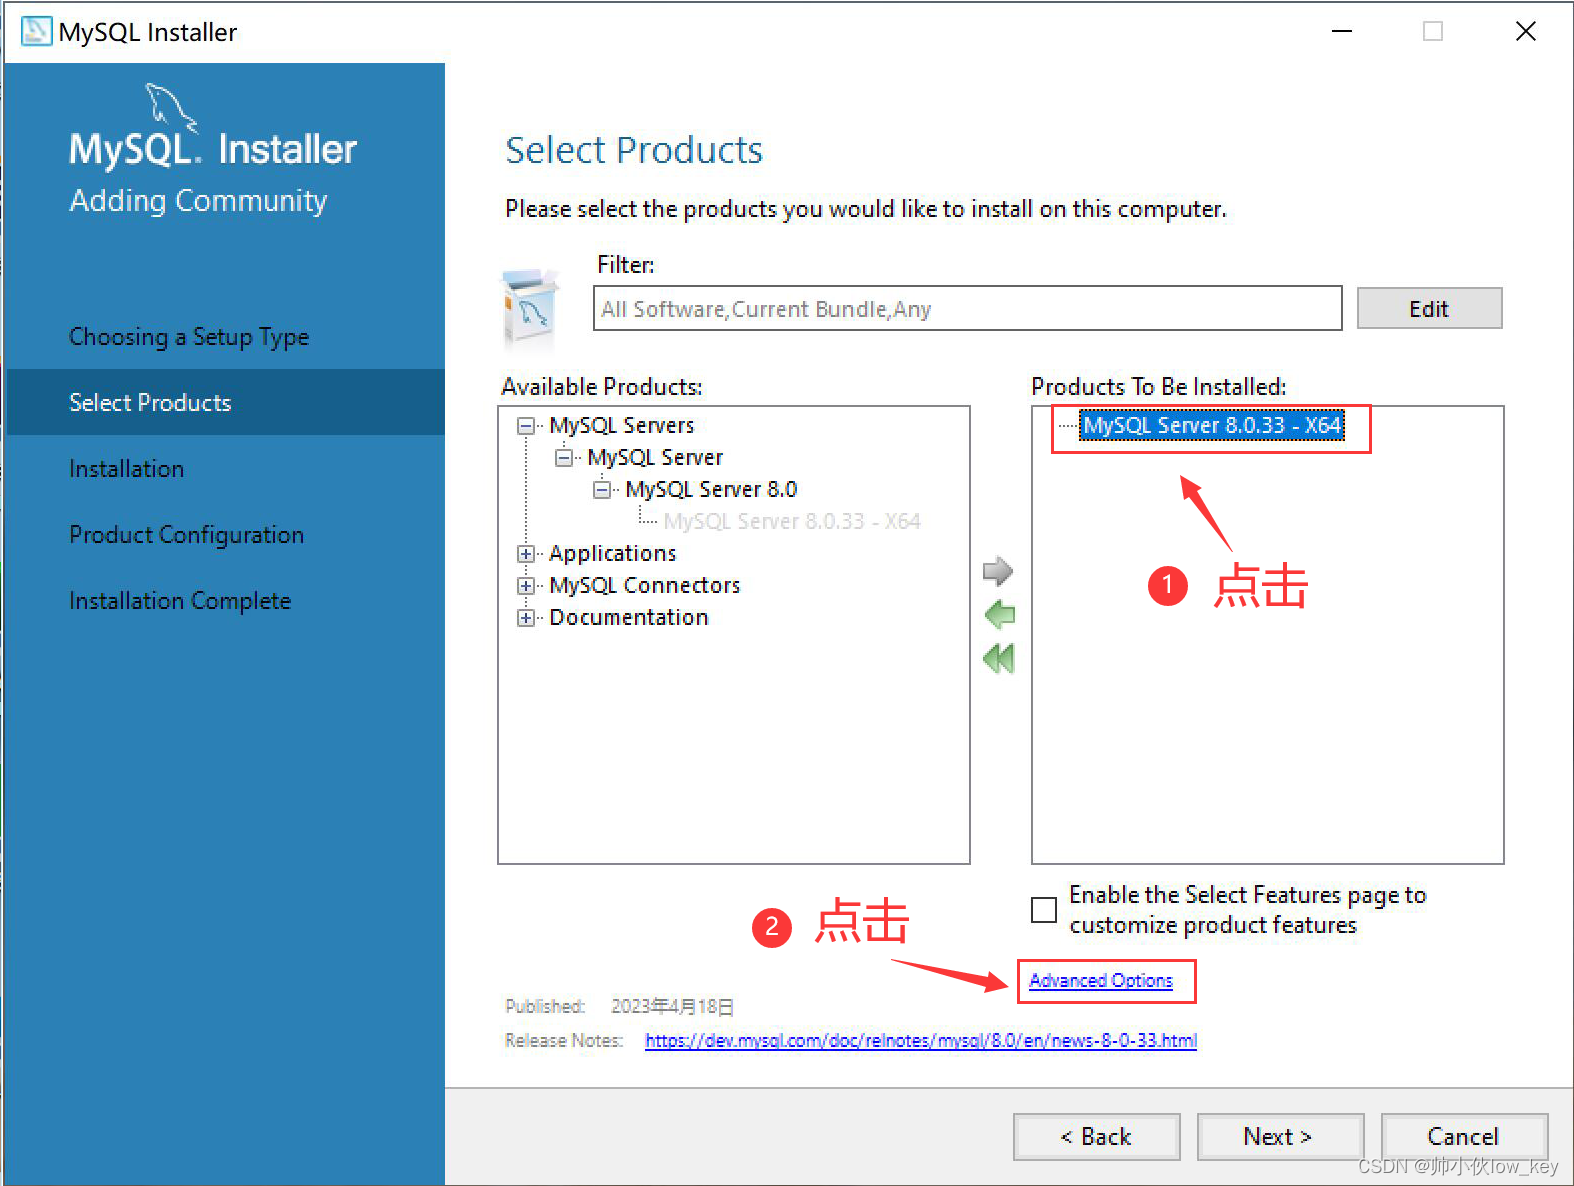
6, select the MySQL server you just added, and then click [Advanced Options].(Advanced Options)Modify the MySQL installation path and the path where MySQL data files are stored.
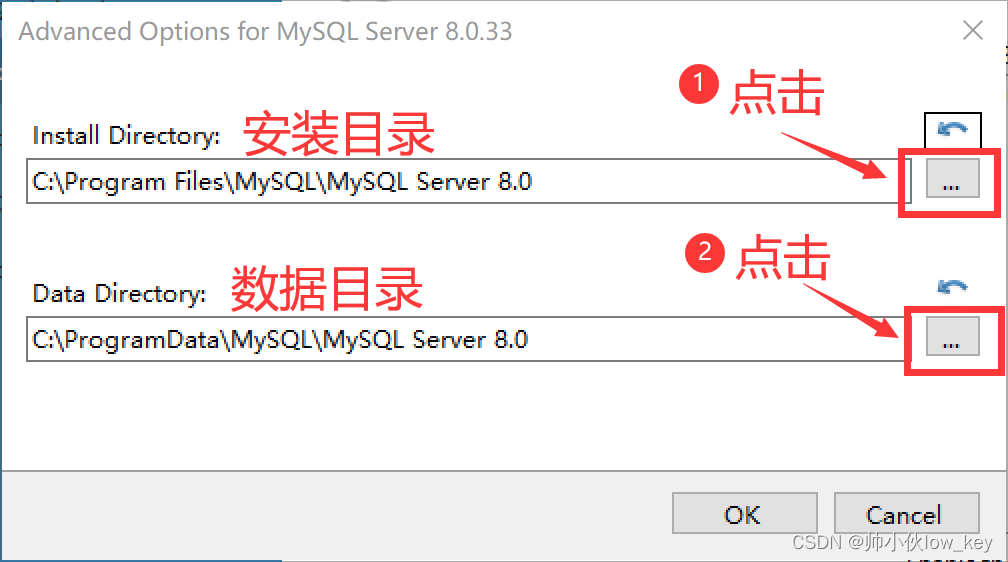
7, the first step first go to the D disk to create a folder named“MySQL”Then click into the MySQL folder and create a folder namedMySQL Server 8.0Then select this folder and click [OK], then this folder is the location of your MySQL files, the second step is to click into the folder you just created.”MySQL”folder, create a new folder inside named“Data”If you want to create a database, you can select this folder and click [OK], and then this is the location of the data stored in the database you created with MySQL.(It’s okay if you don’t want to change the installation location, but it will be installed on the C drive by default, so it’s recommended that you try to change the installation location as much as possible.)
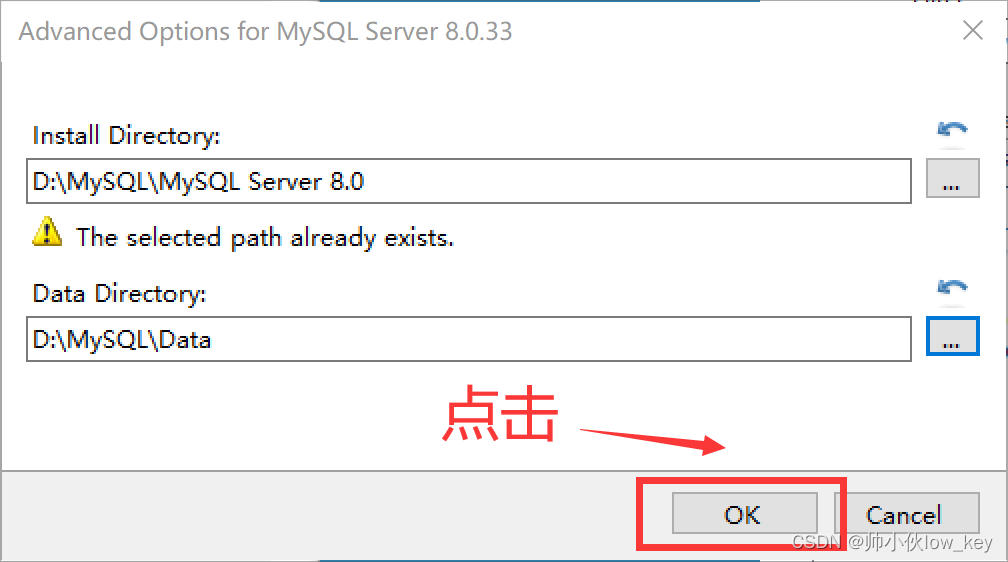
8, change the path after clicking [OK] to determine the changes.
9, click [Next] next.
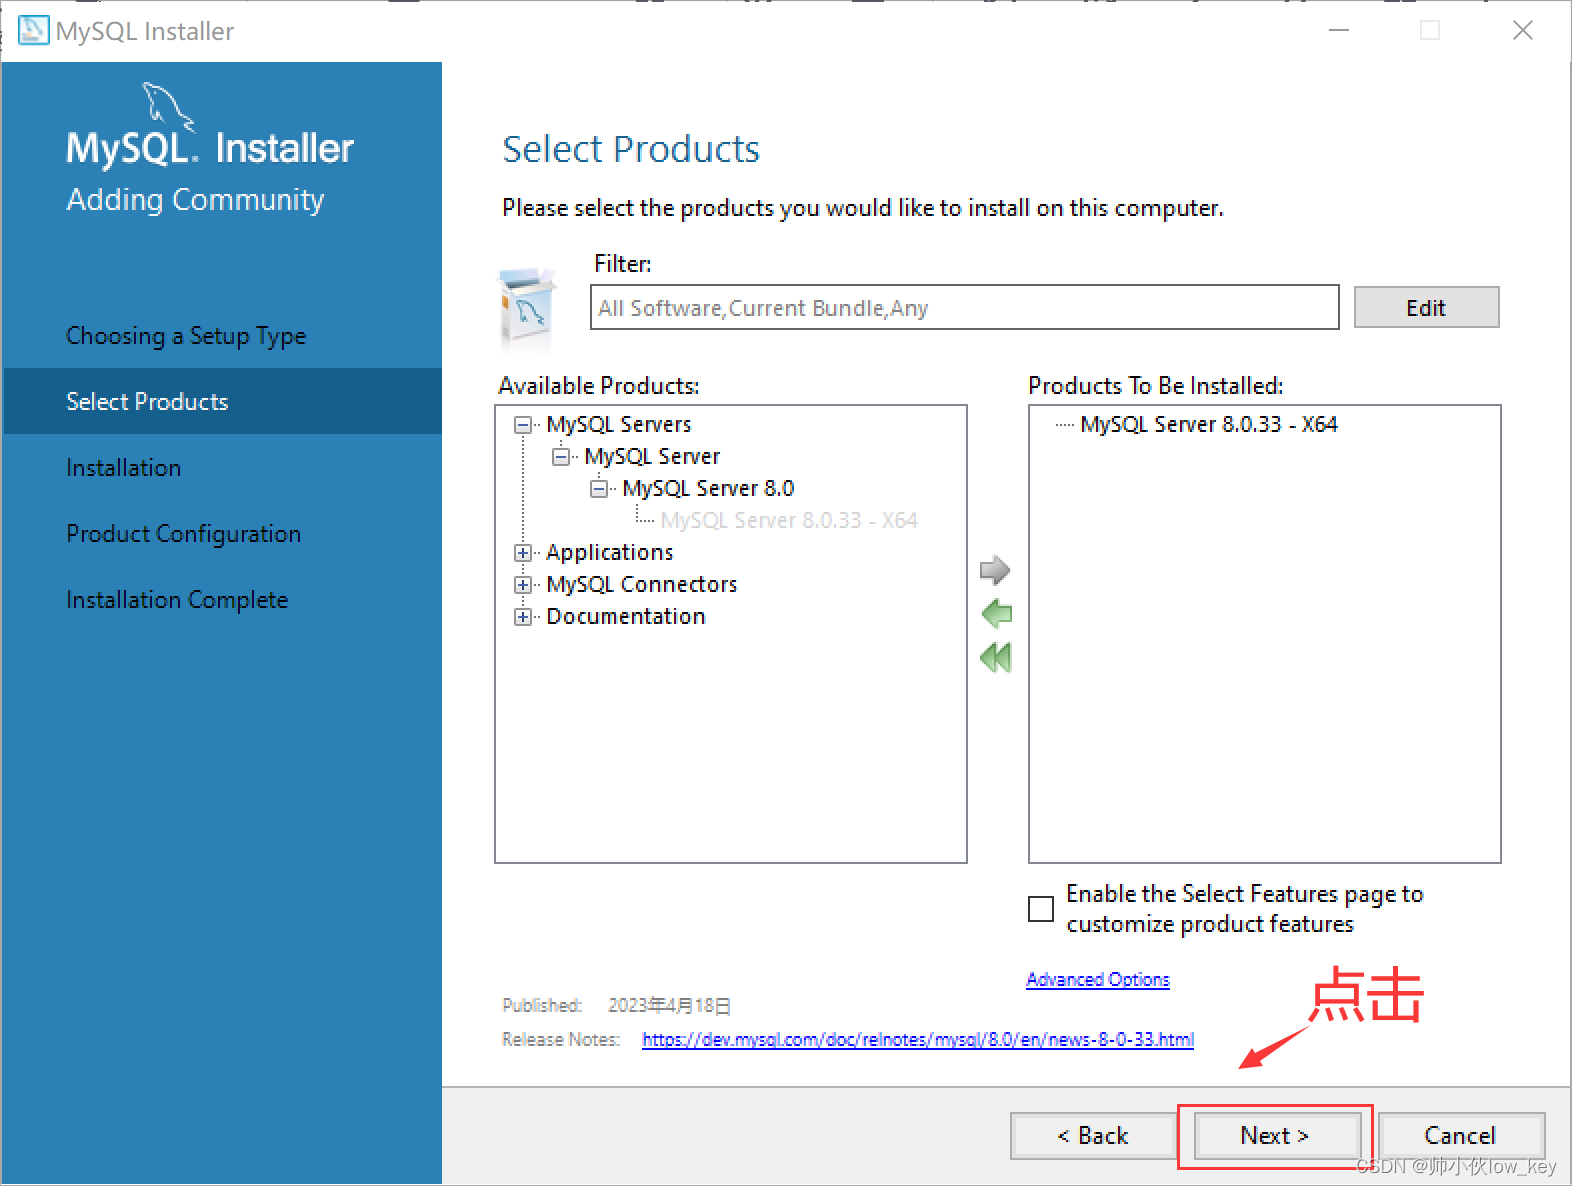
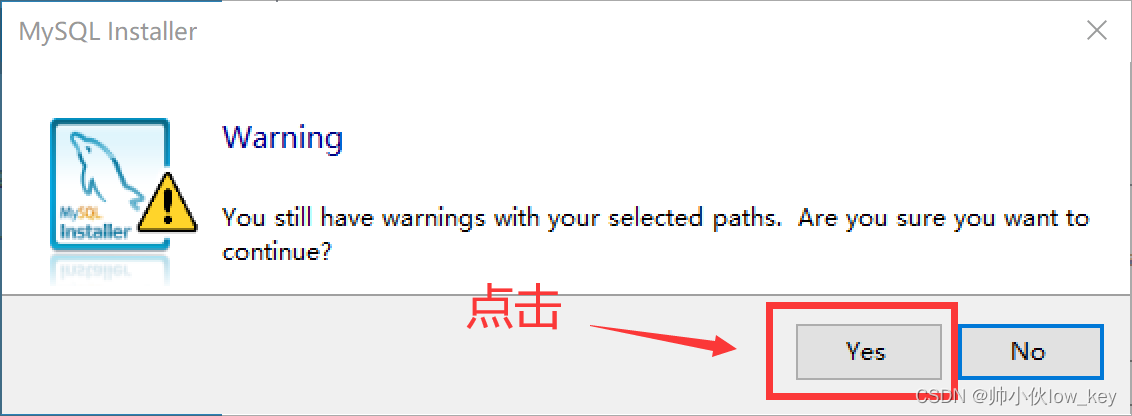
10, click on the next step, if you also appear this“Path Conflicts”Path conflict pop-up window, because you created in the D-disk file name and his previous default installation in the C-disk path name is the same, so it will show a conflict, can be ignored, directly click on [Next] next to the C-disk file to overwrite. (If there is no path conflict, then please ignore this, directly see the next point.)
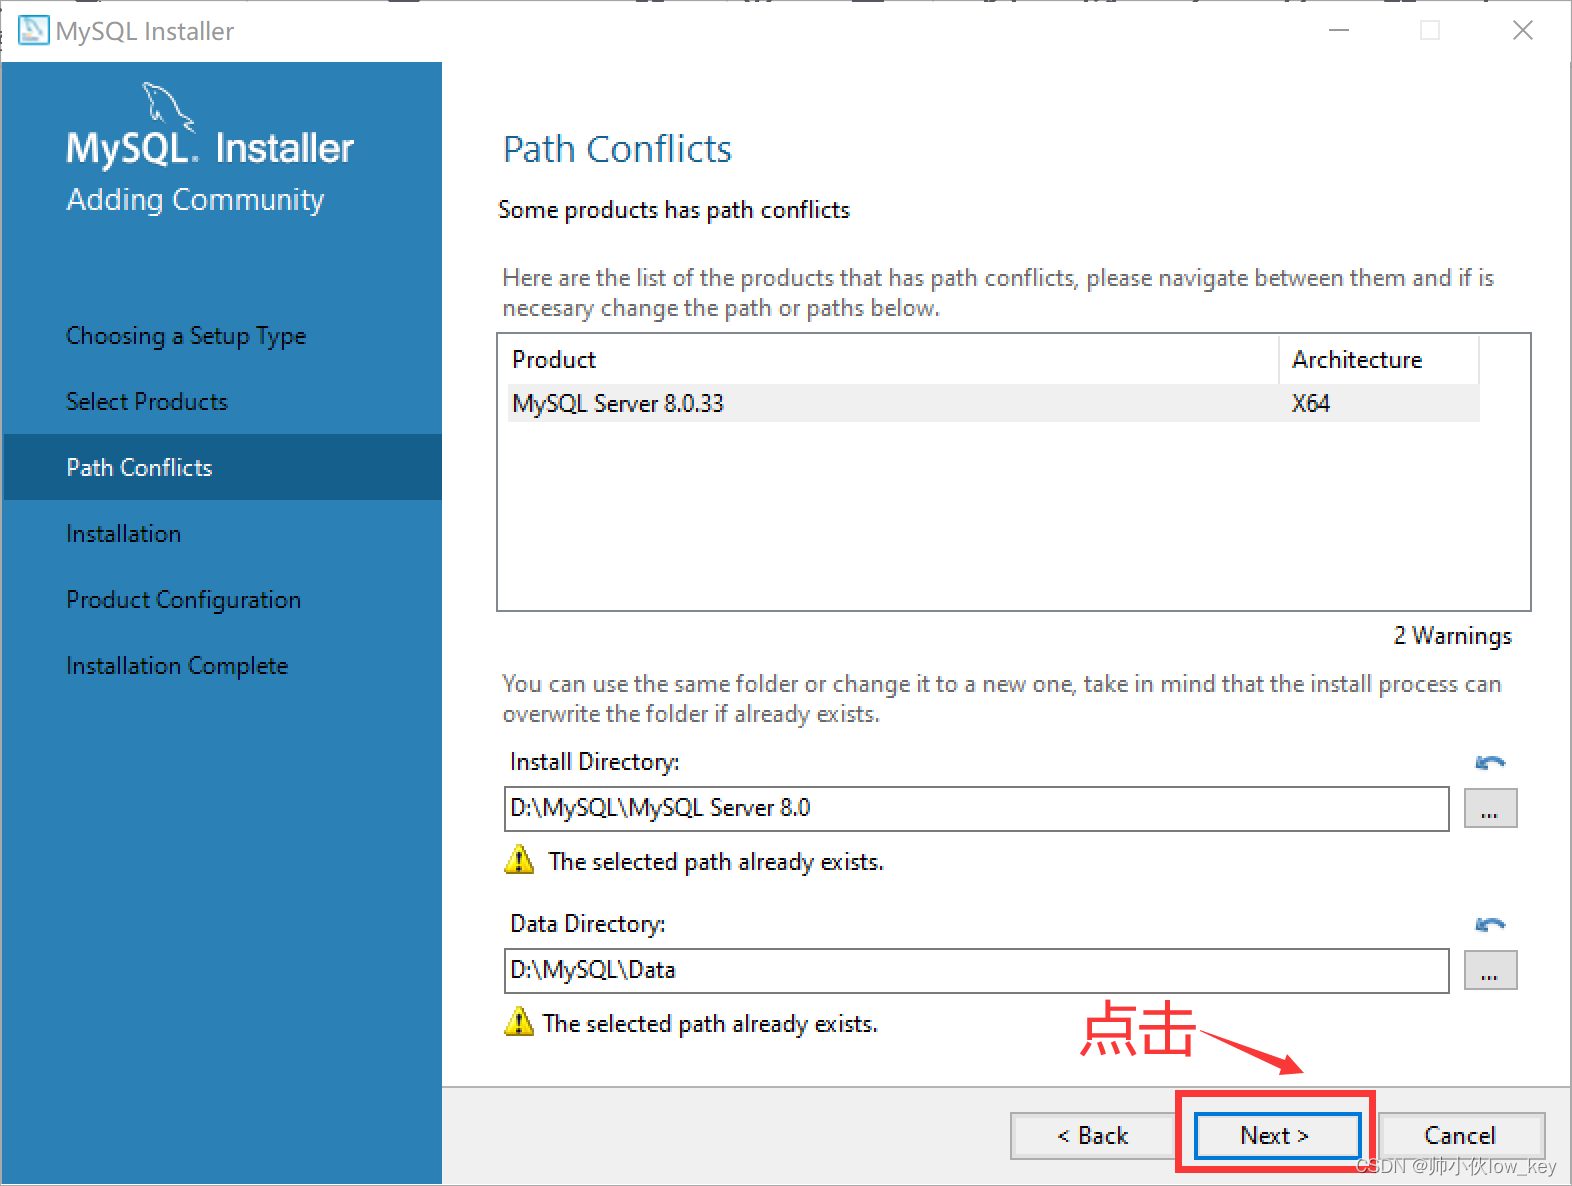
Click [Yes].
11, click [Execute](Implementation)Perform a MySQL Server installation.
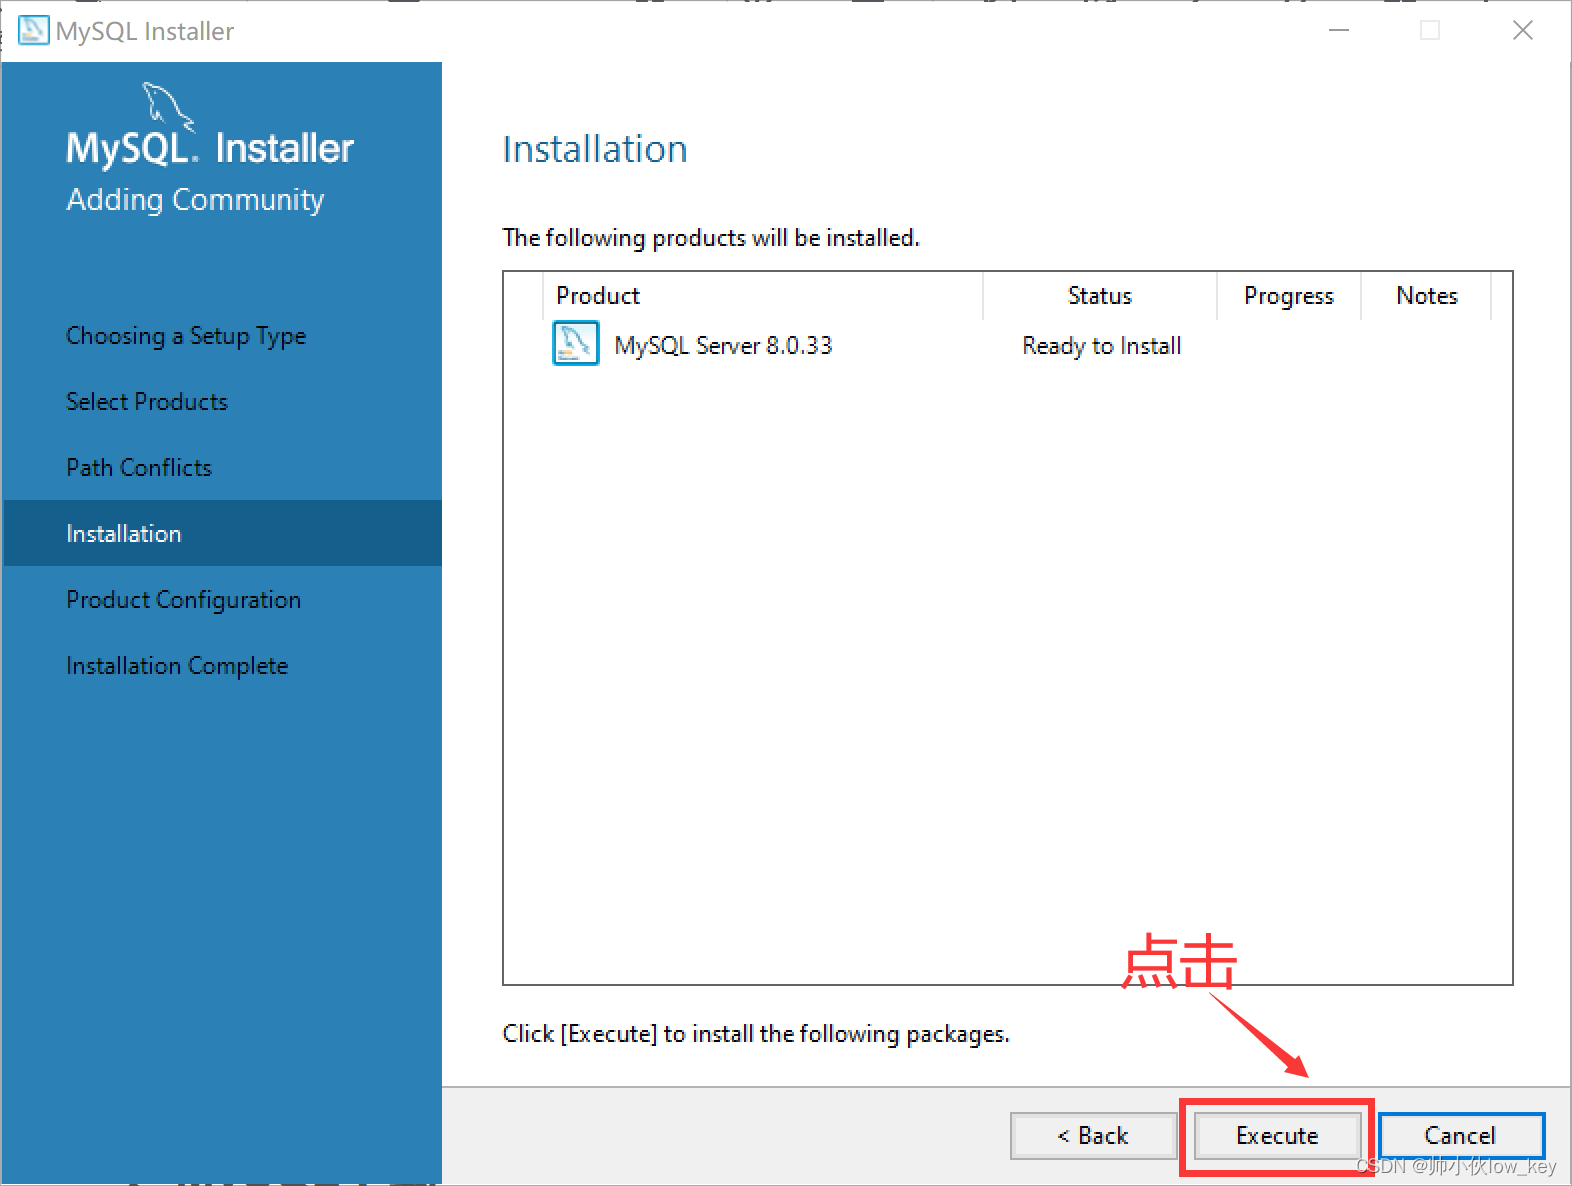
12, after the download click [Next] next.
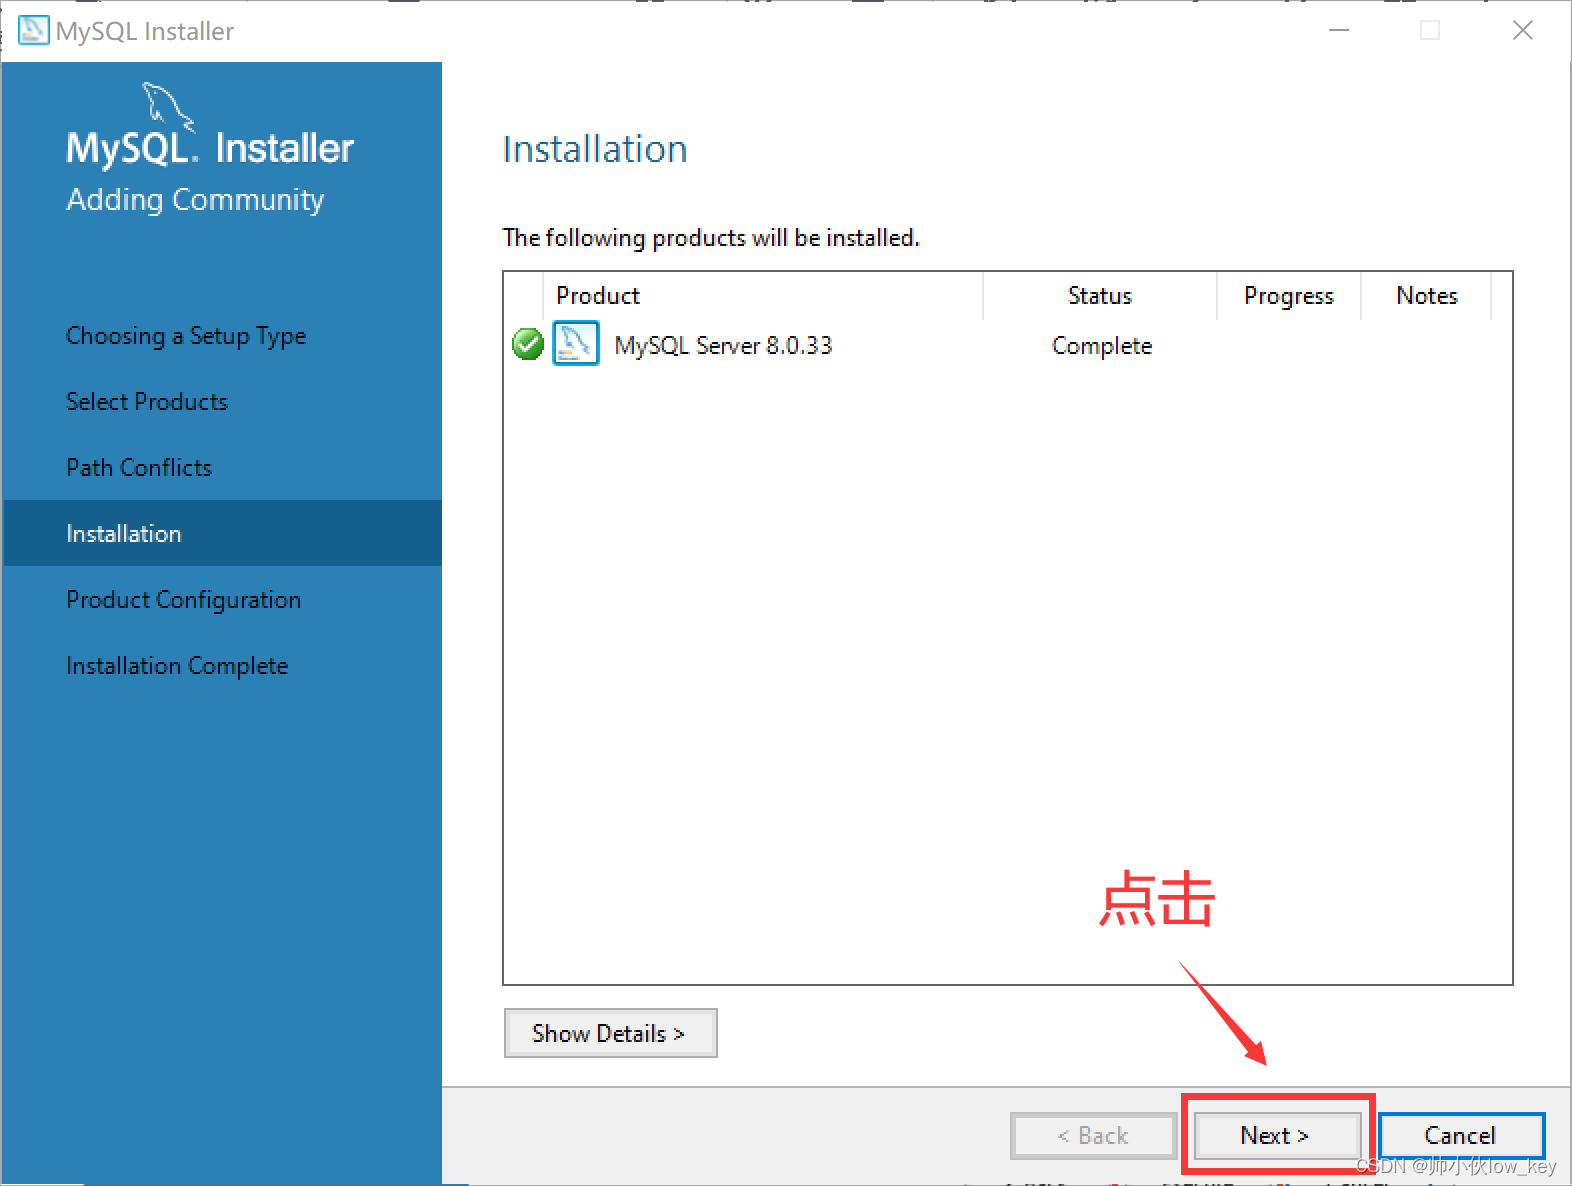
13, click [Next] for product configuration.
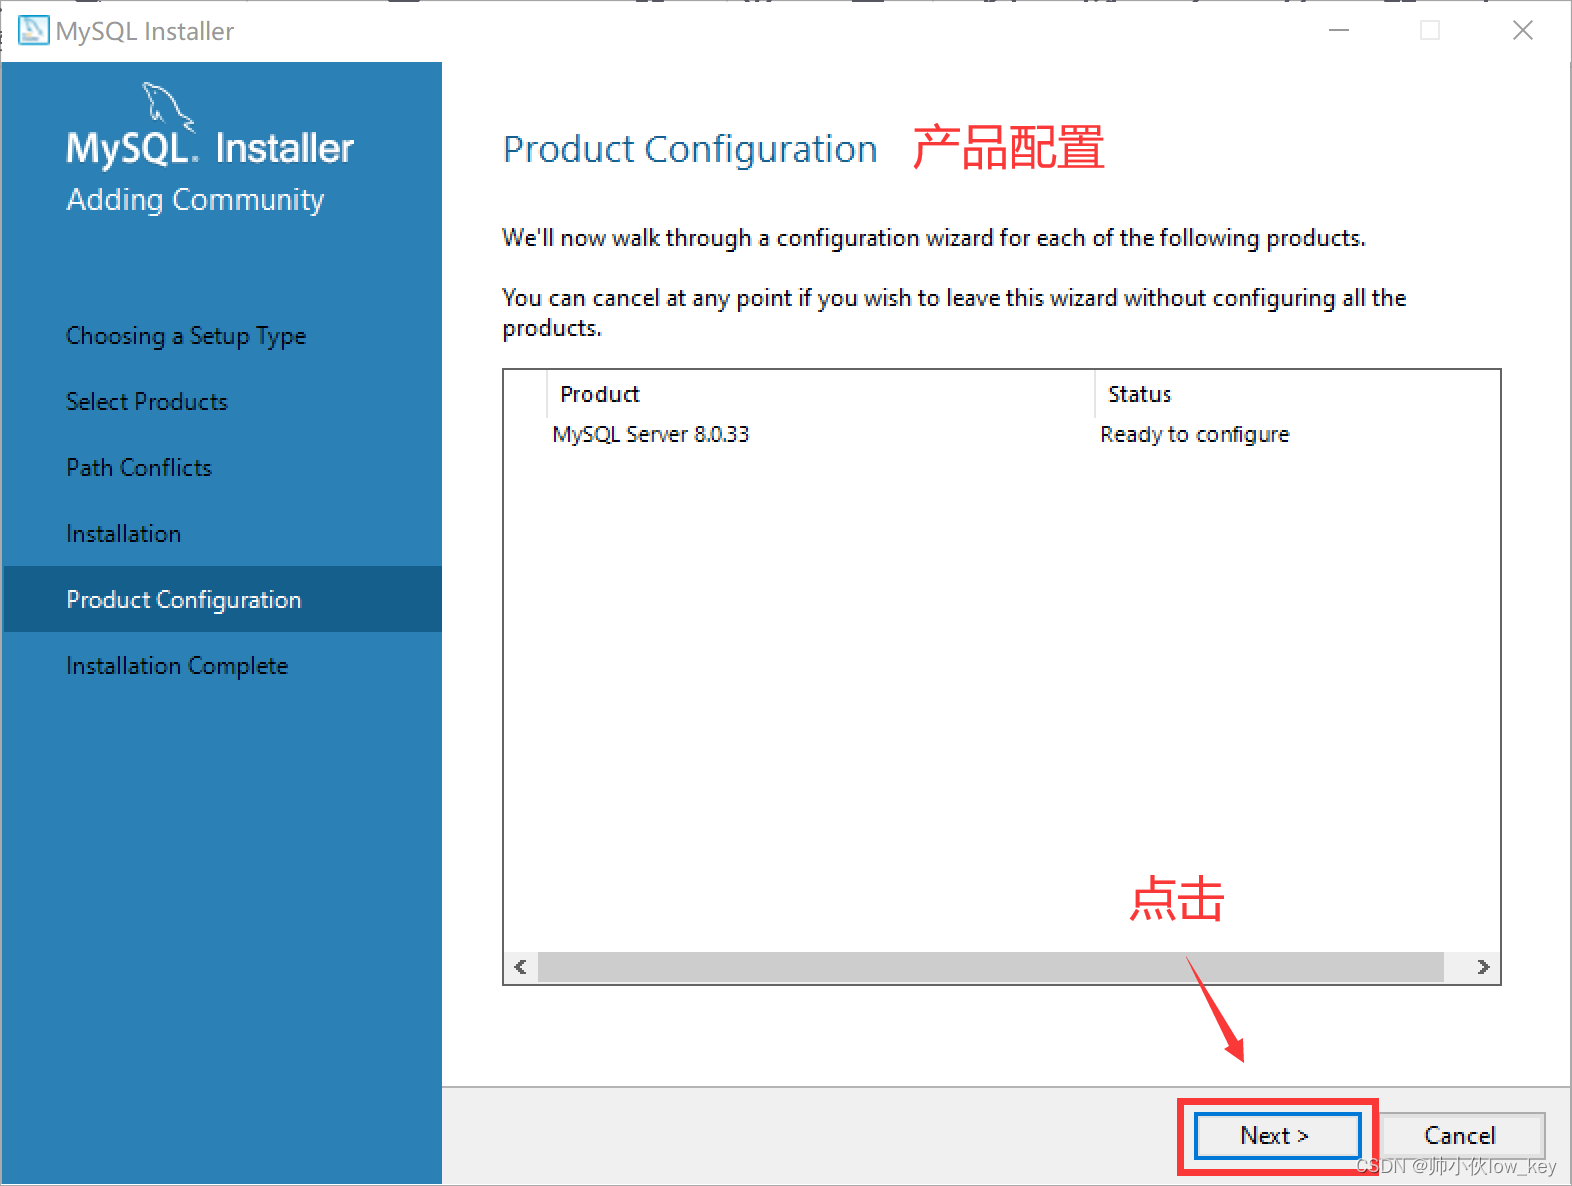
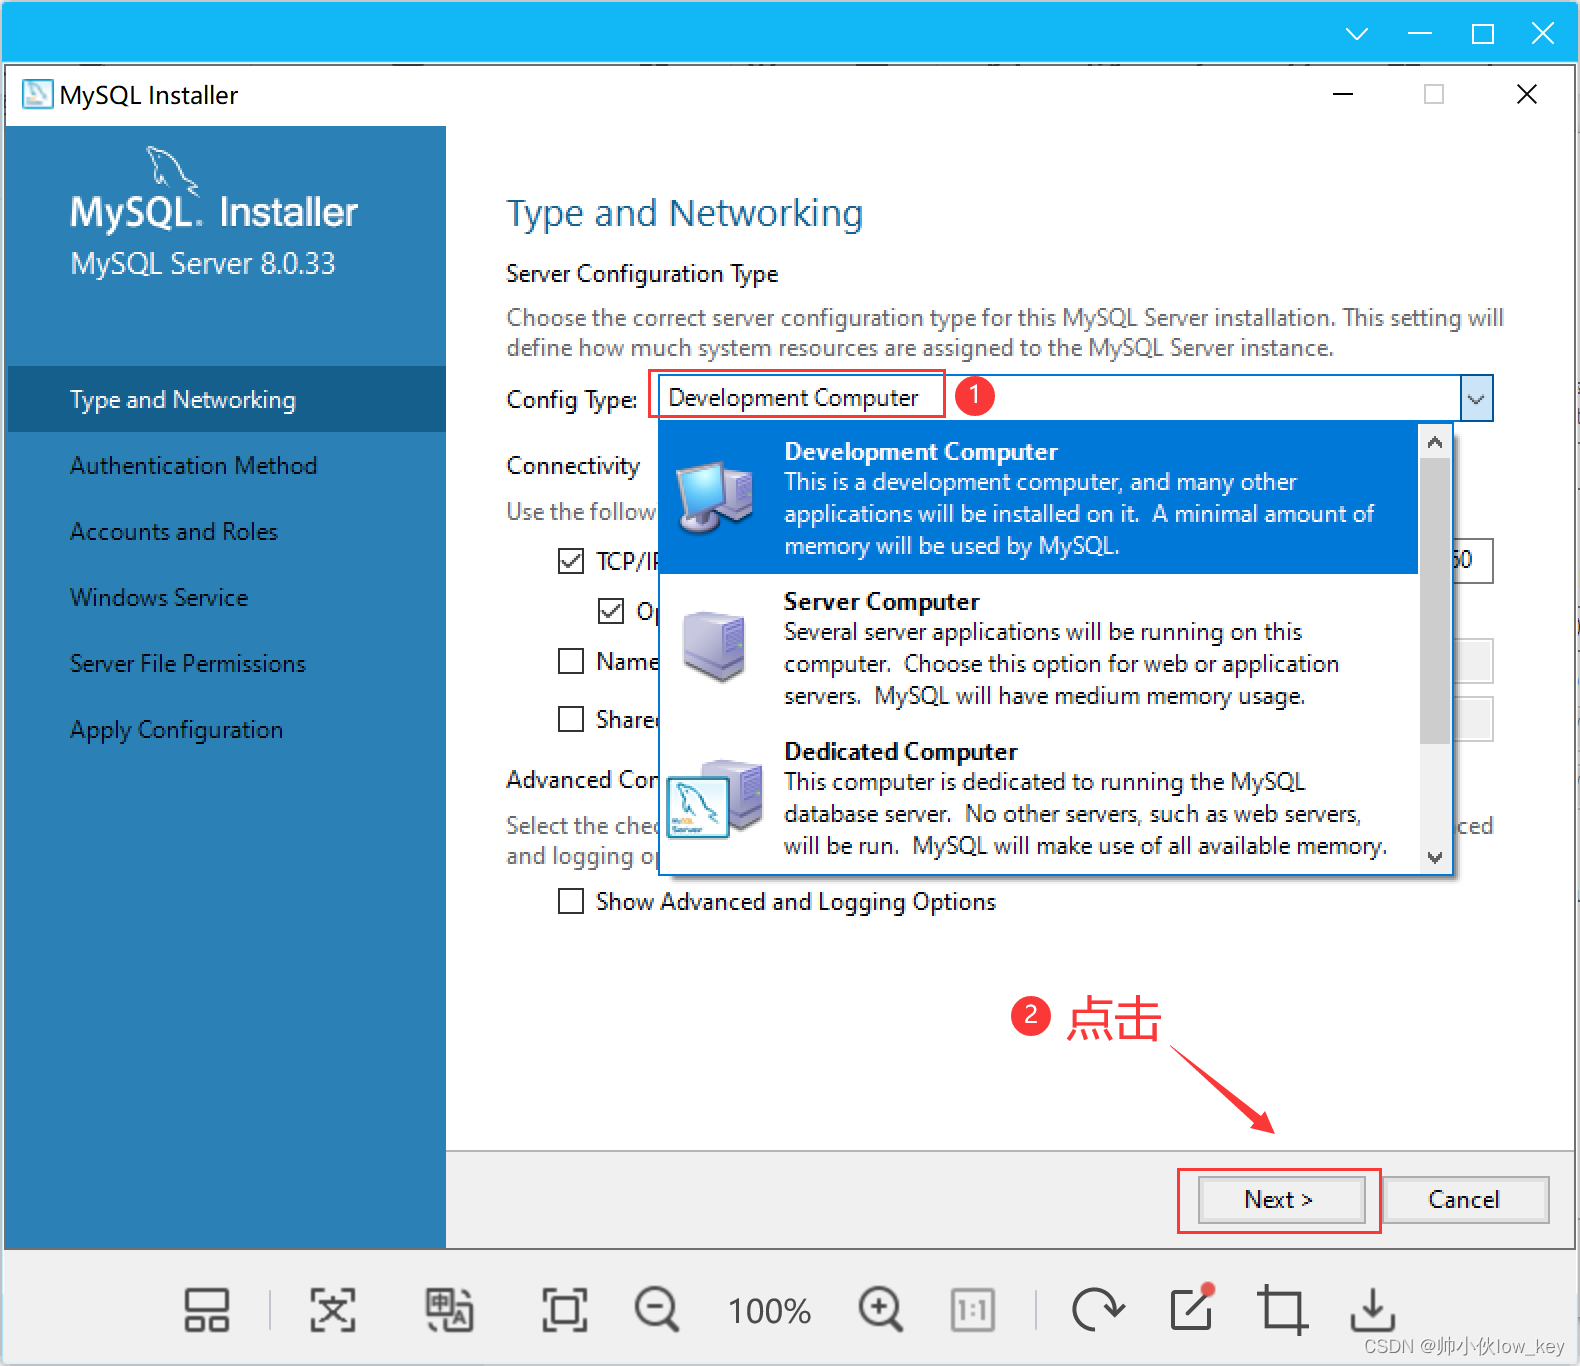
14, select [Developement Computer], all other options default, do not move, click [Next] Next. (port: 3306 means the default port number is 3306)
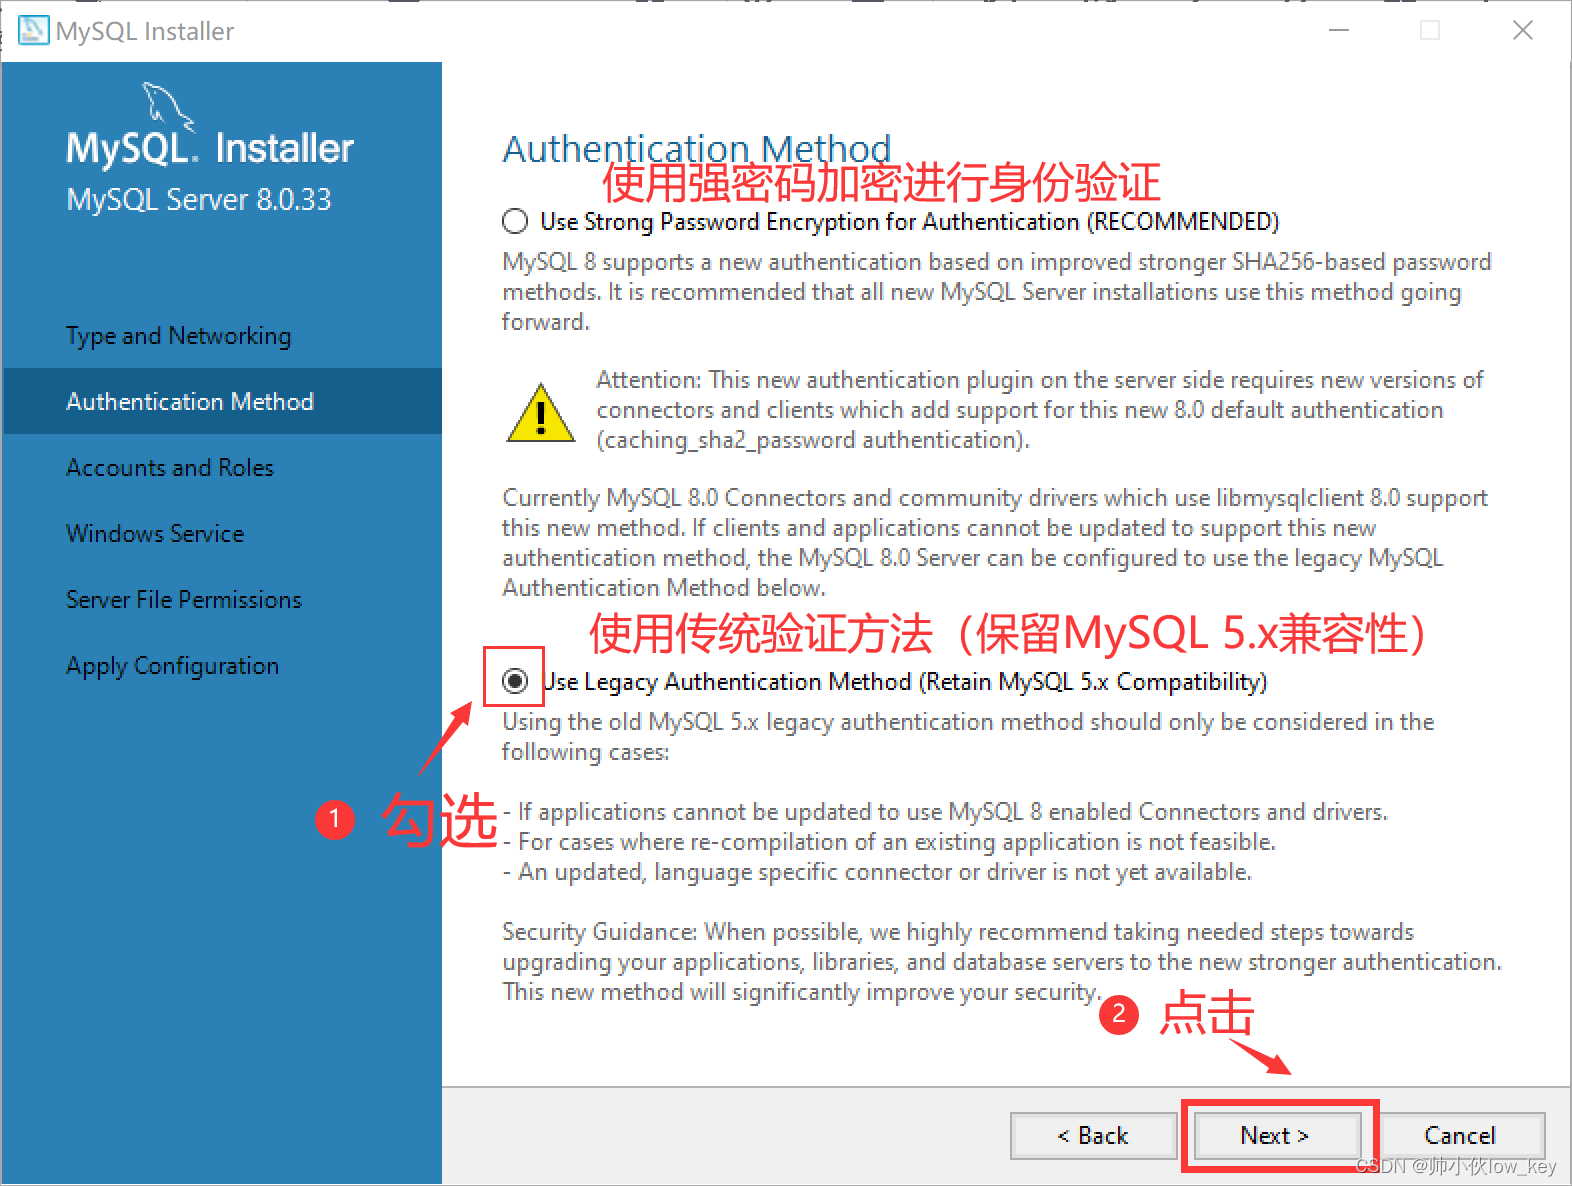
15, check the [Jse Legacy Authentication Method], and then click [Next] next. Because the first is a new version of the encryption of the authentication method, due to some of the old version of the application may not support, so choose the traditional authentication method.
16. Setting the MySQL root user password(Remember, the root password must be remembered, because later you need to use the root user to log in to MySQL, my mysql password is 123456, so it shows that the password strength is weak)Click [Next] to go to the next step.
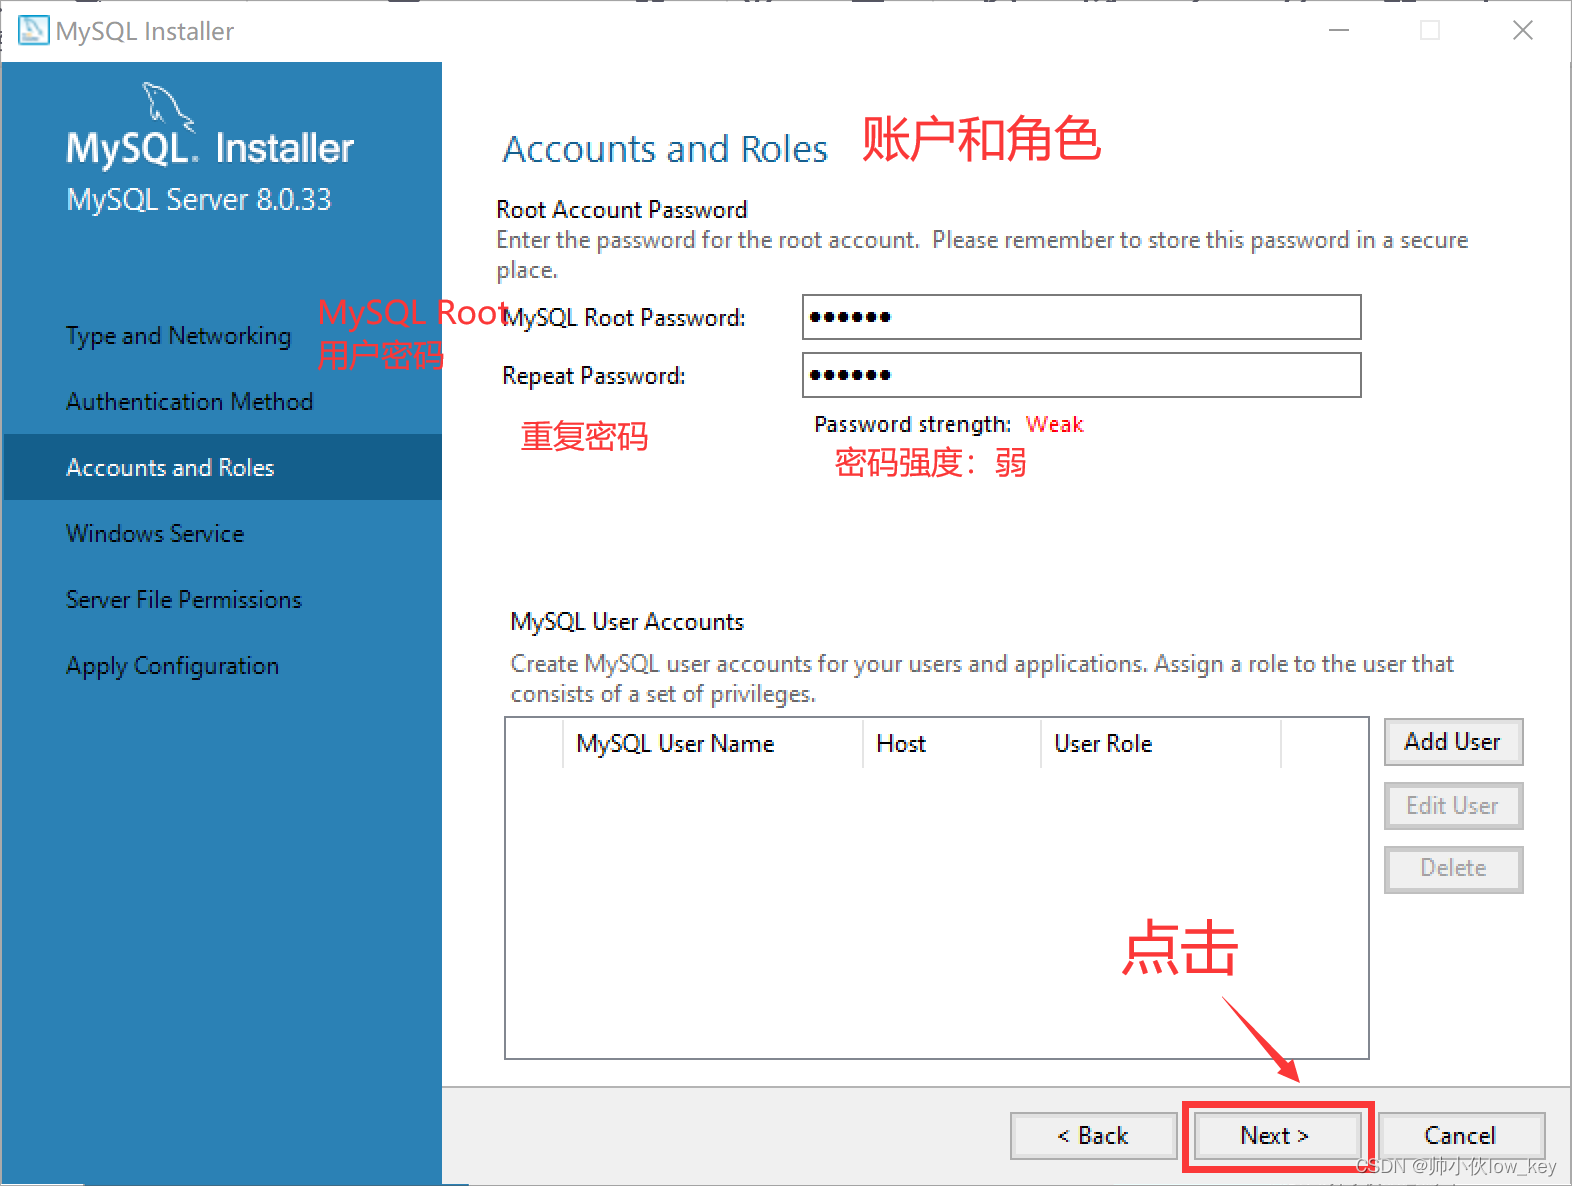
17, all defaults, click [Next] Next.
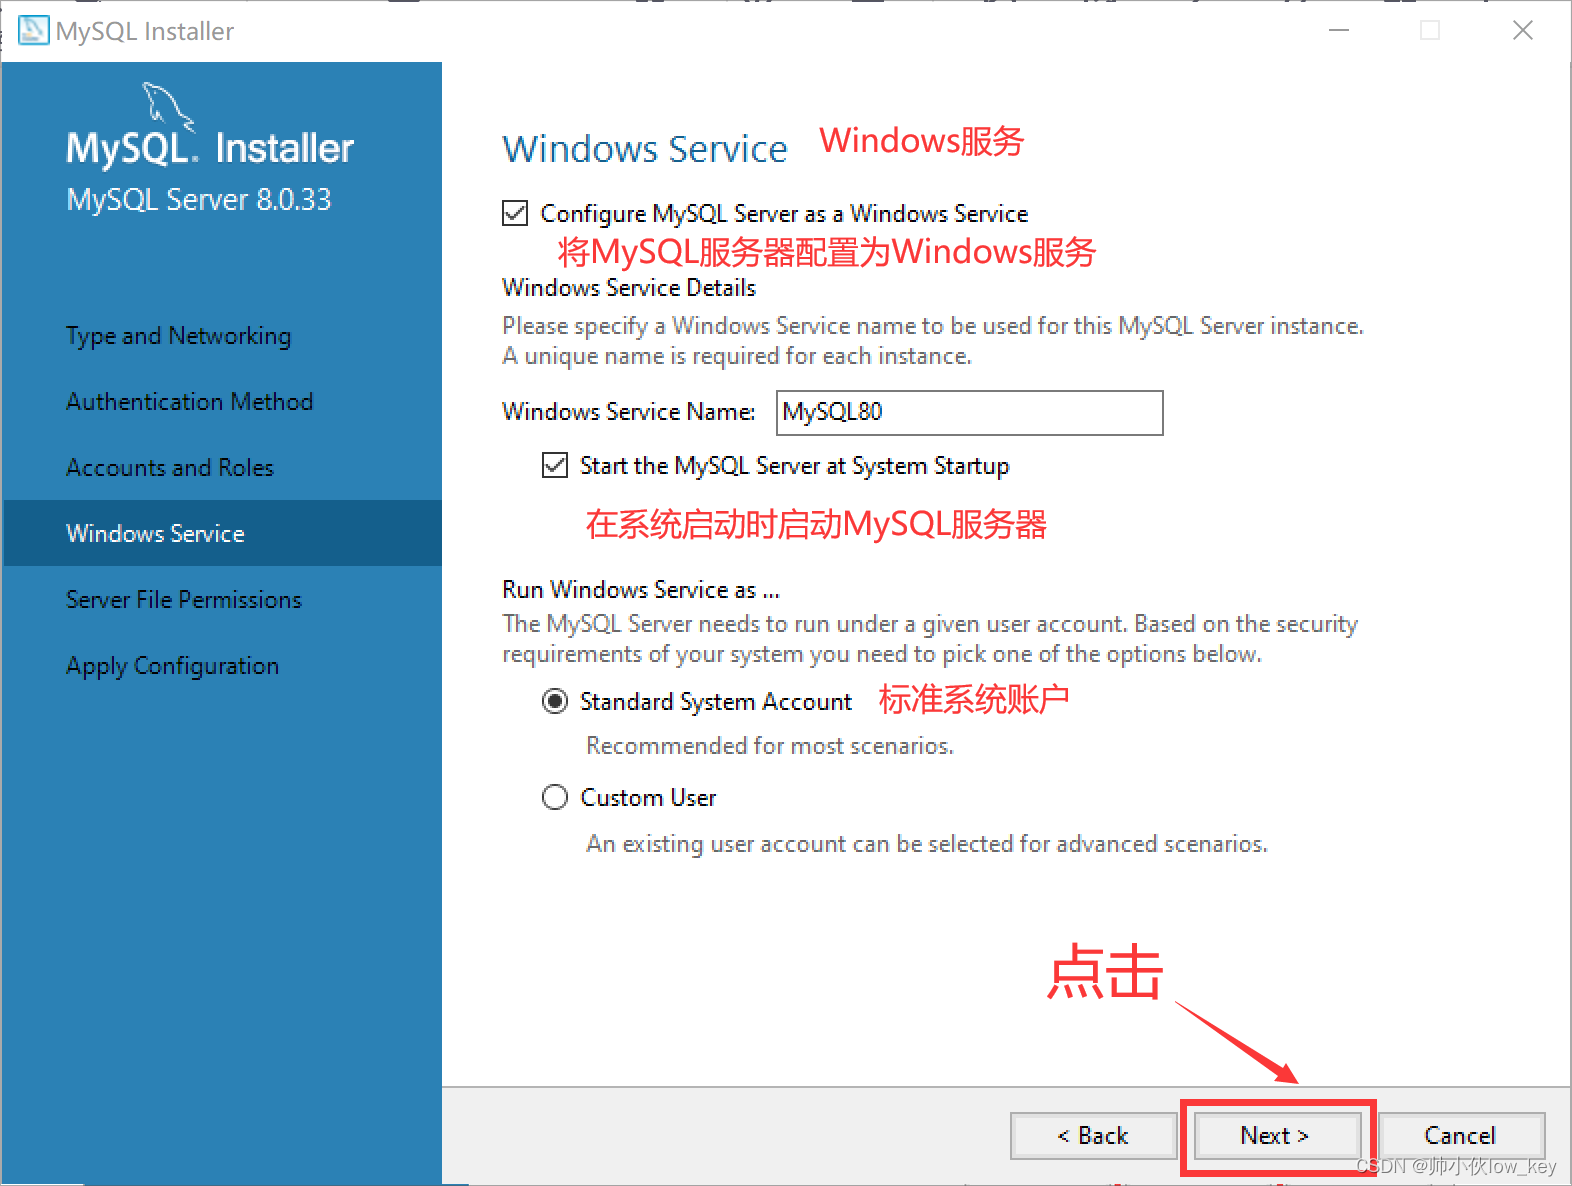
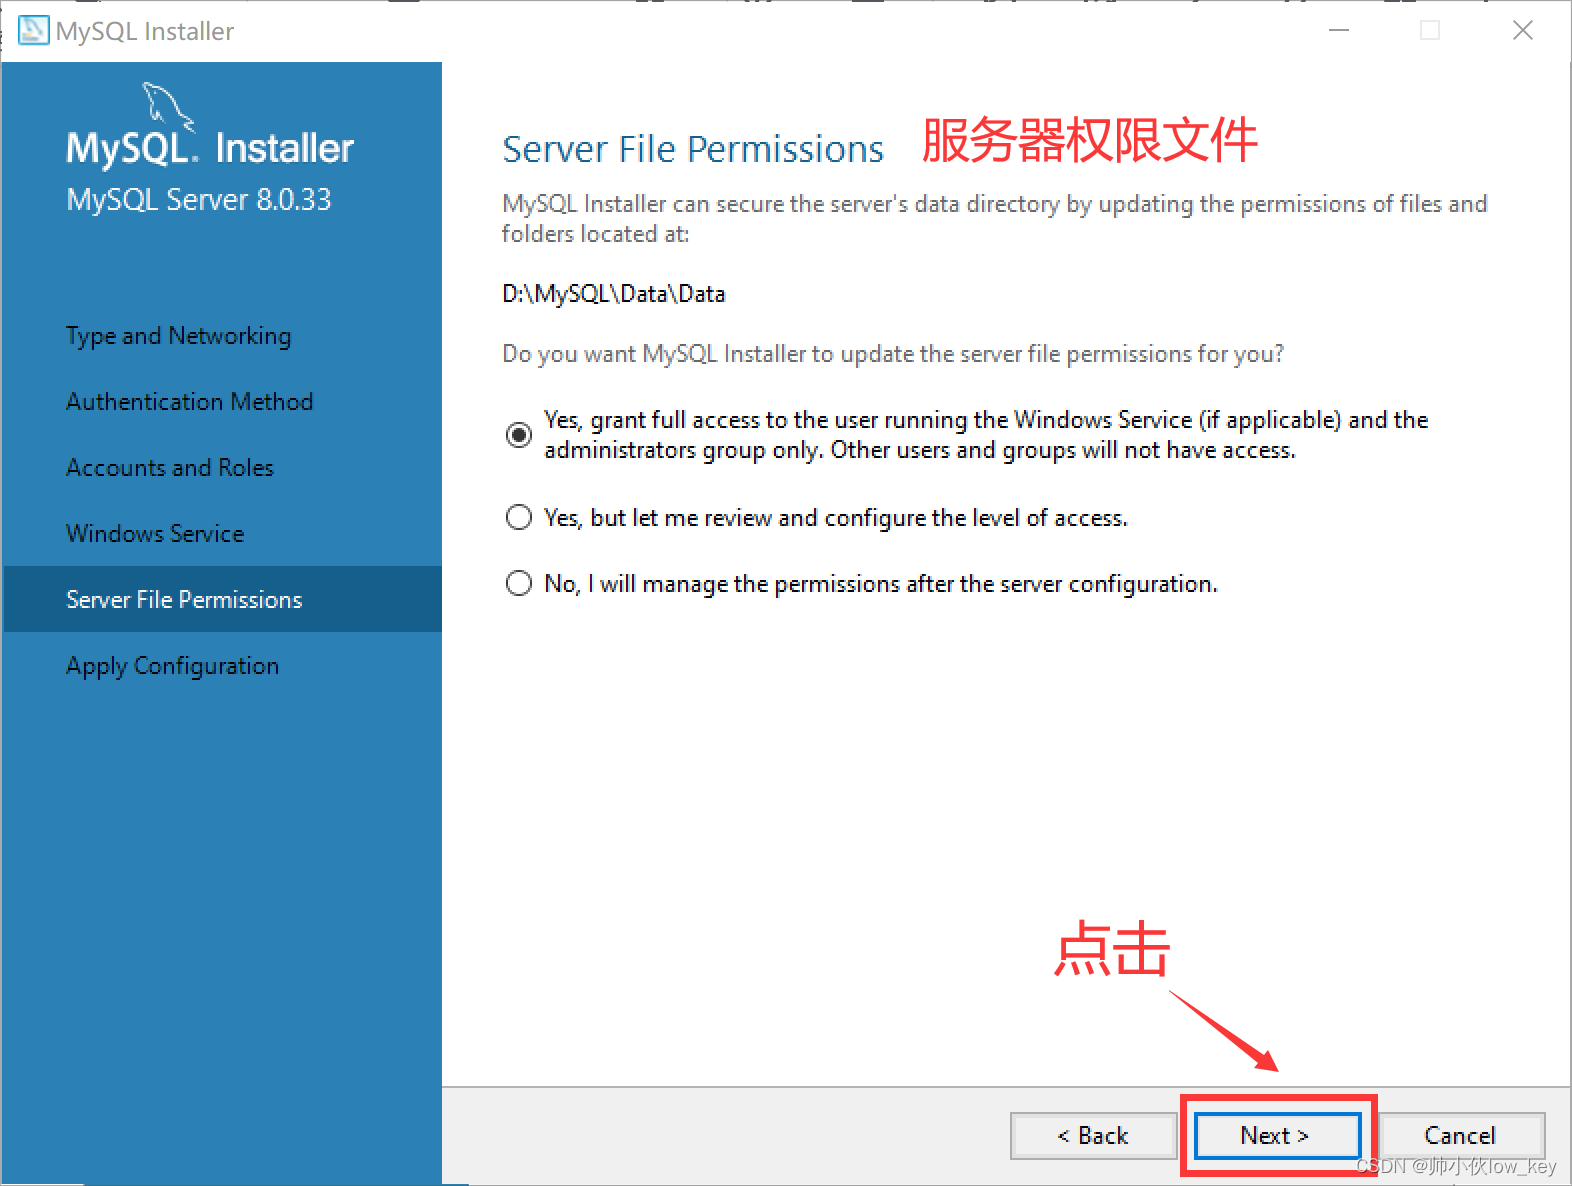
18. Check the first one by default to give MySQL administrator privileges directly.
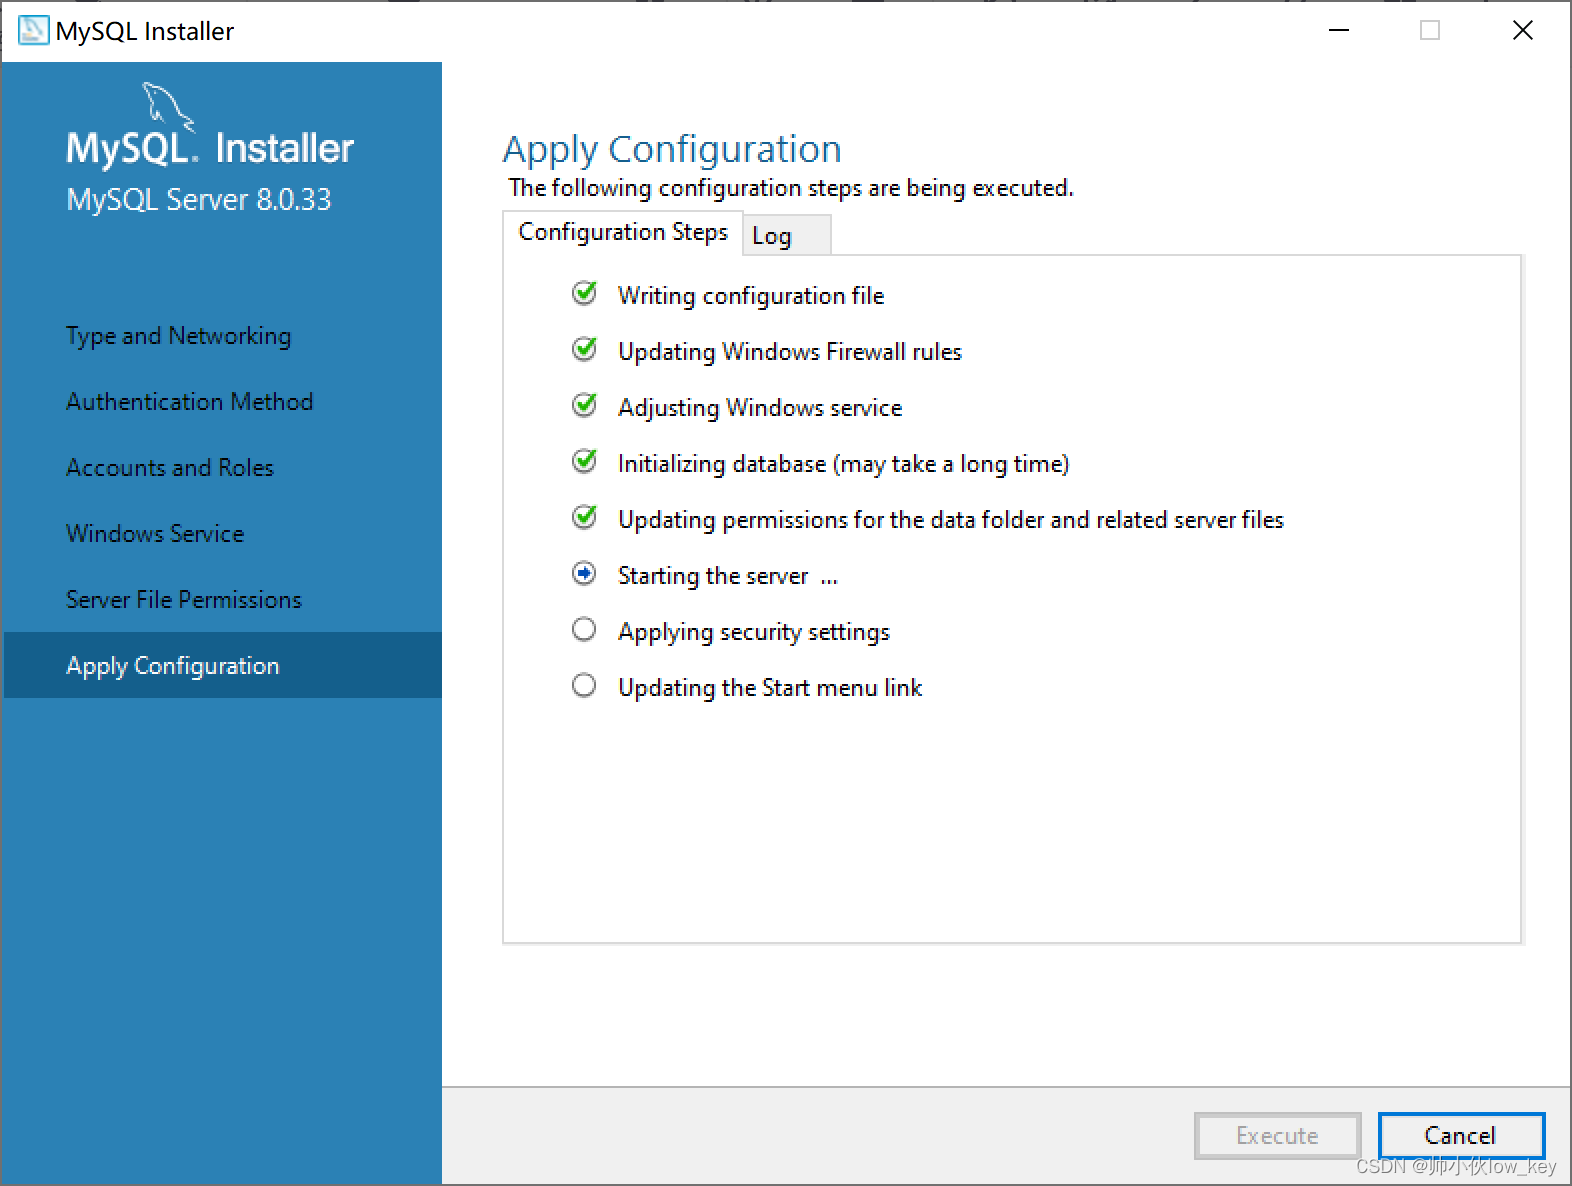
19. Click [Execute] to install the application configuration.
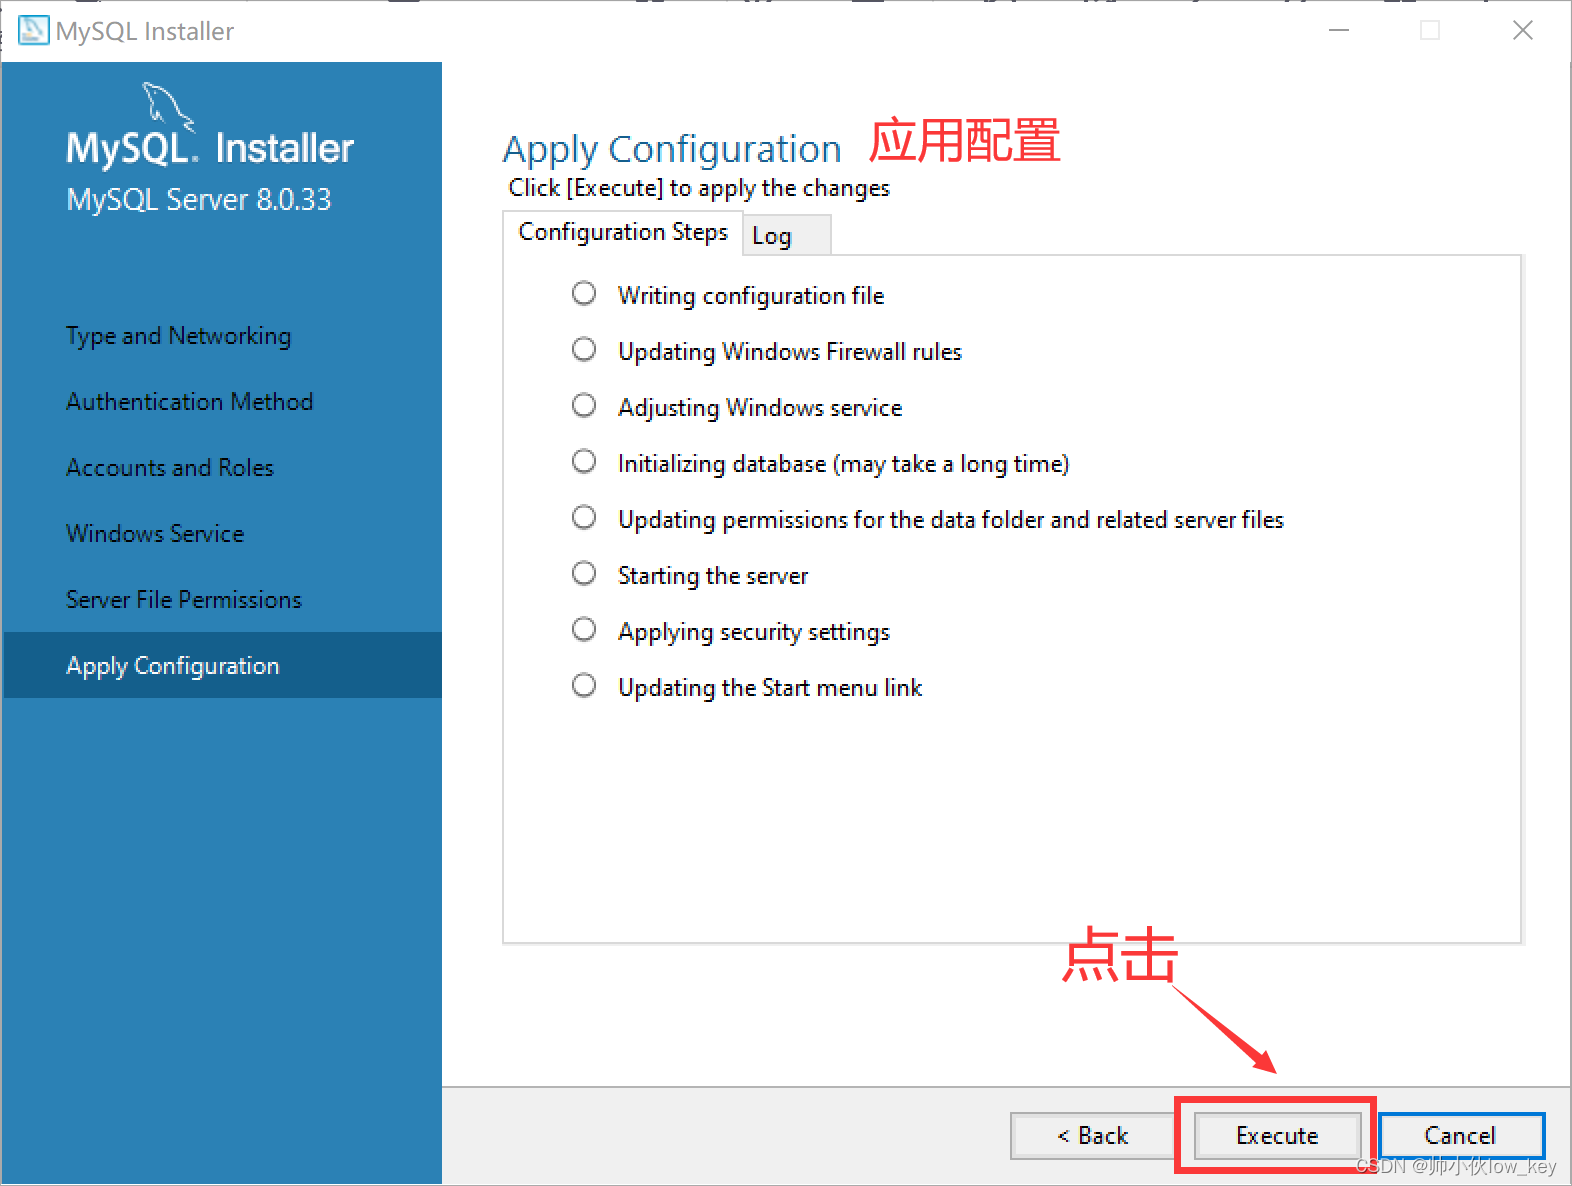
20, is being installed, the installation will be completed in order to tick.
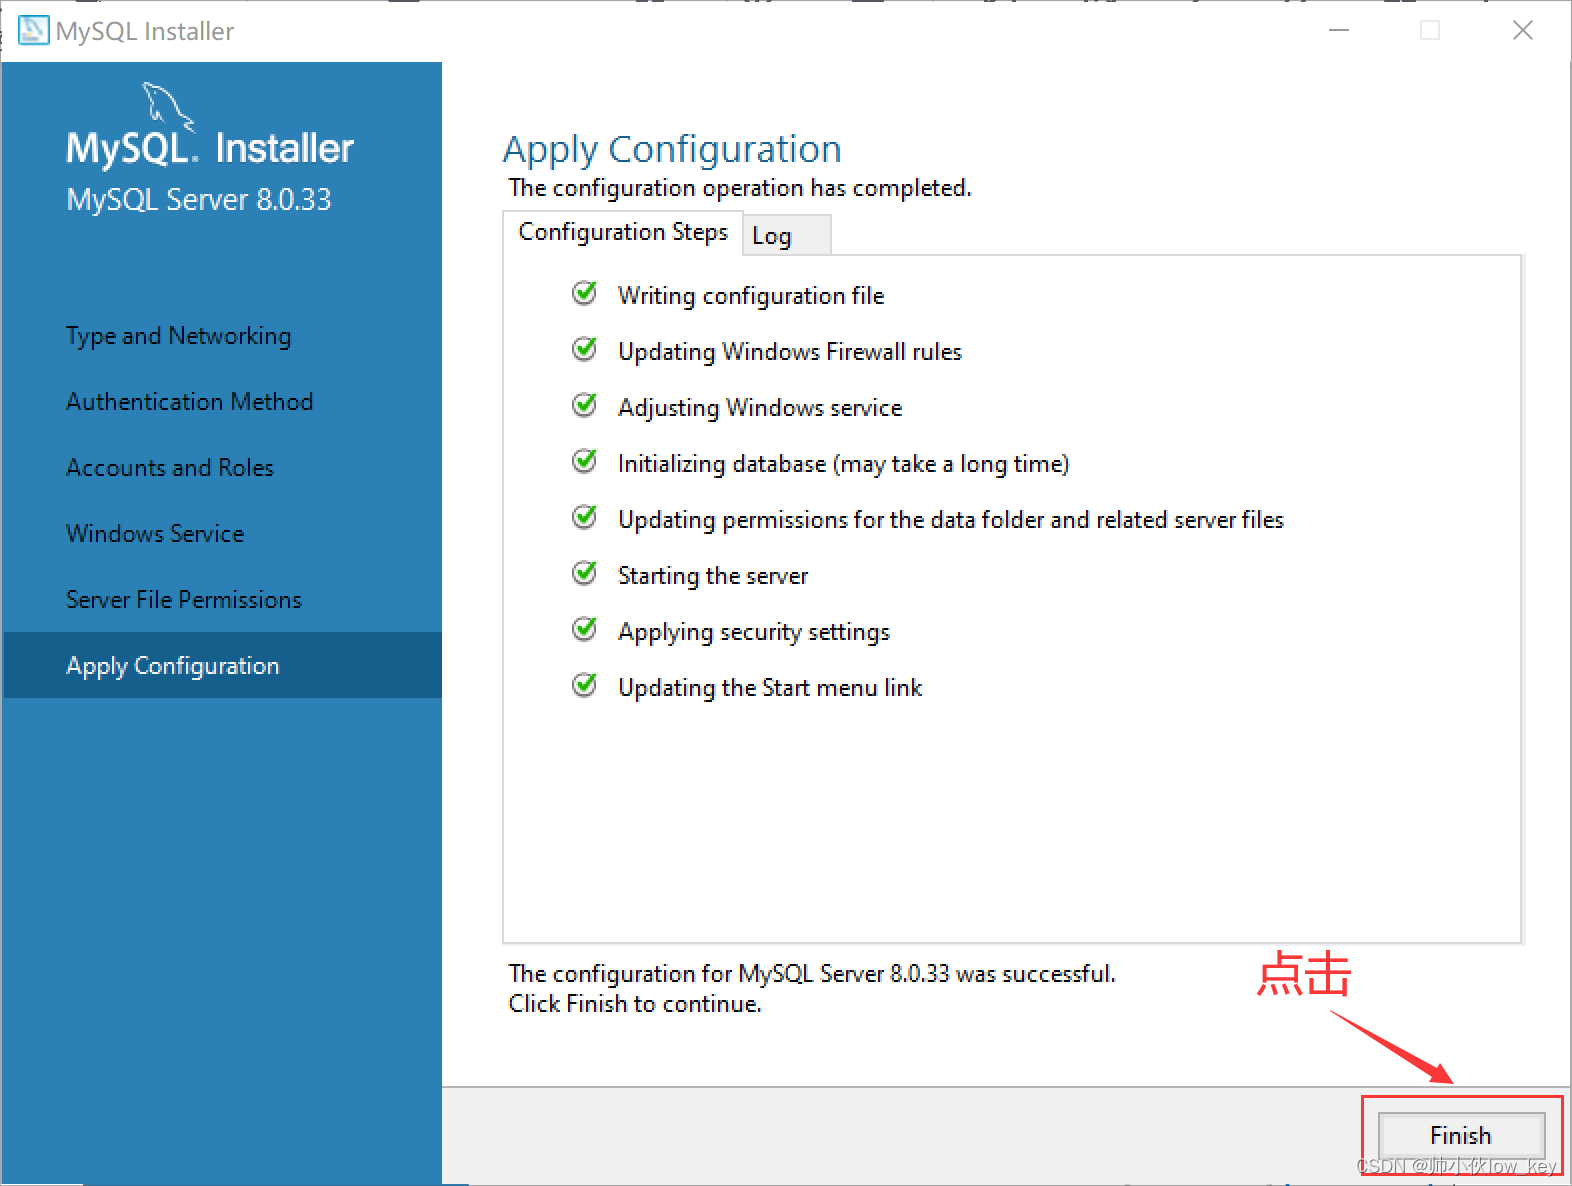
21. After the MySQL server is configured, click [Finsh] to finish.
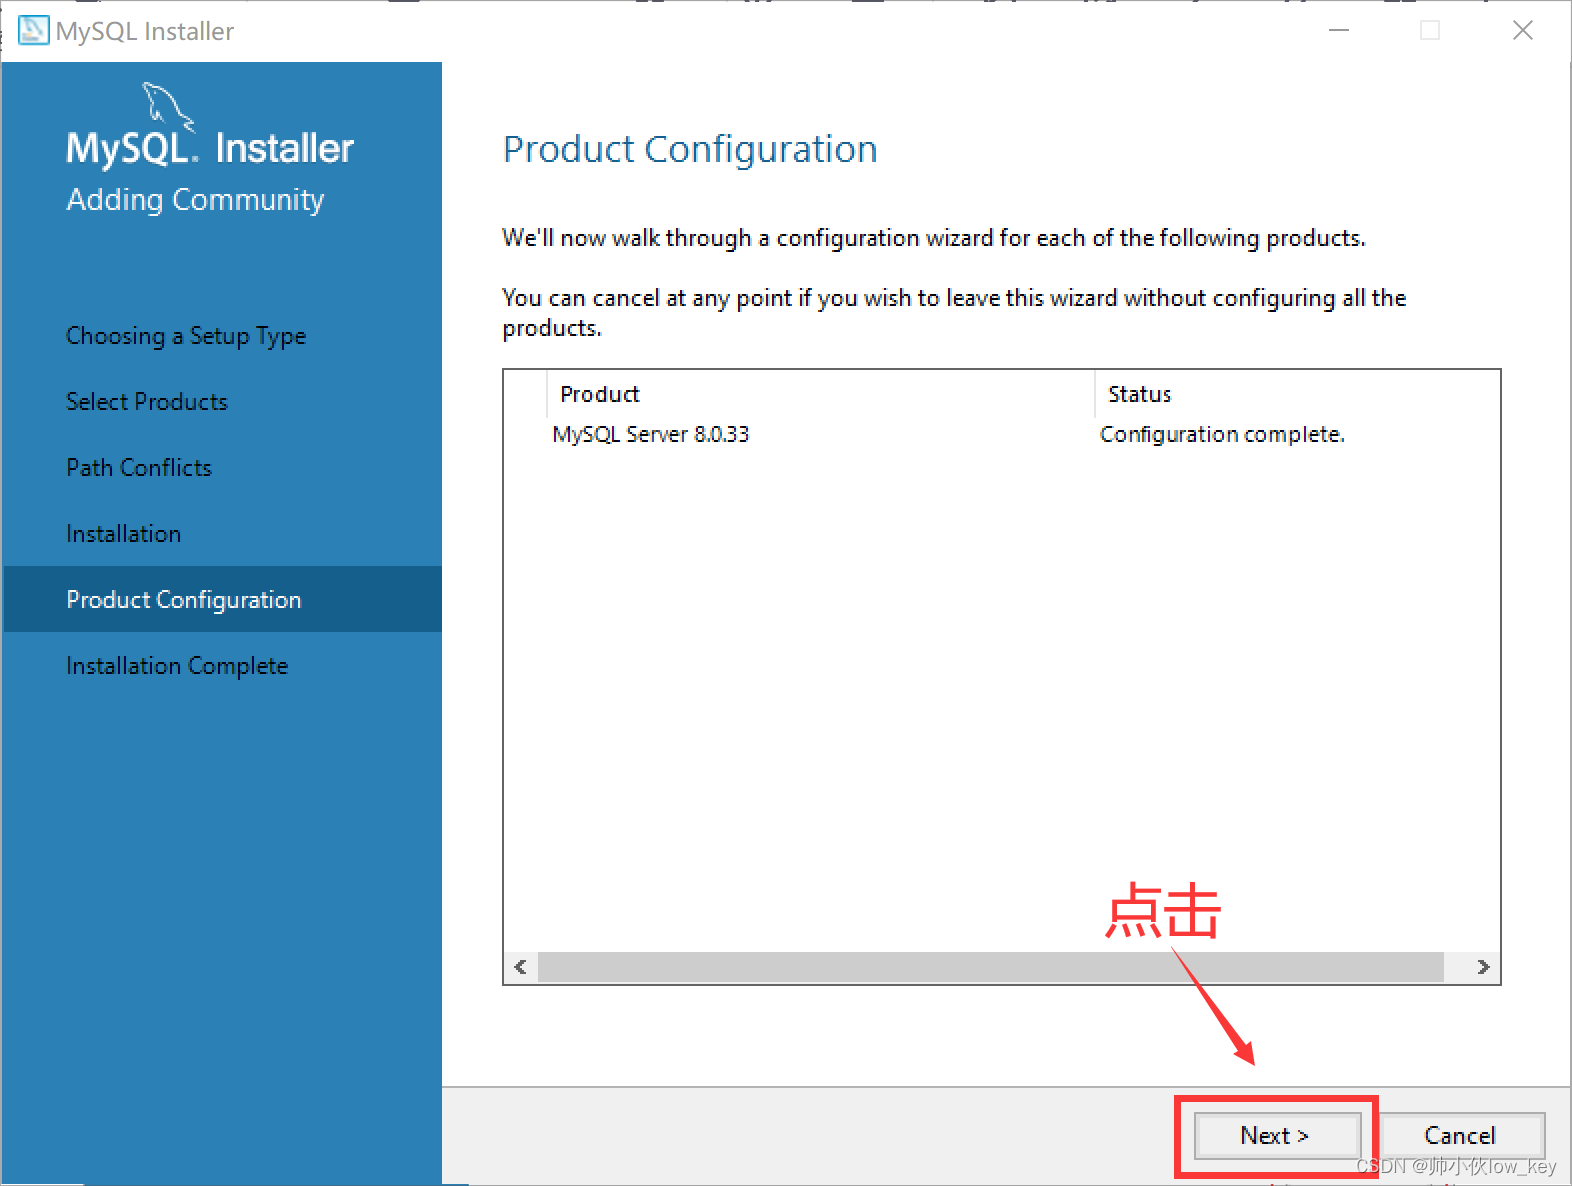
22, click [Next] next.
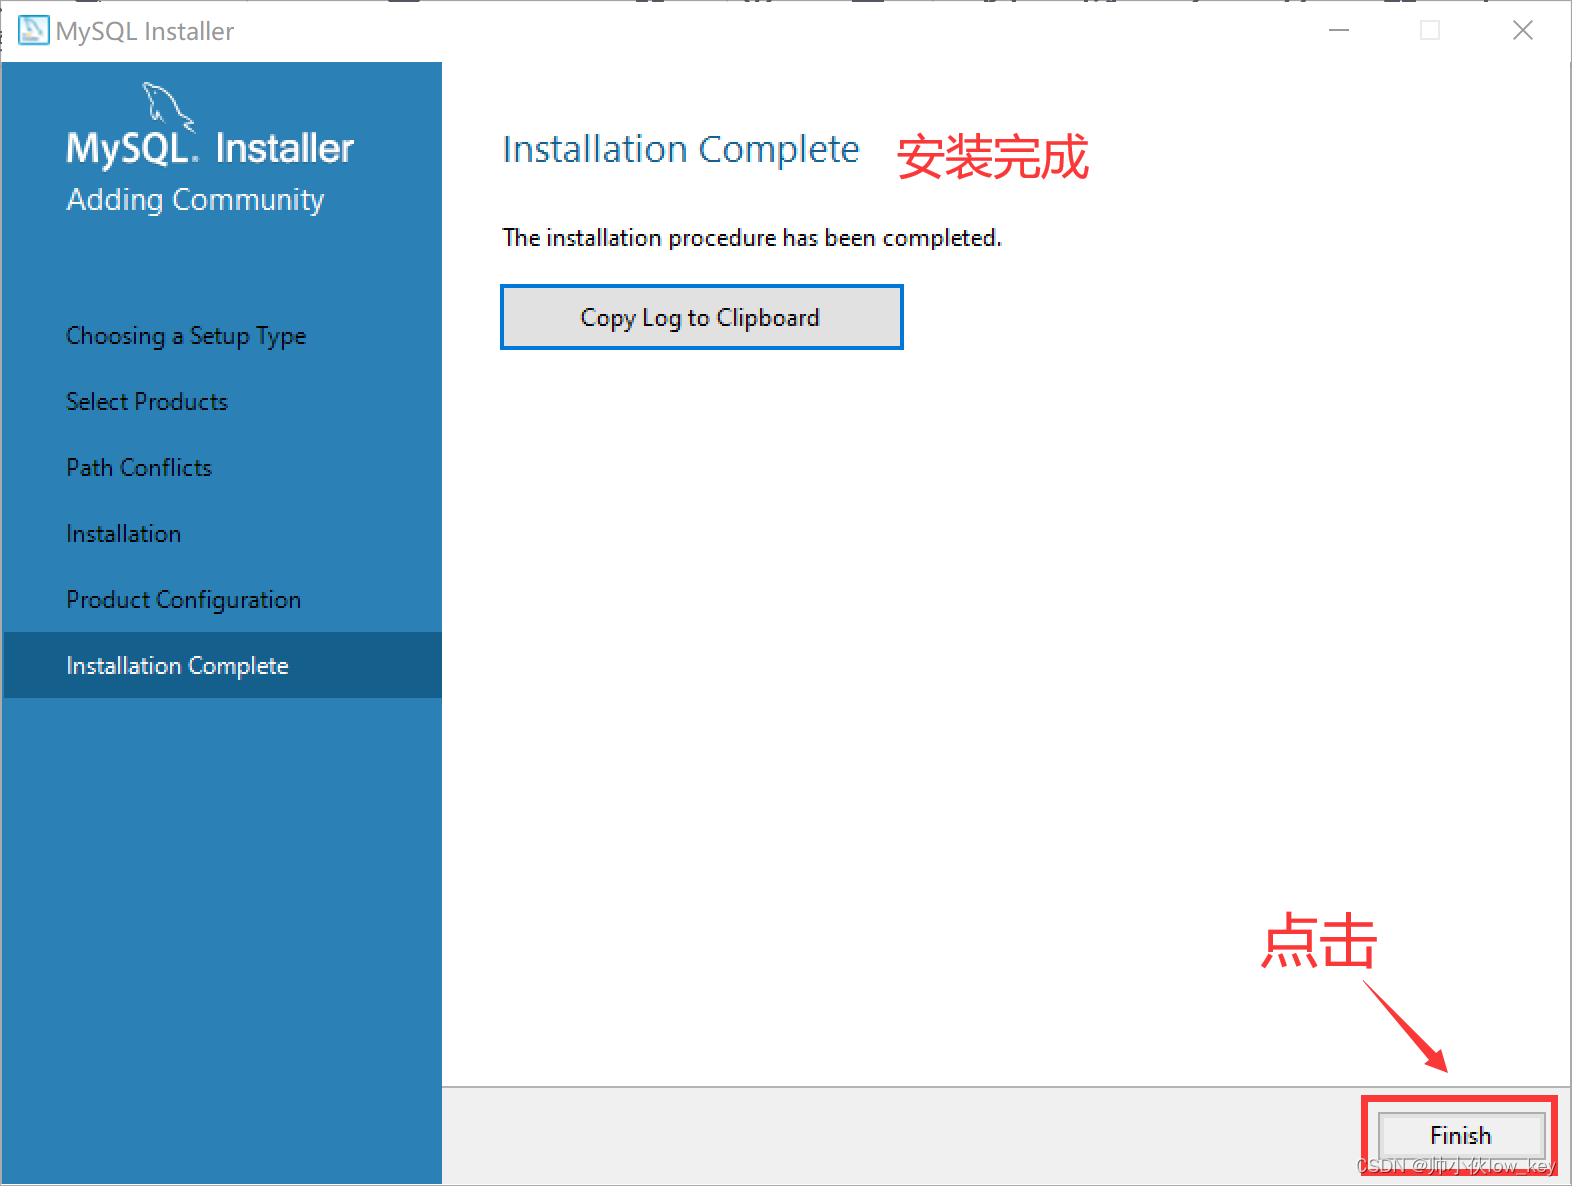
23, click [Finsh] to complete the installation.
III. Configuring environment variables
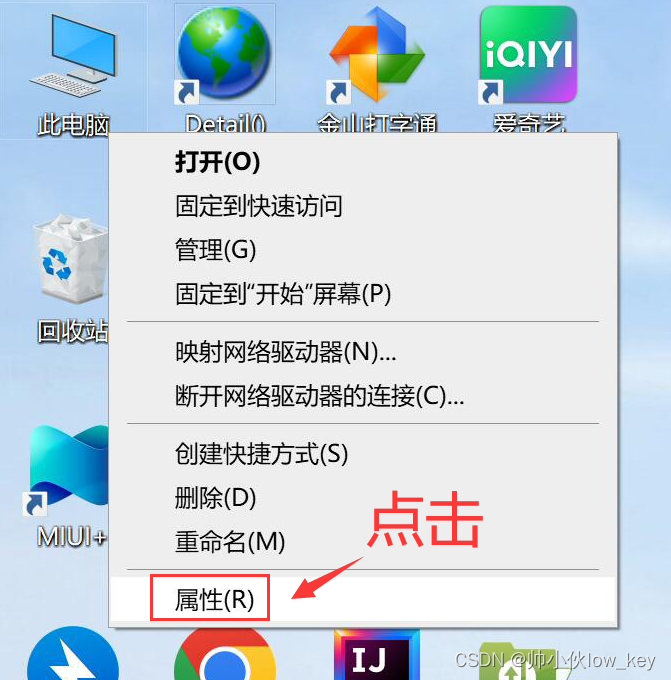
1, right-click on the desktop “this computer”, click “Properties”.
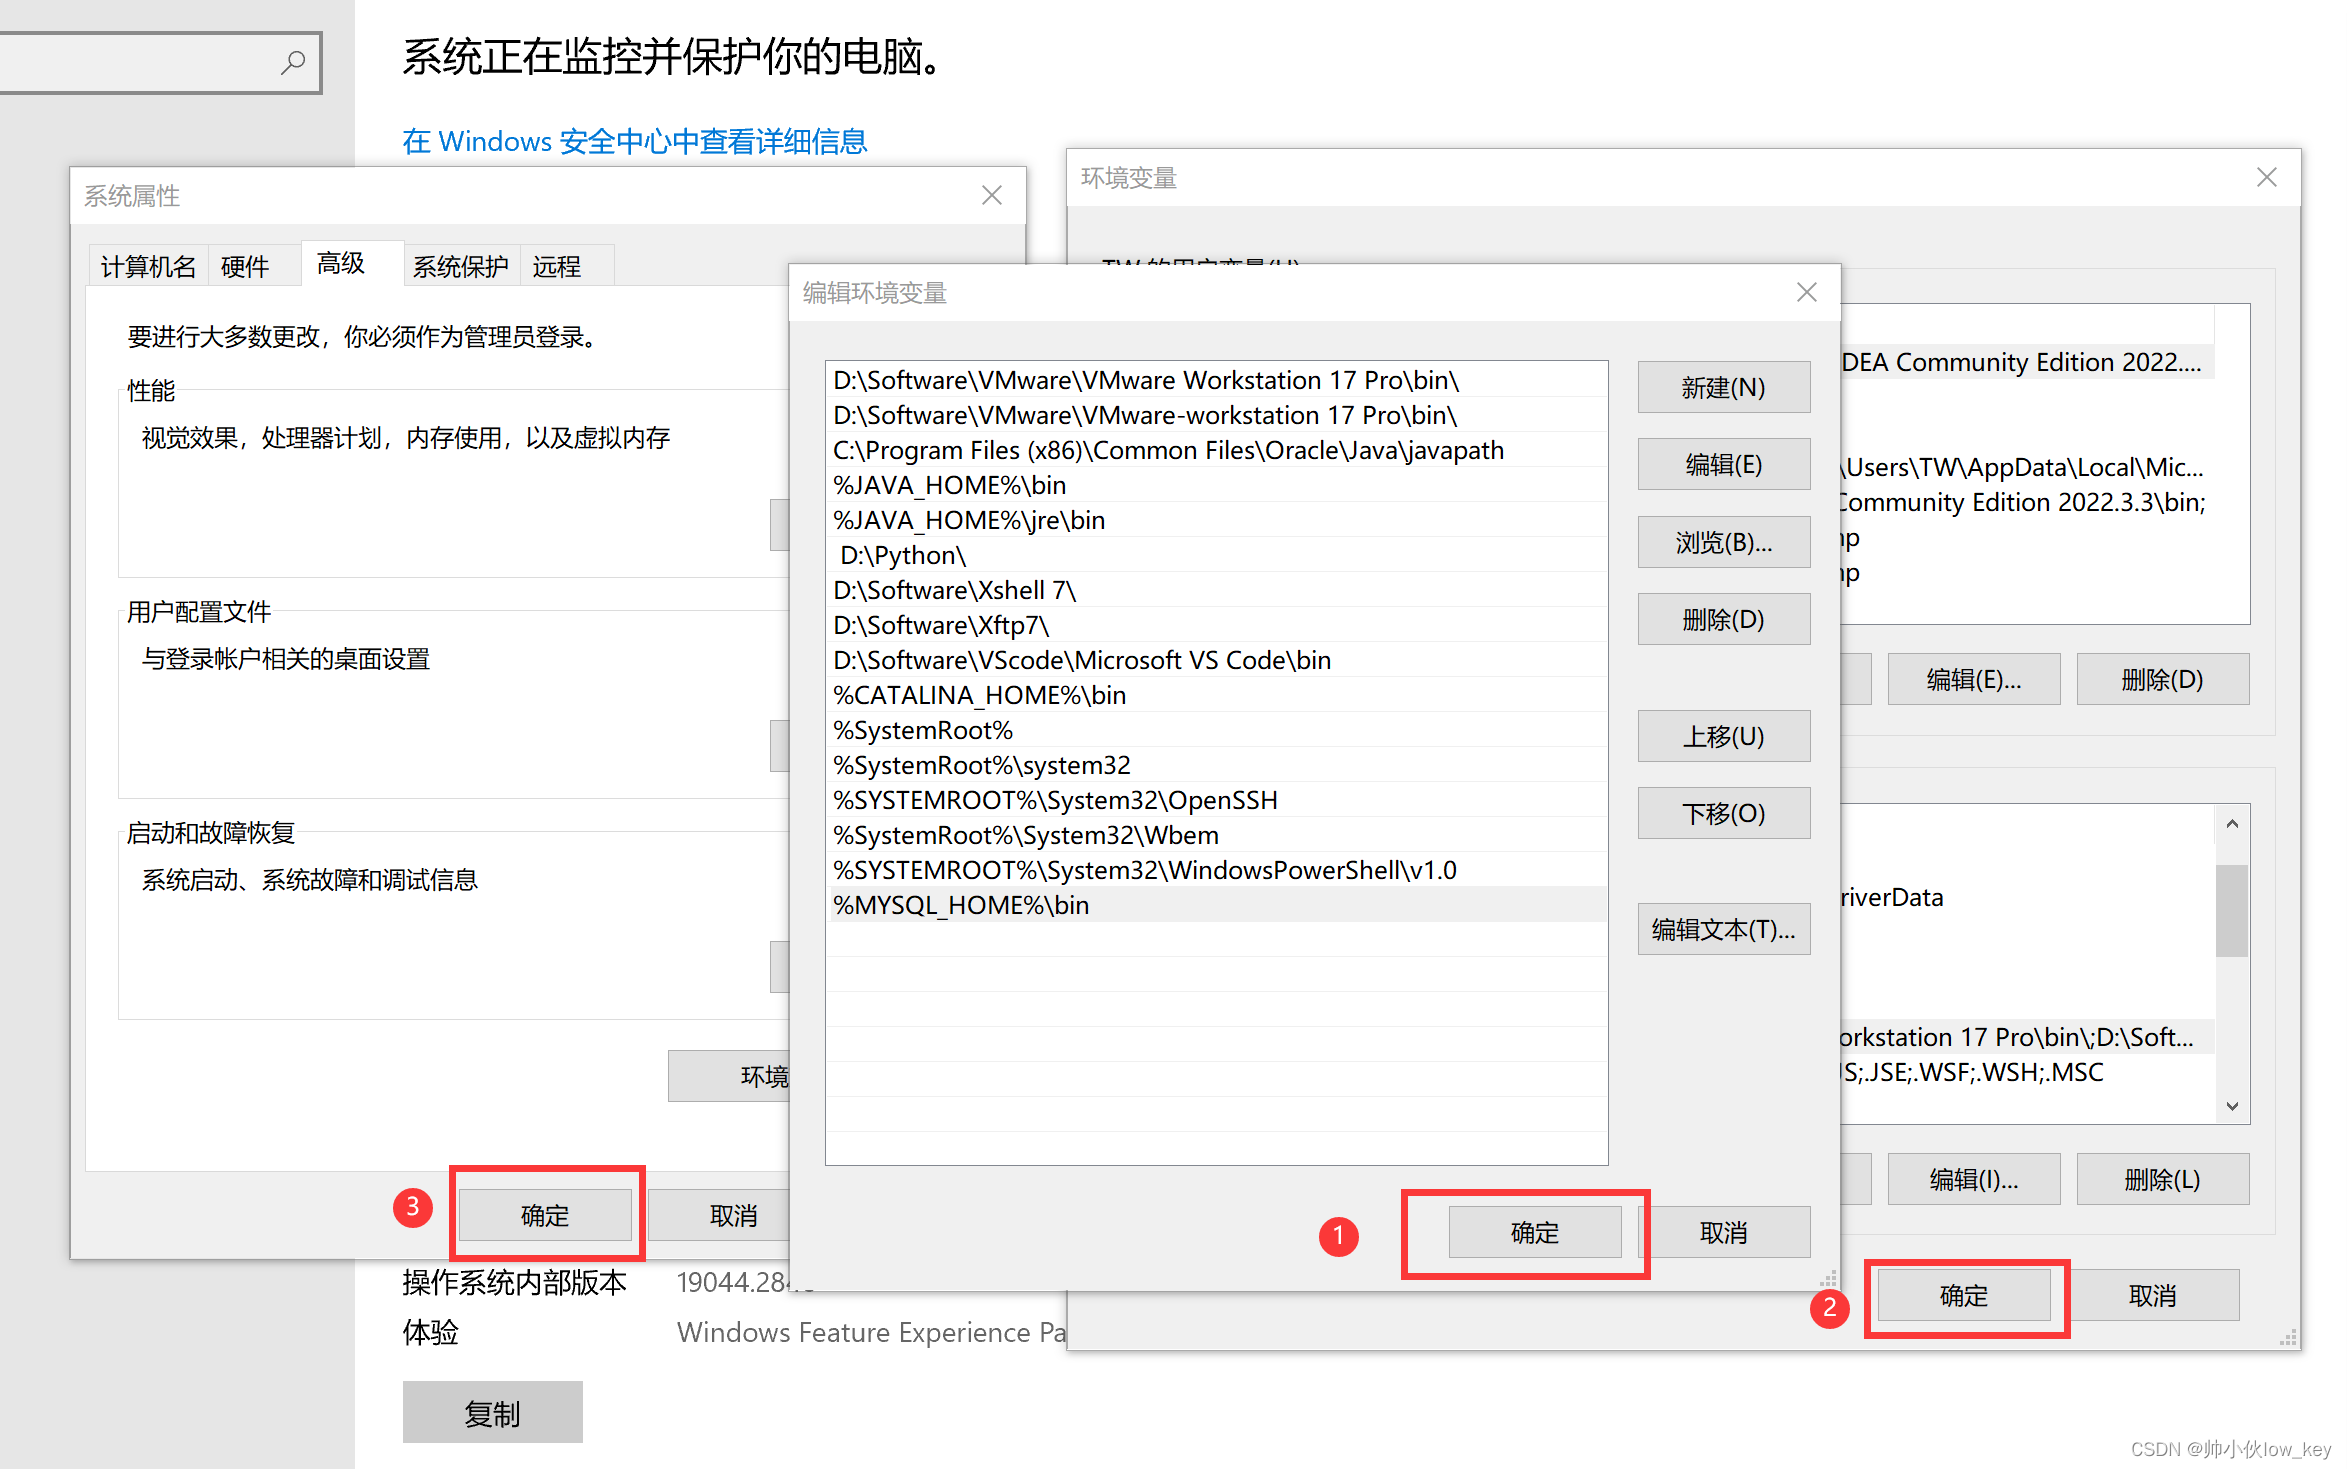
2, click [Advanced System Settings] → [Environment Variables], select “System Variables”, click [New].
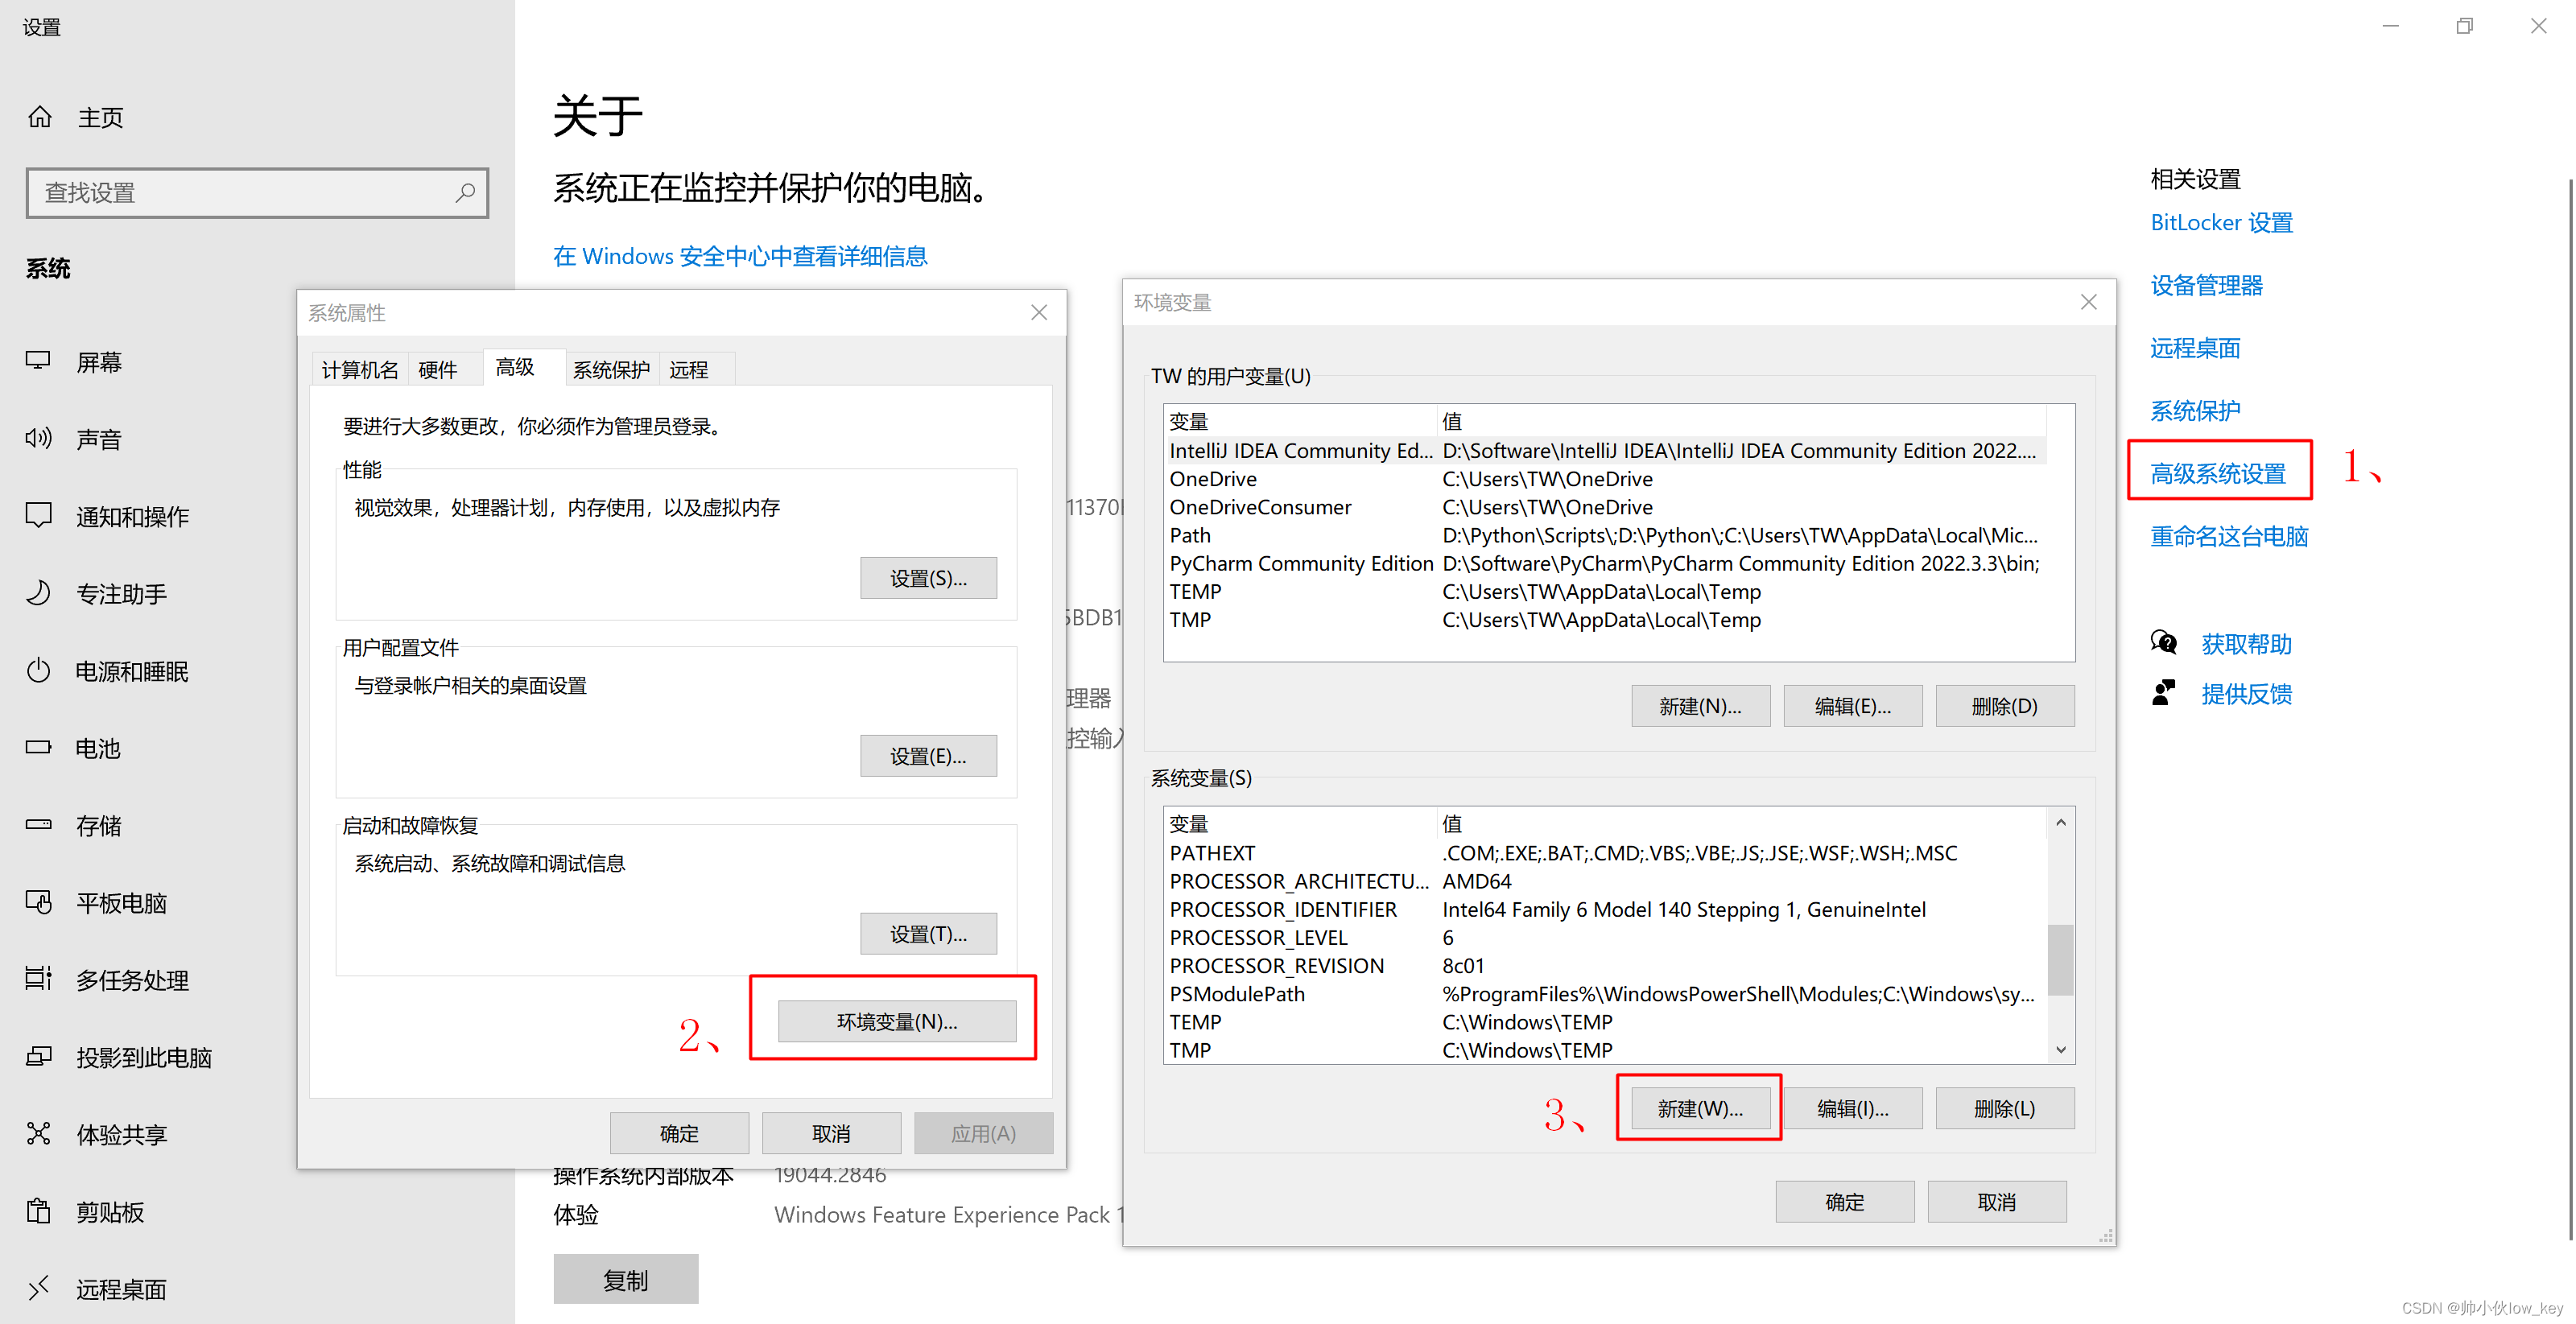
3. Input:
Variable Name:MYSQL_HOME
Variable values:D:\MySQL\MySQL Server 8.0

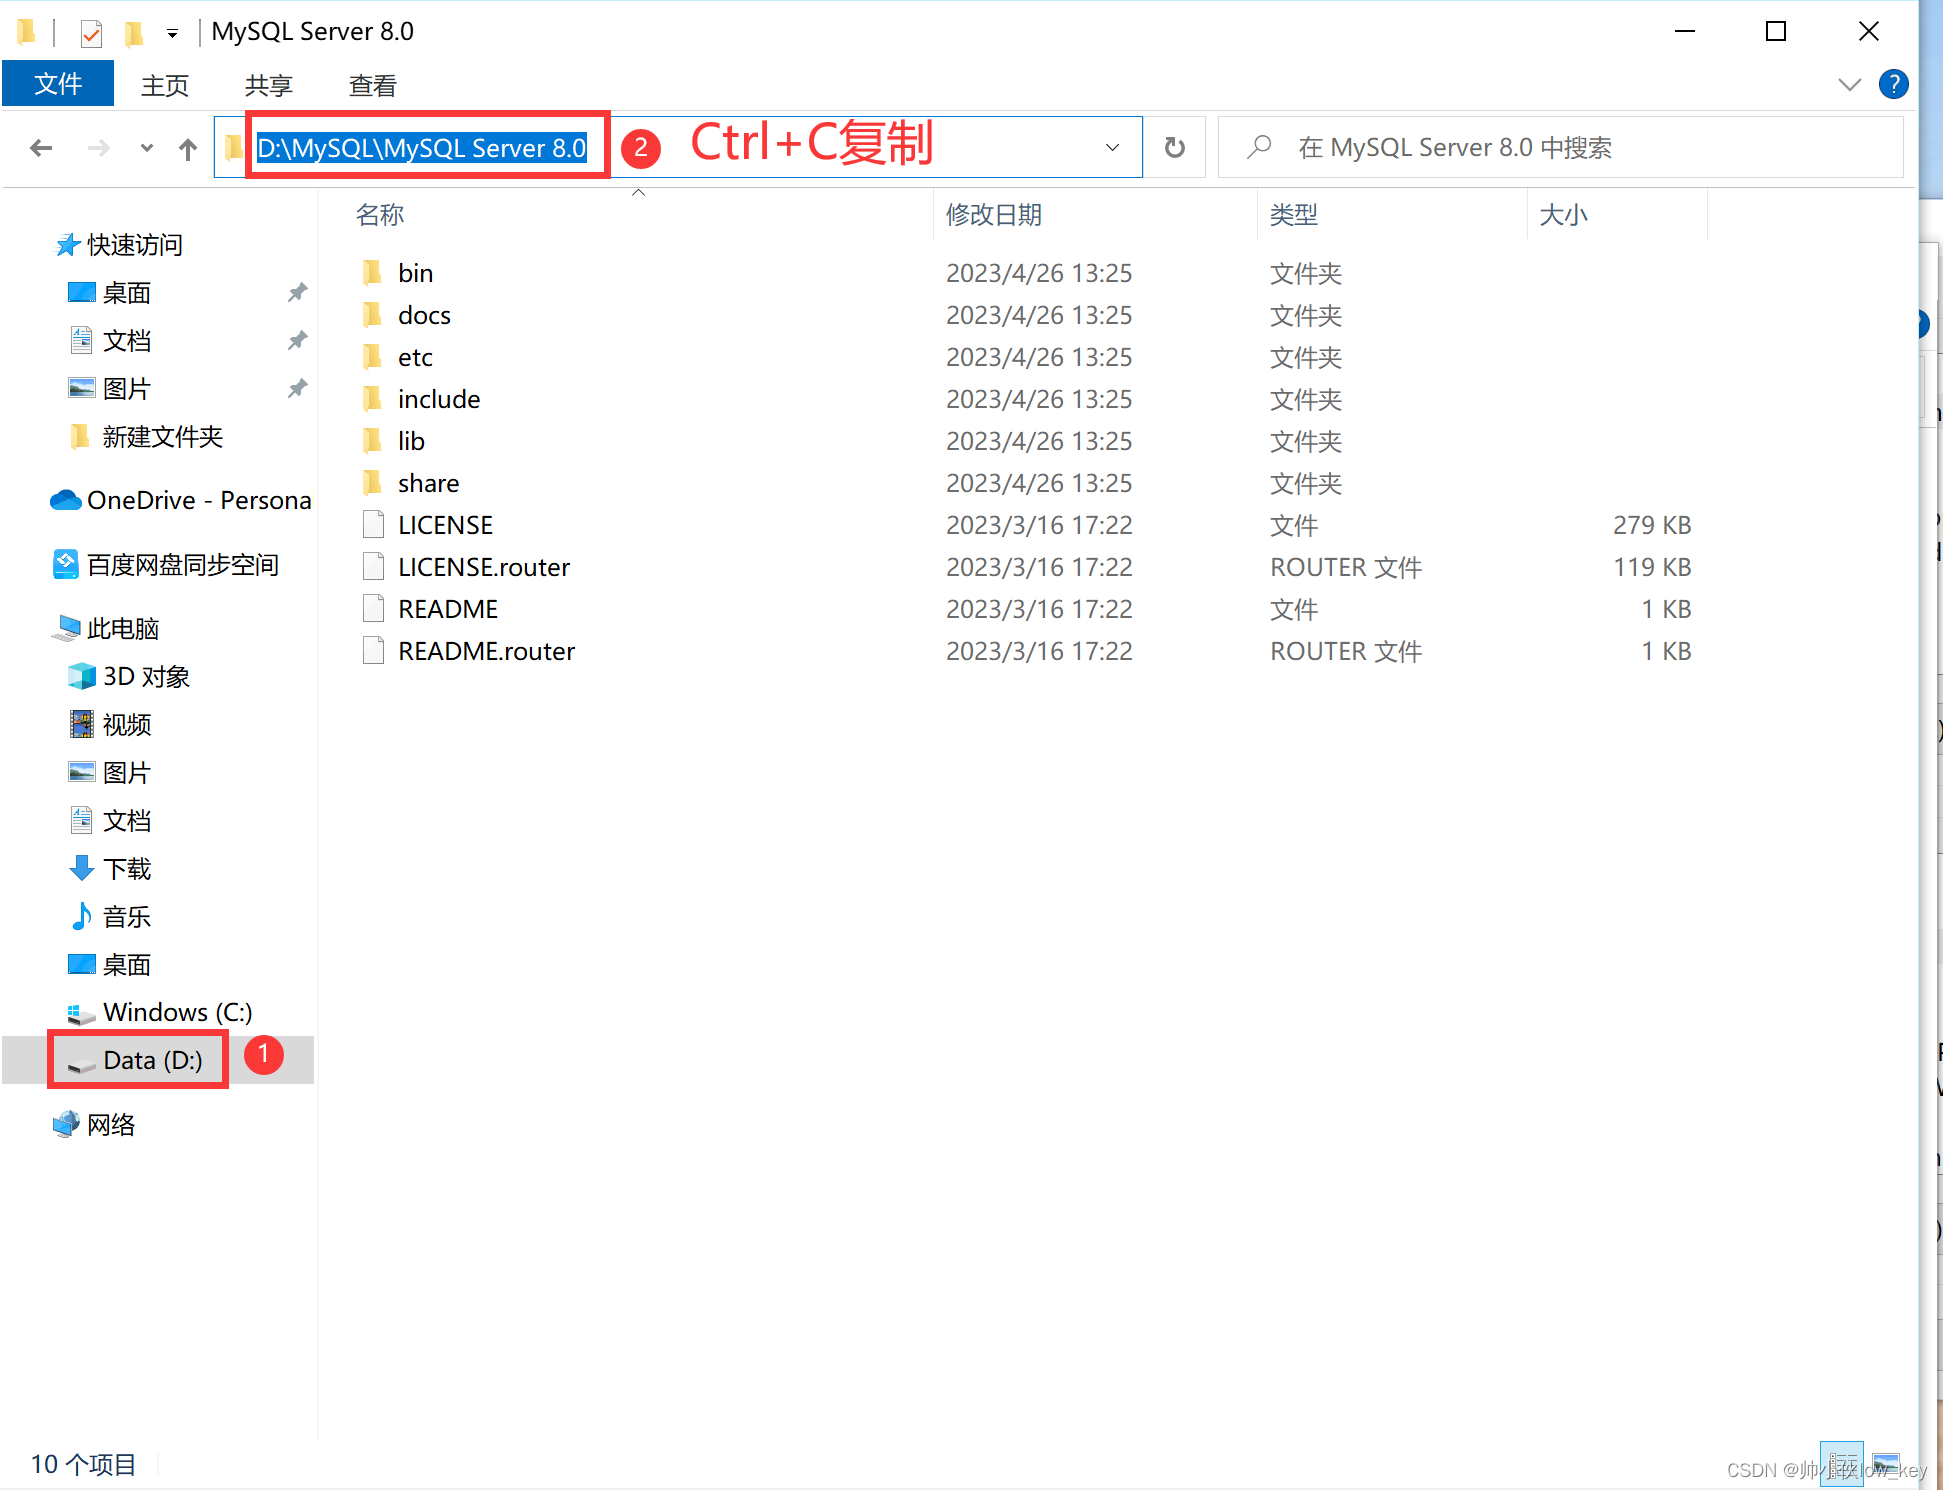
If you don’t know how to find the file address, for example, my MySQL location is atD:\MySQL\MySQL Server 8.0So, go to the D drive and find the file calledMySQL FilesThen click on it and find the nameDocumentation for MySQL Server 8.0Then click on the box above to copy the path and paste it into the variable value.
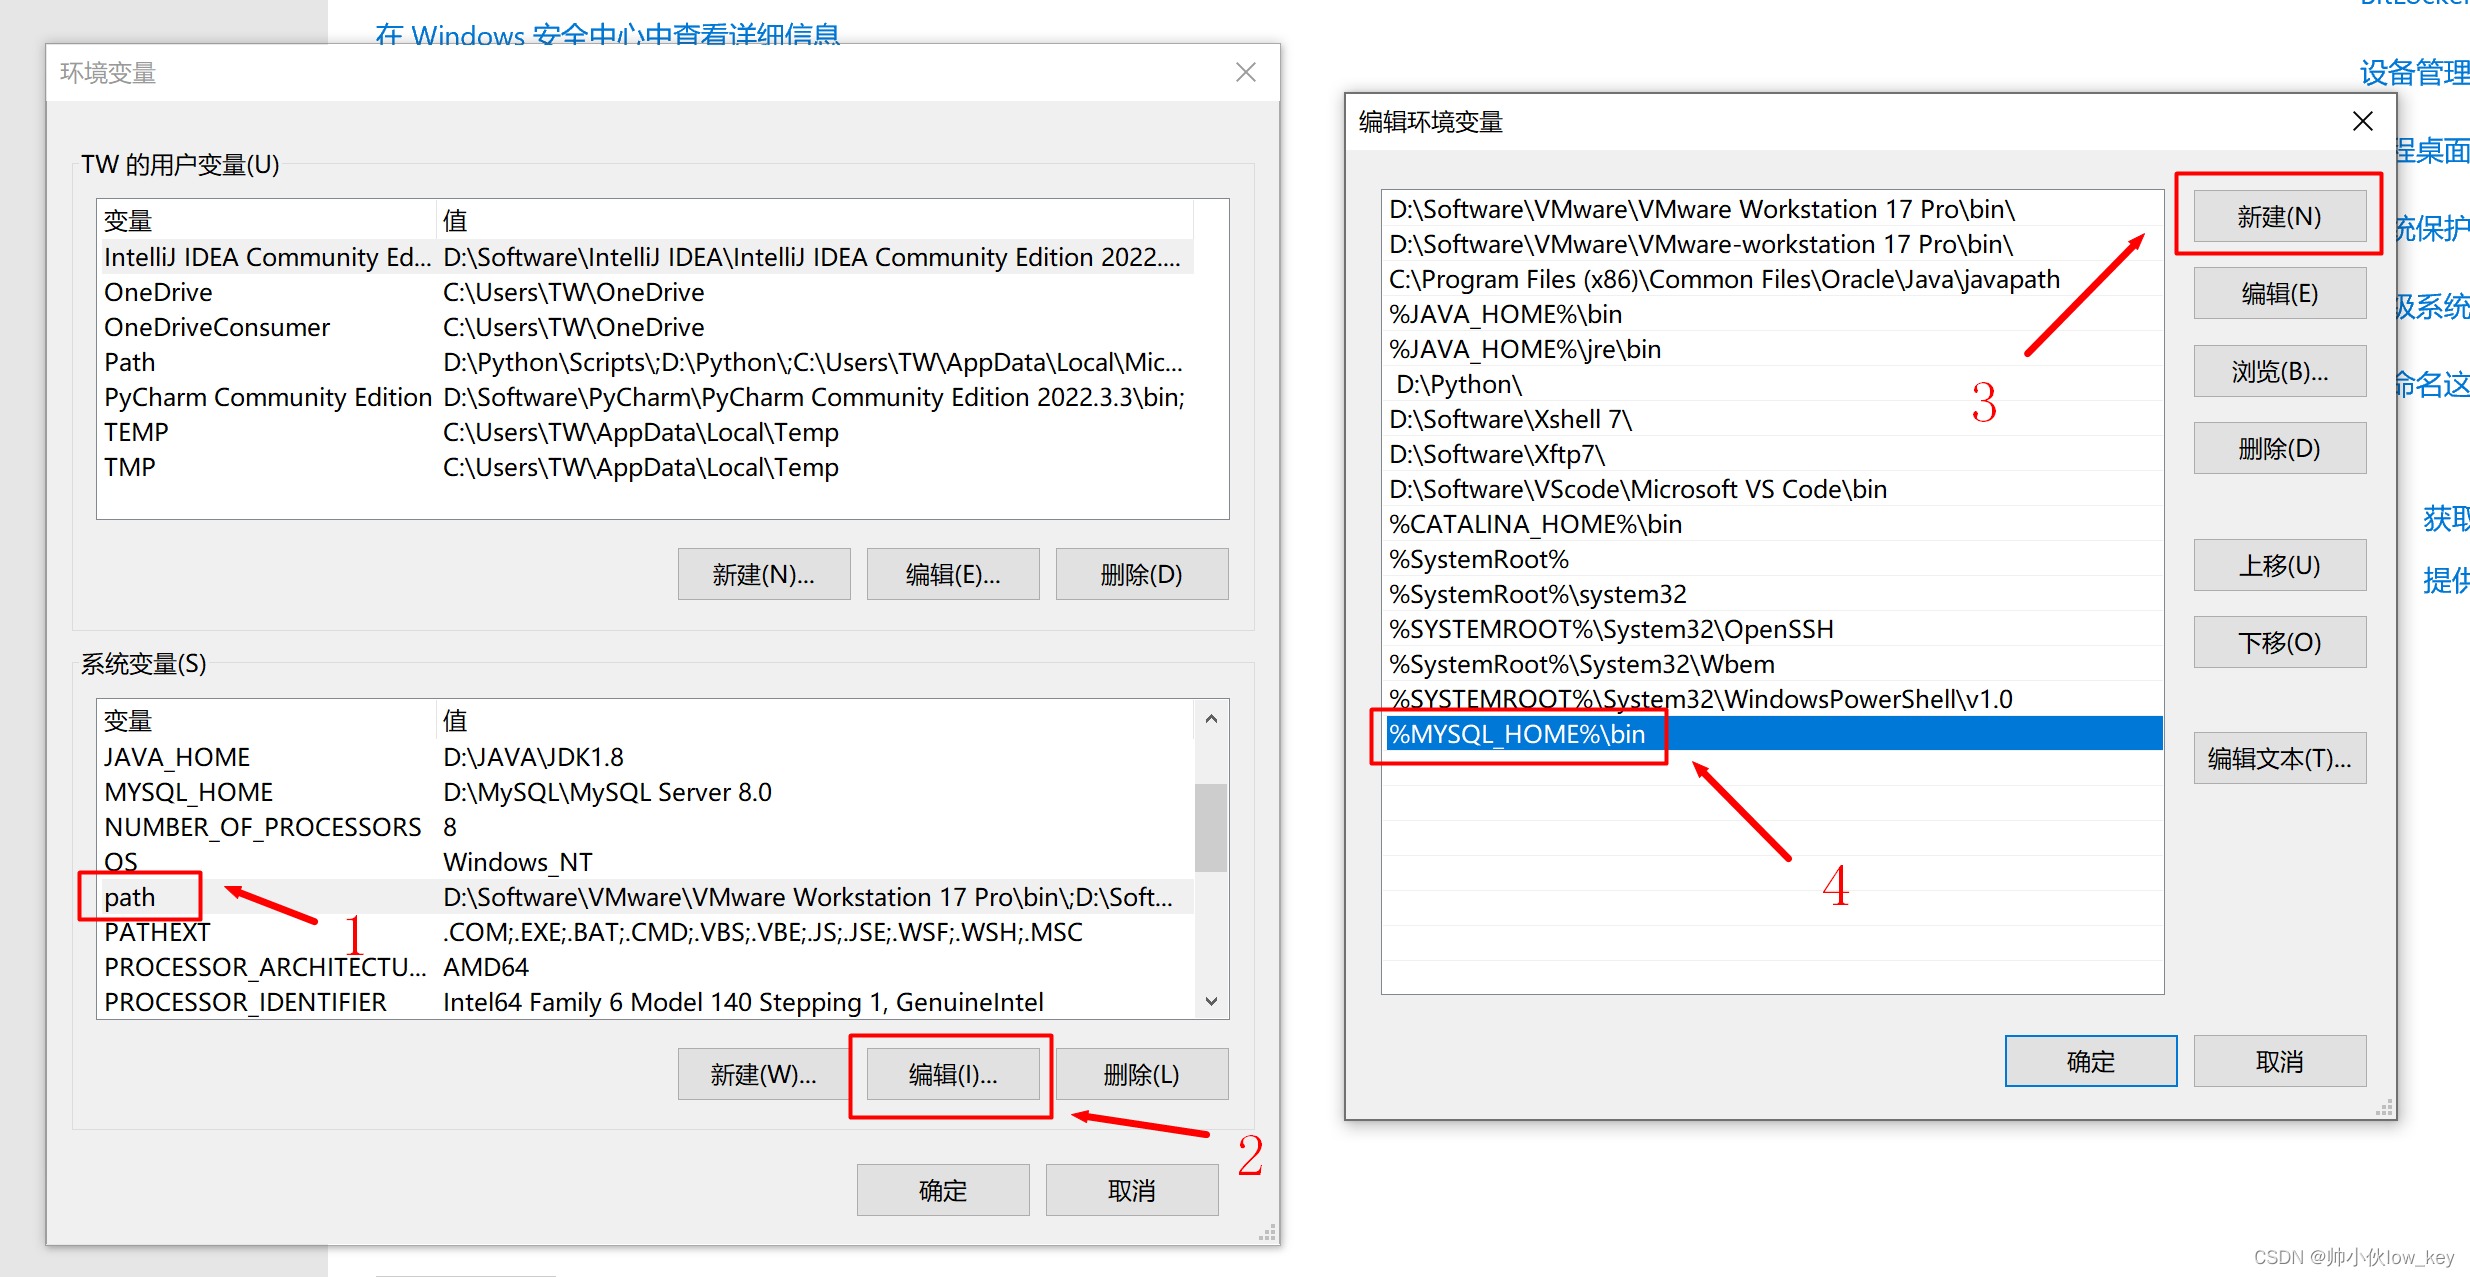
4, find the path, click [Edit], click [New].
Add a variable:%MYSQL_HOME%\bin
4, and then all click [OK] [OK] [OK].
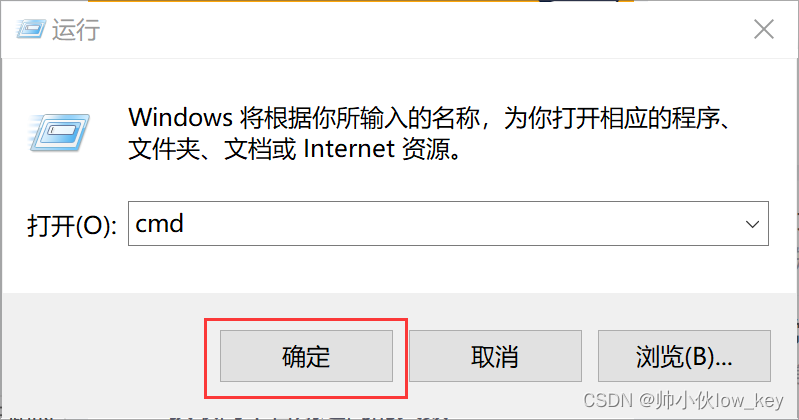
5, Win + R to open the Run window type cmd, click [OK] or [Enter].
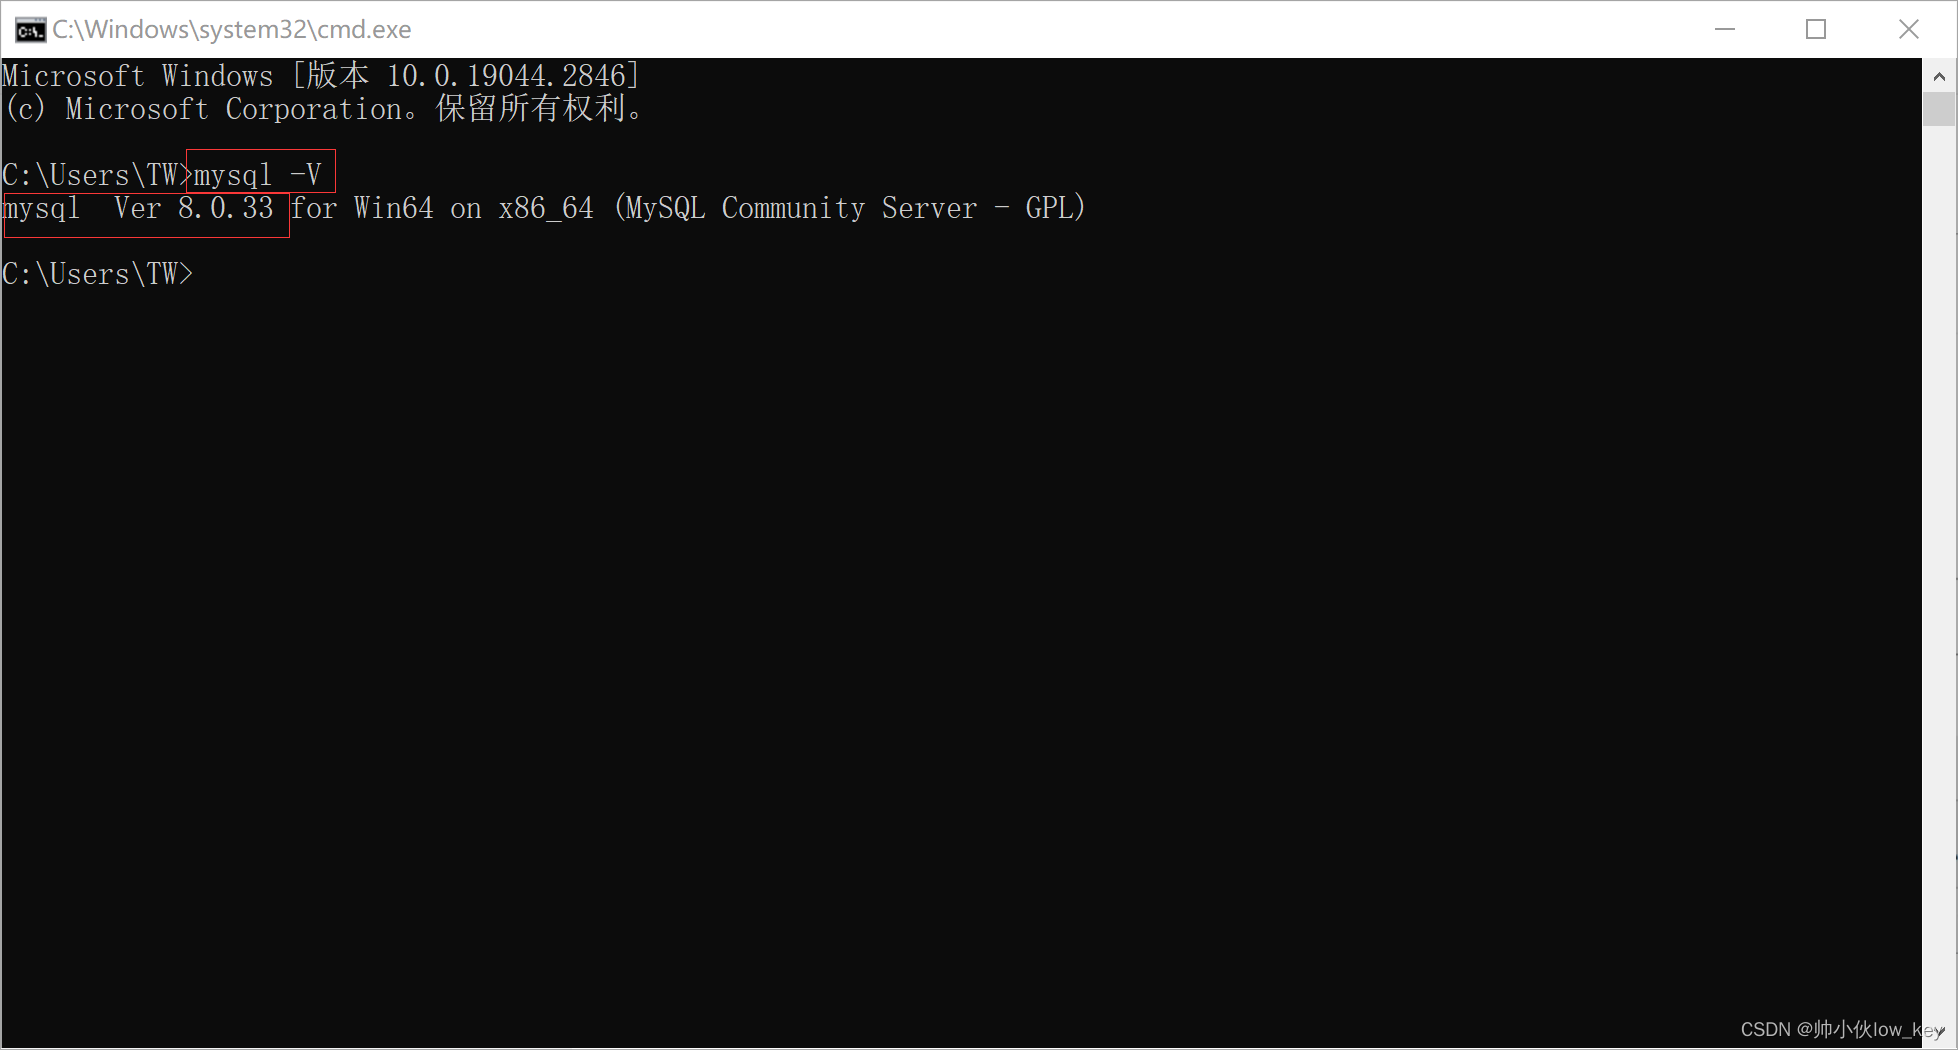
6. Enter the command:mysql -VCheck the MySQL version number, if the MySQL version number appears then your environment variables have been configured successfully.
Starting and Stopping MySQL Services
Parsing:After MySQL is installed, the MySQL service needs to be started for users to access the database and to use the MySQL connection tool for database connection.
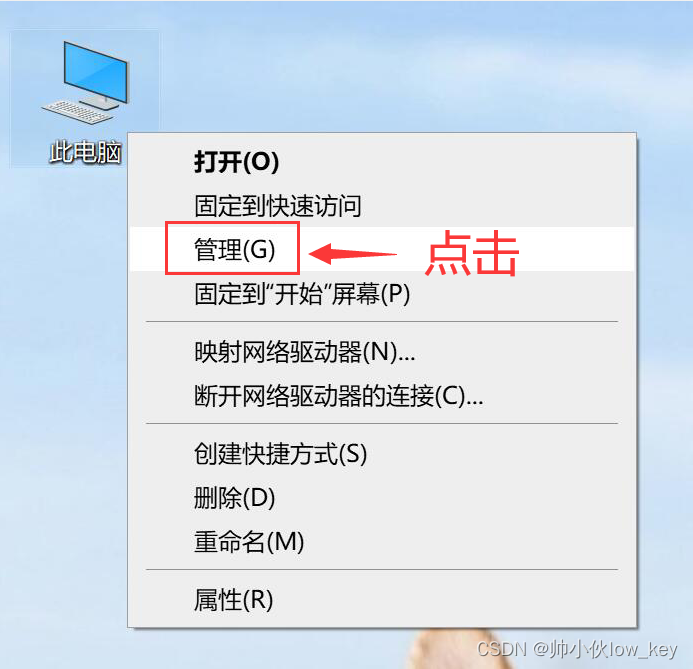
1, right mouse click on the computer desktop “this computer”, click [Management].
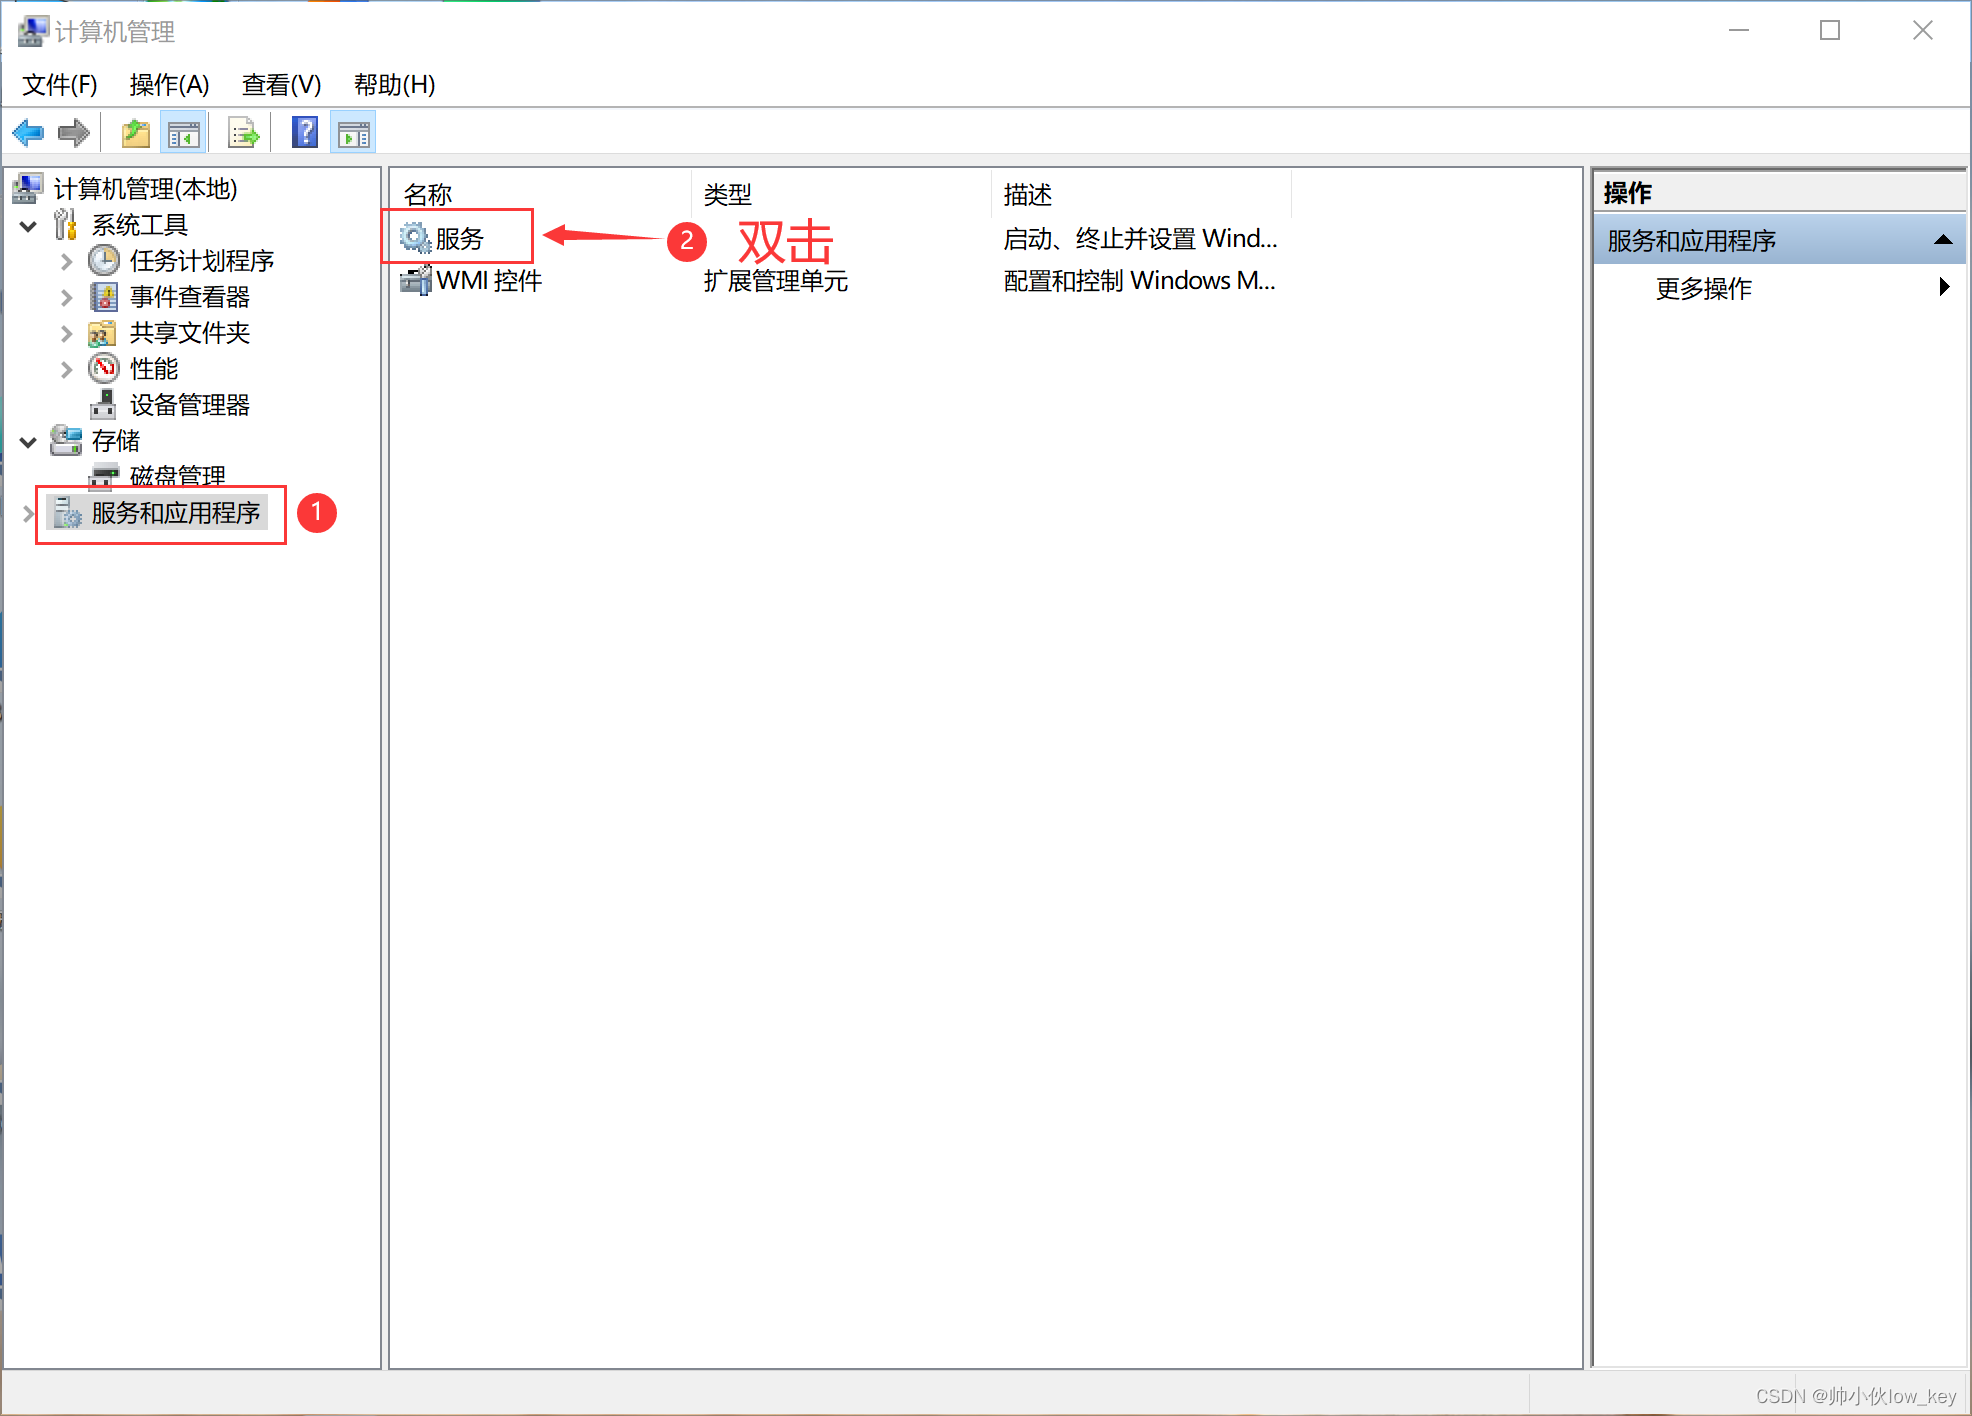
2, find [Services and Applications], double-click to open [Services].
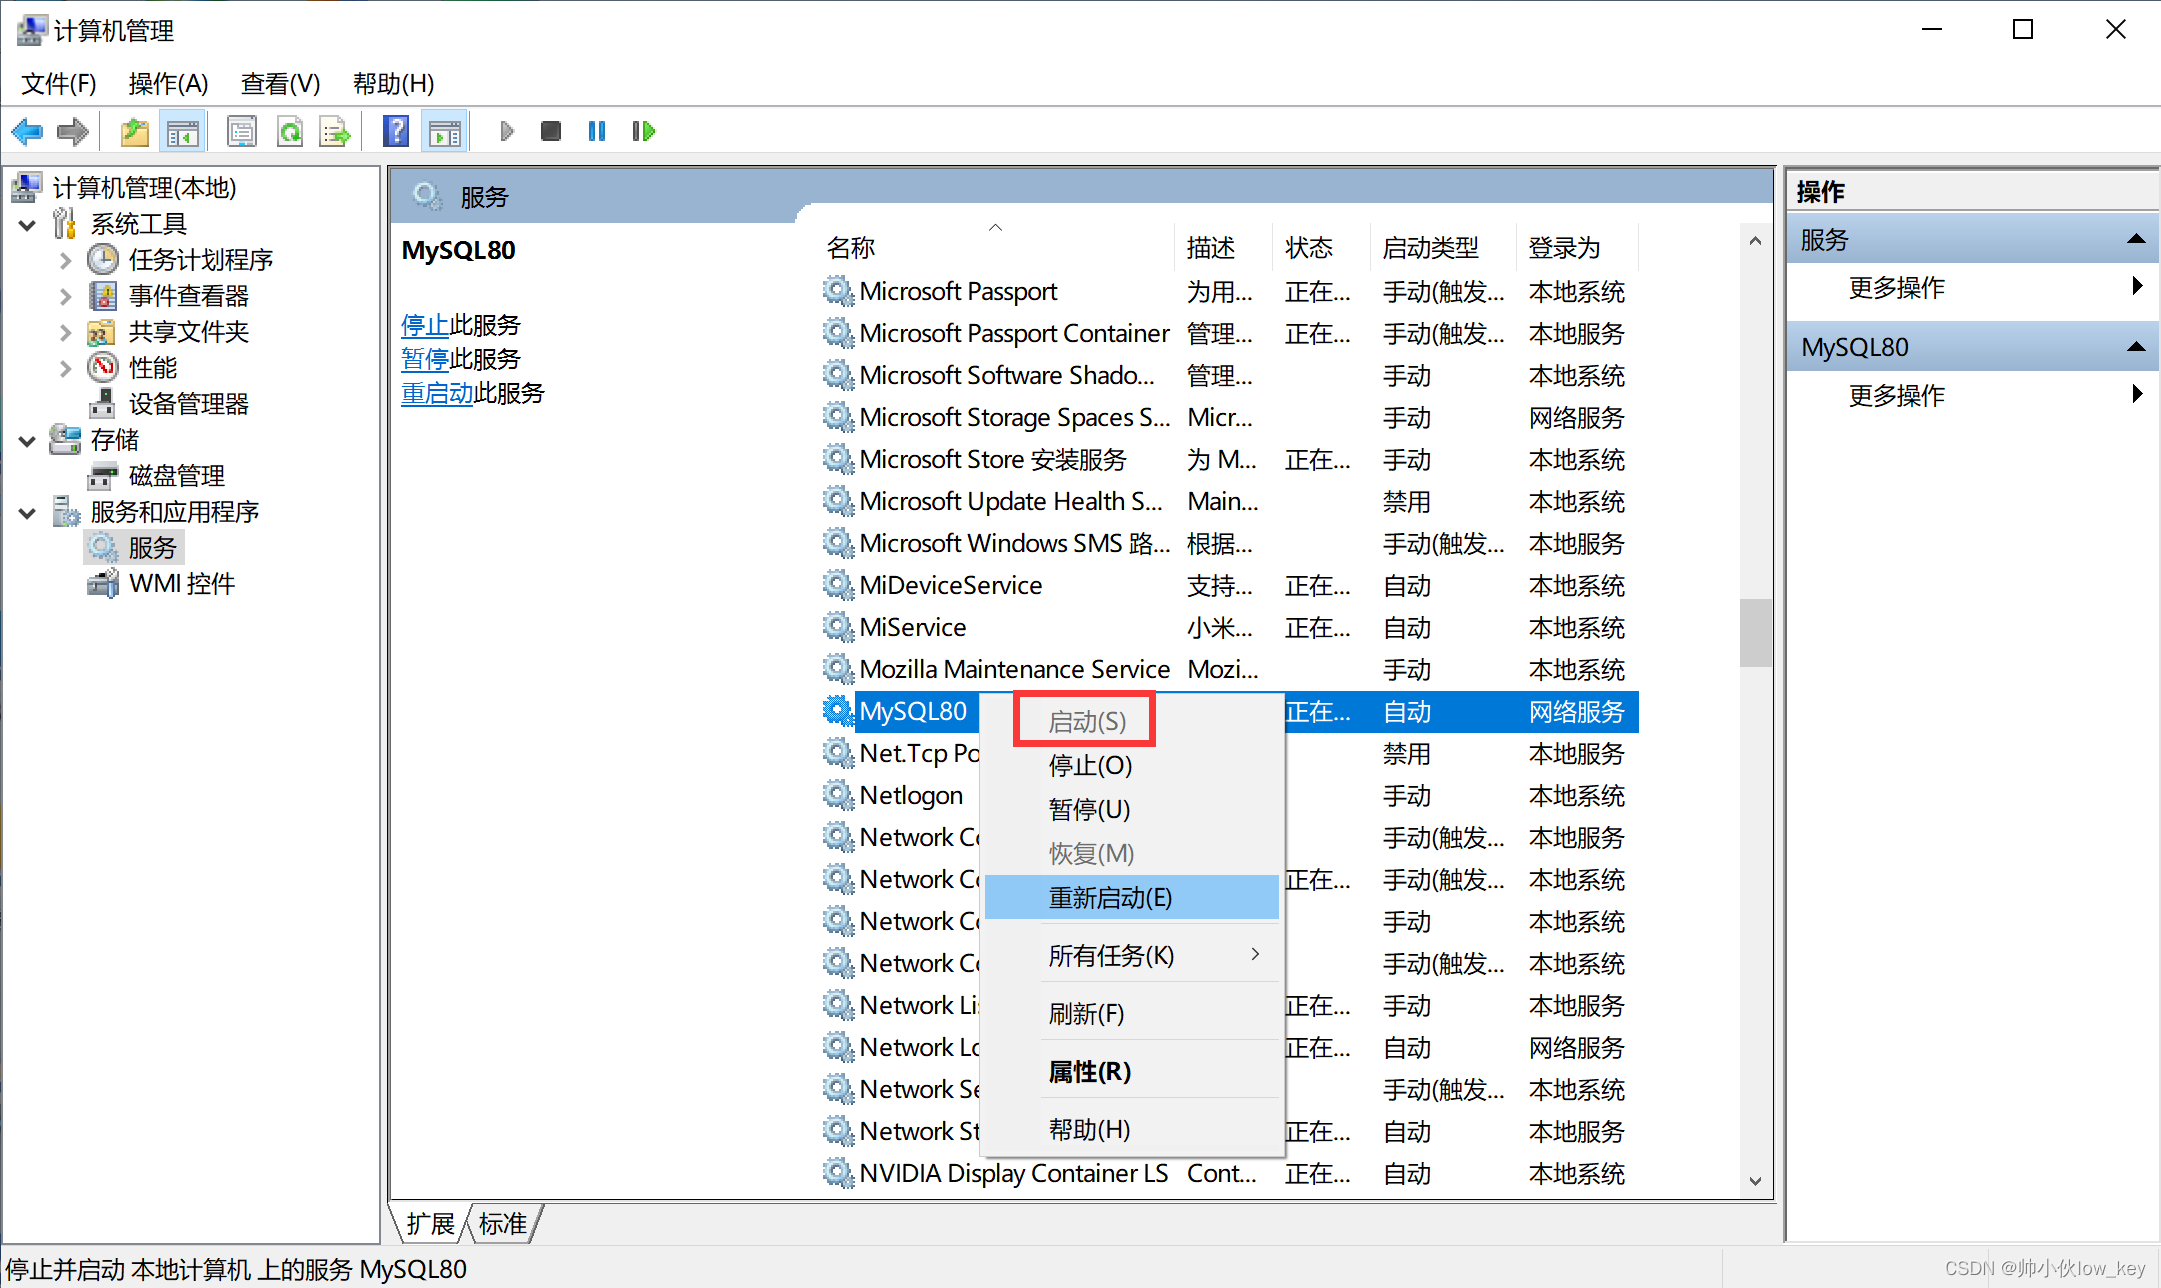
3, in the open “Services” window, down to find the MySQL service and click the right mouse button, in the context of the right-click menu bar, click Start, because my MySQL is in the startup state, so the [Start] item is grayed out. If you don’t want to use MySQL service anymore, you can click Stop MySQL service.
V. Logging In and Out of the MySQL Server
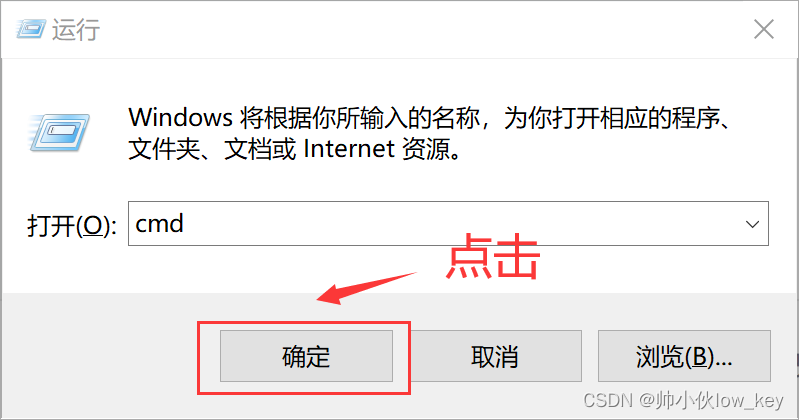
1, Win + R to open the window type cmd click [OK] or [Enter].
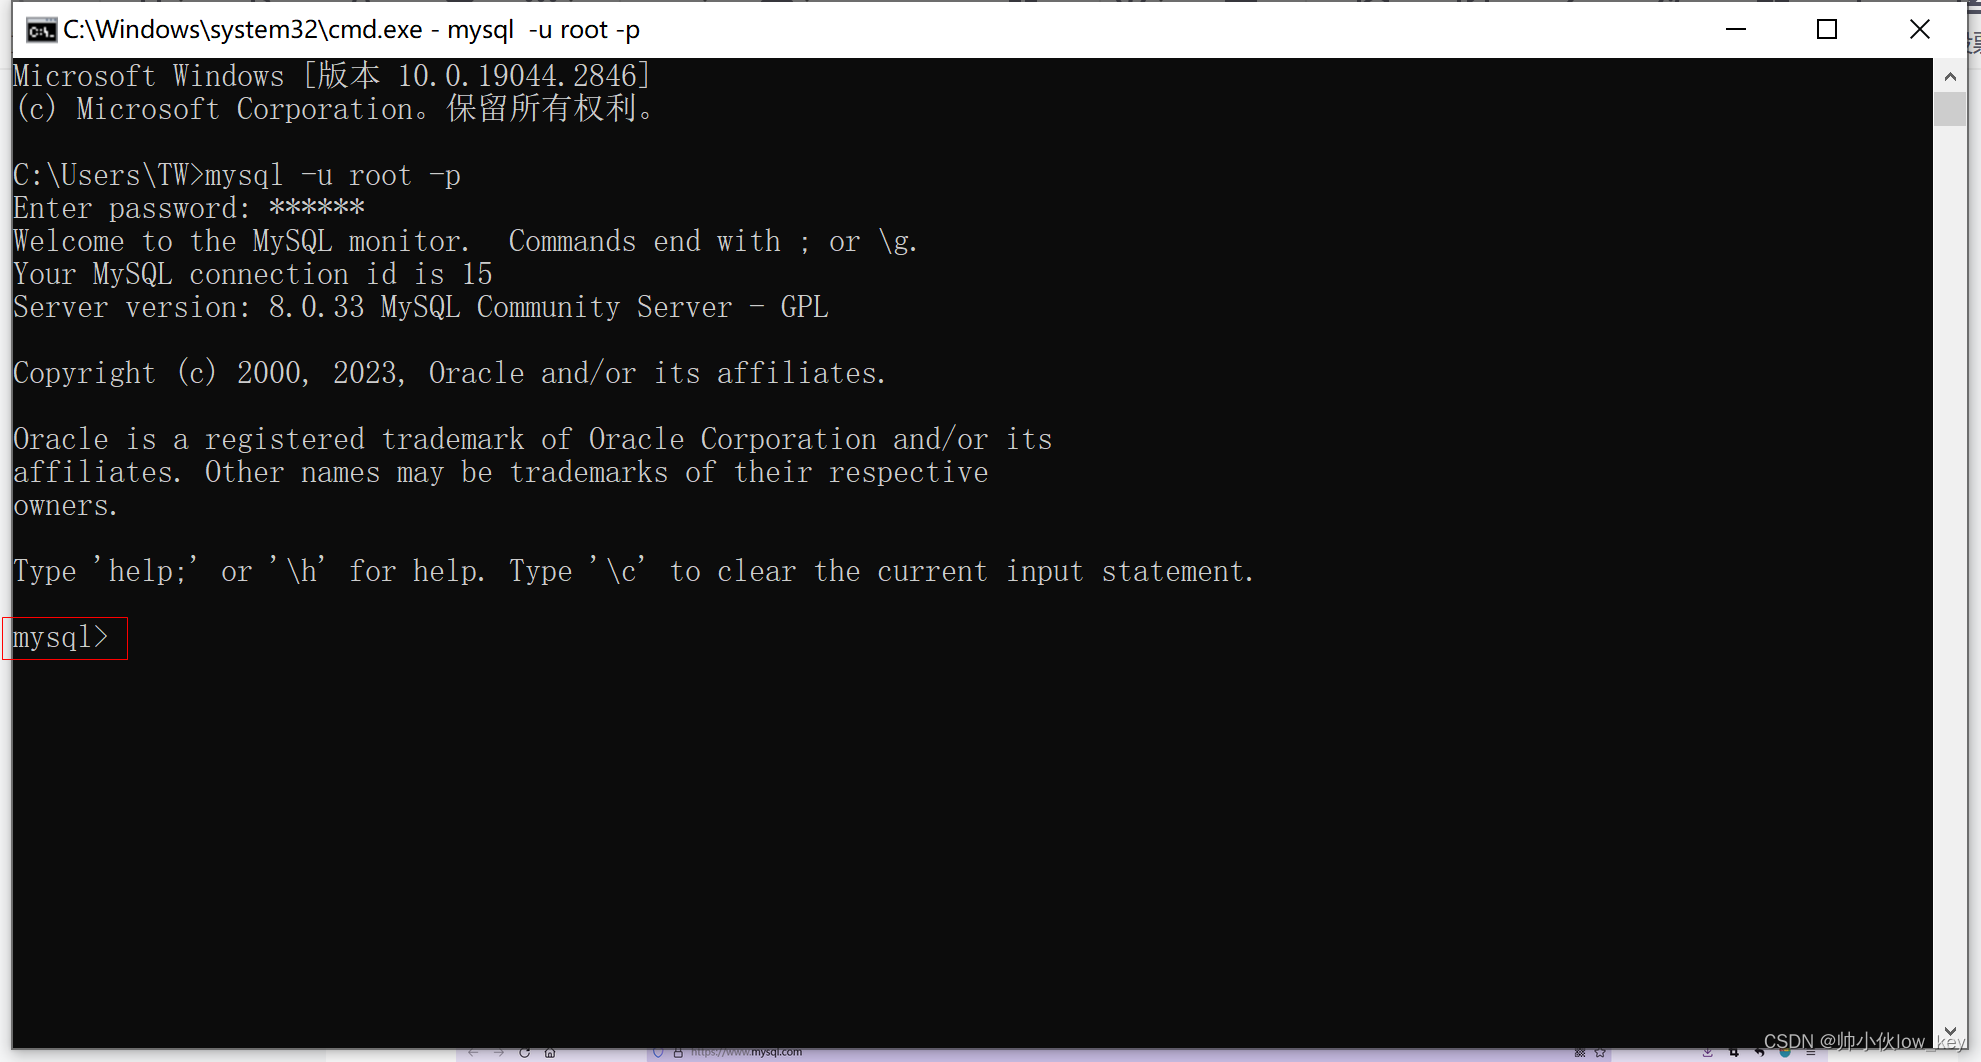
2. Inputmysql -u root -p(This command means logging in to mysql as root, since MySQL installs the top administrator account root by default, so logging in as root))If you want to enter the root password, click enter, and then in Enter password: enter the root password, I previously configured the root password is 123456, so it is 6 *.
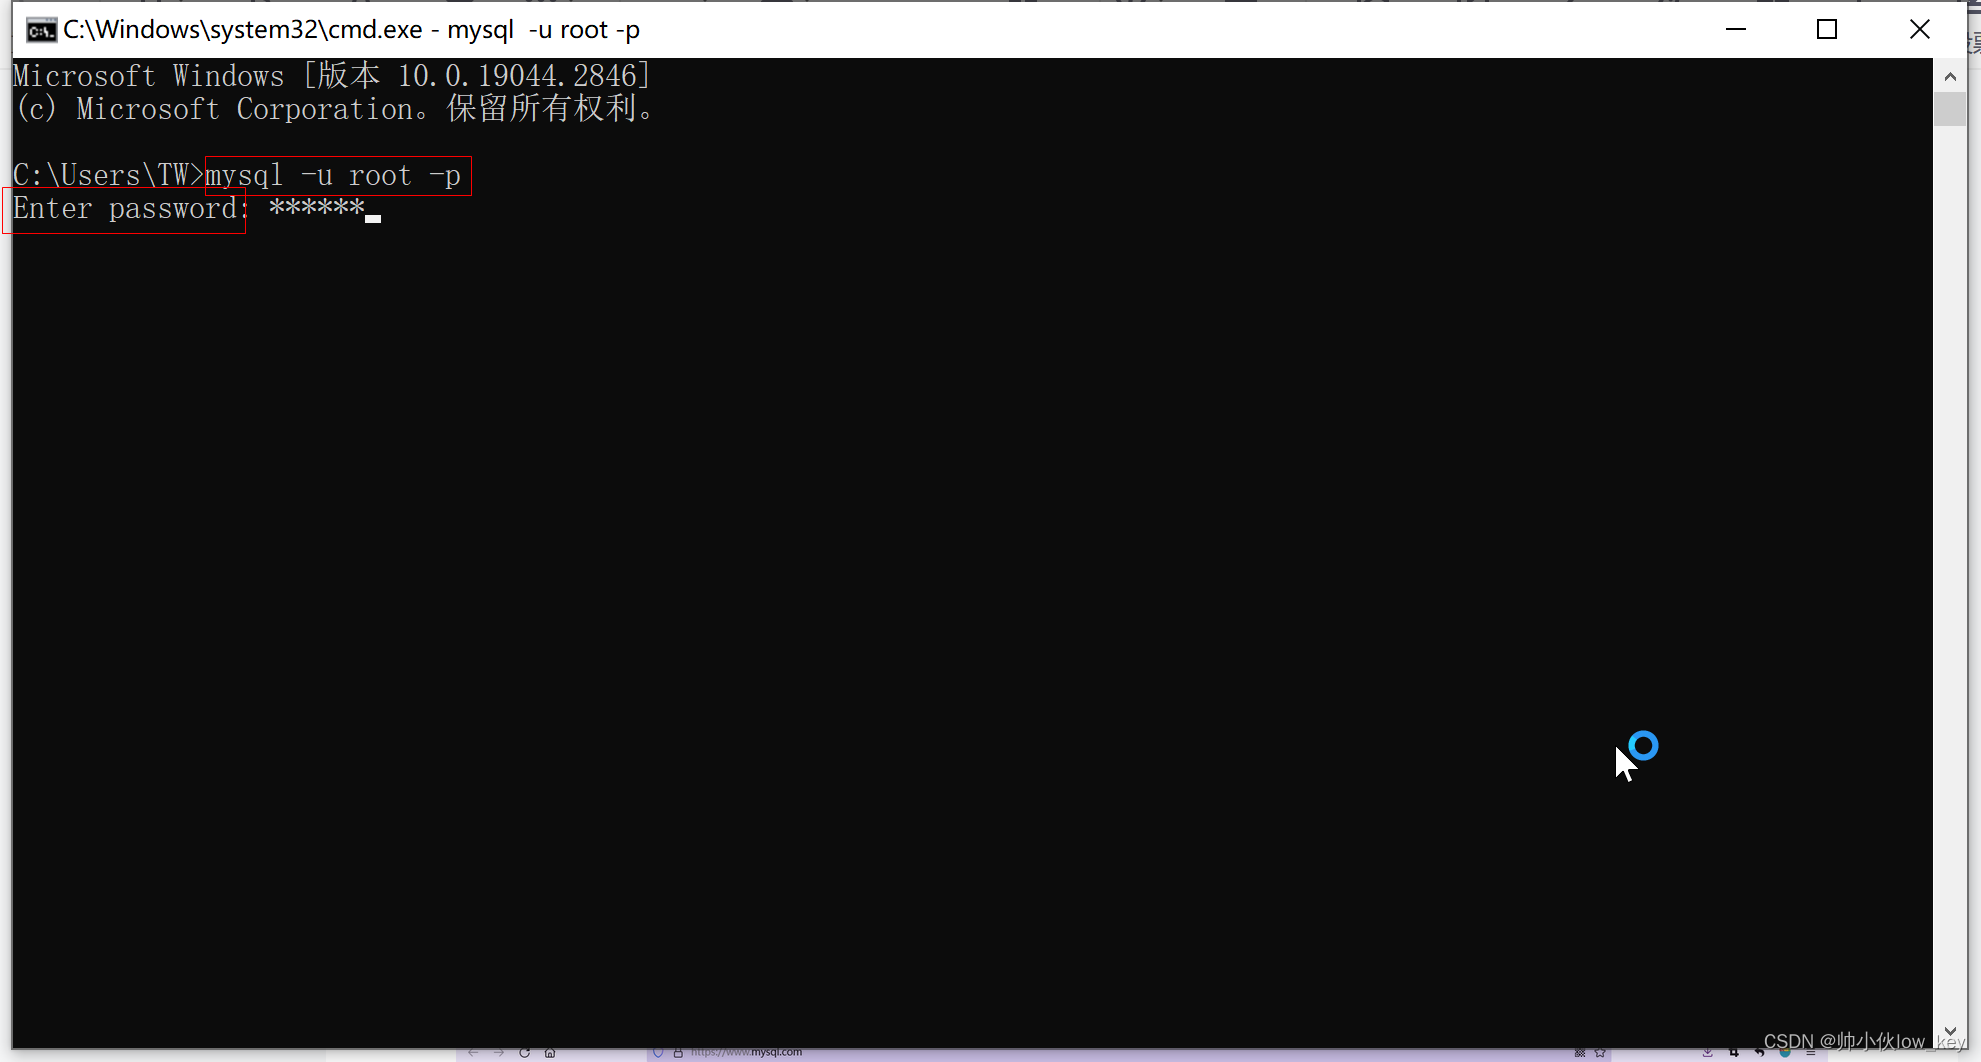
Description:Enter password: ****** means enter password, asterisk * is the password entered.
3. If you see “mysql>” command prompt indicates that you have successfully linked the MySQL server.
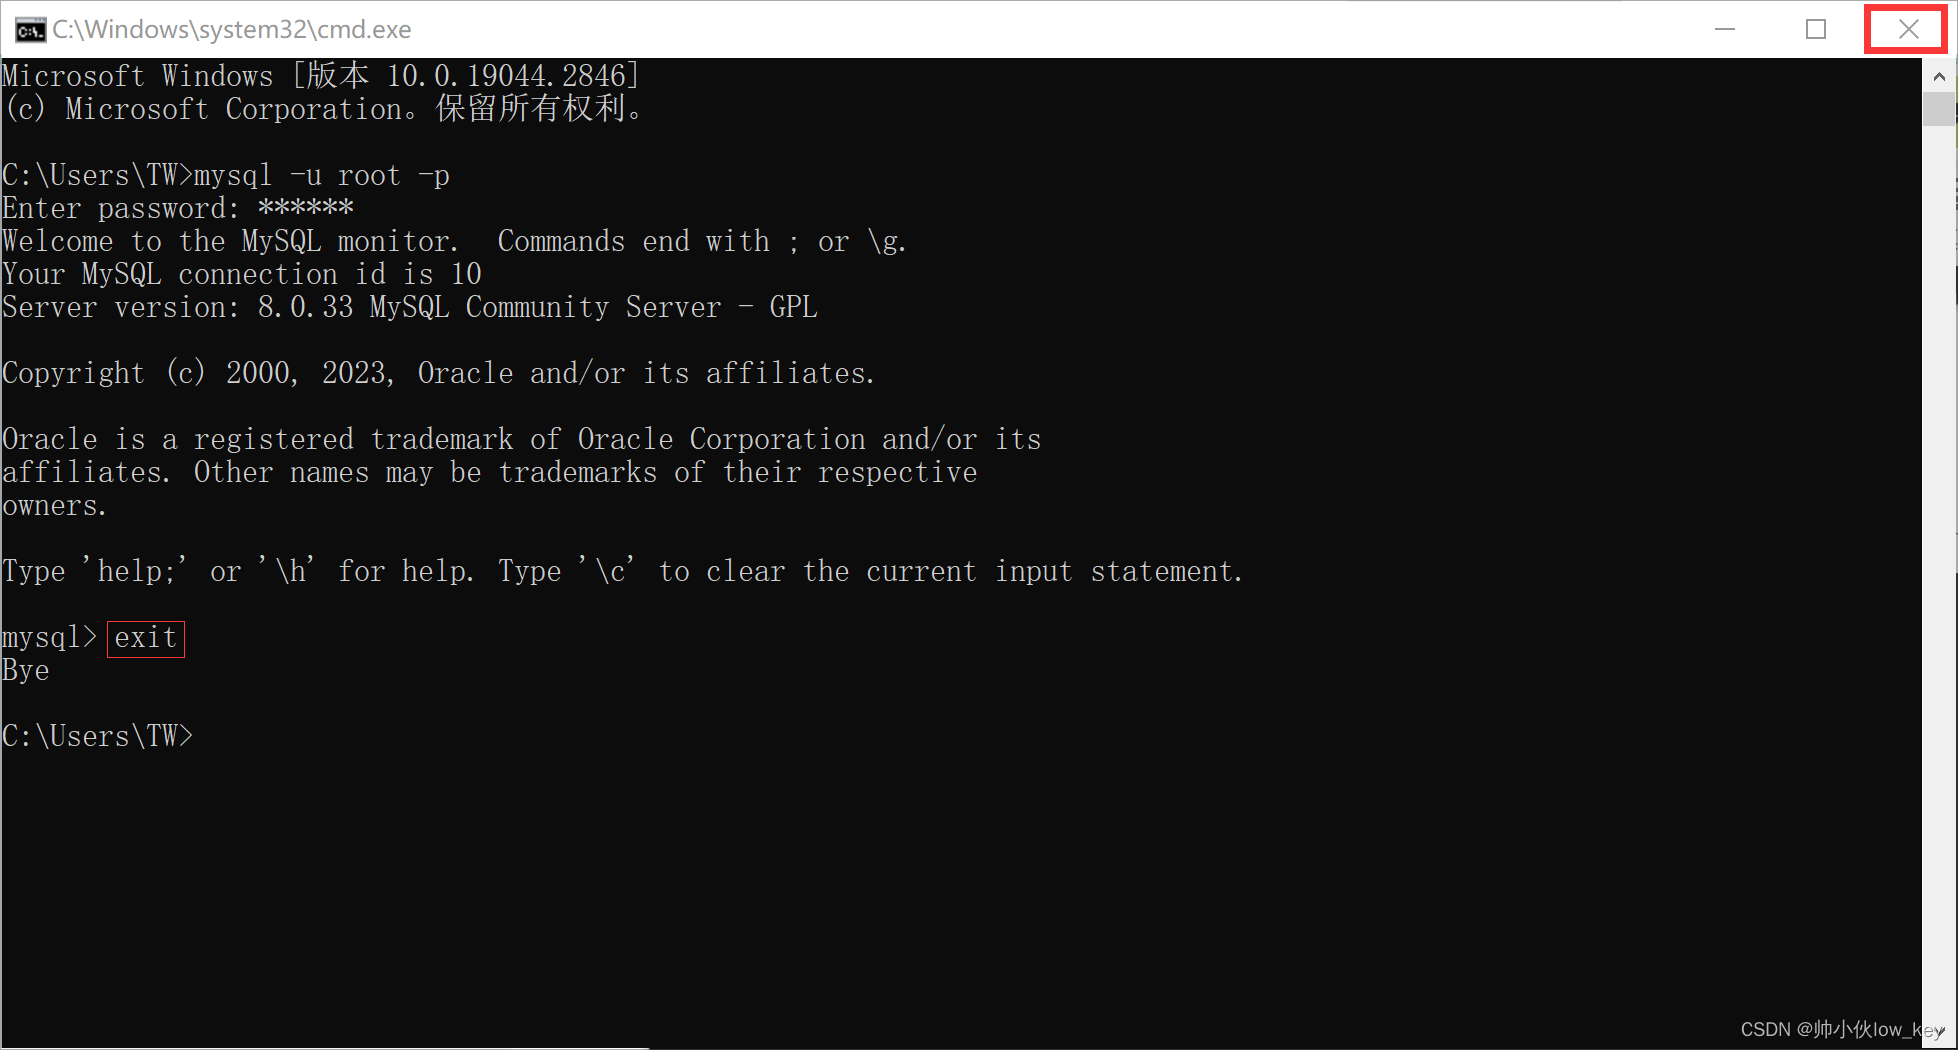
4. Finally, enter the commandexitorquitOr you can exit the MySQL server by clicking the x to close the window in the upper right corner.
